How to Get More from Your Small Stamp Sets: Yippee for Yana

Hi friend! Please join me in welcoming back the oh-so-talented and amazing Yana Smakula! (Please note: our dear friend Yana is Ukrainian. To show support to our brothers and sisters in Ukraine, please see Yana’s post HERE.)
Small stamped images can sometimes feel tricky to use. Many stamp sets include tiny icons, florals, or seasonal elements that are adorable on their own, but figuring out how to turn them into a full card design can be a challenge. In this Yippee for Yana episode, I’m sharing three creative and practical ways to use small stamped images to create eye-catching handmade cards.
While today’s examples feature Saint Patrick’s Day clovers from the Simon Says Stamp Printmaking Clovers set, these techniques work for any small images in your collection. Think florals, hearts, leaves, snowflakes, critters, or even tiny sentiments. The design concepts stay the same no matter the theme.
Layered Stamping with Heat Embossing for Extra Impact
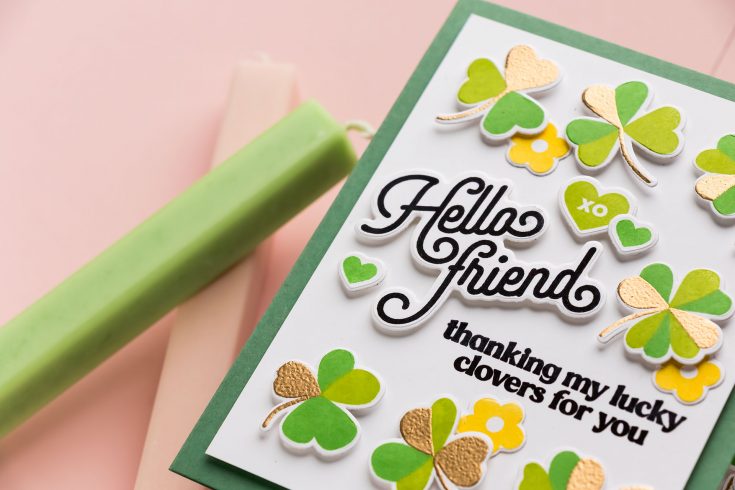
The Printmaking Clovers set includes layered images, which means each clover is built in multiple steps. I like to start with the stem layer first, as it makes alignment easier for me. Because the images are layered, you can introduce multiple ink colors for added interest.

Instead of stamping all layers in ink, try replacing one layer with heat embossing. For this project, I heat embossed the stem layer using antique gold embossing powder. Swapping ink for embossing powder instantly elevates the look and adds subtle shine and texture.
Using a stamp positioner like a stamp wheel makes aligning three or four layers quick and precise, especially when mass producing multiple images. Once the embossed layer was complete, I stamped additional layers using coordinating ink colors, experimenting with different combinations beyond traditional green. Adding unexpected colors such as pink or yellow gives small images a fresh and modern feel.
After stamping, I used the coordinating dies to cut out the clovers, creating a large assortment of small embellishments ready to build with.
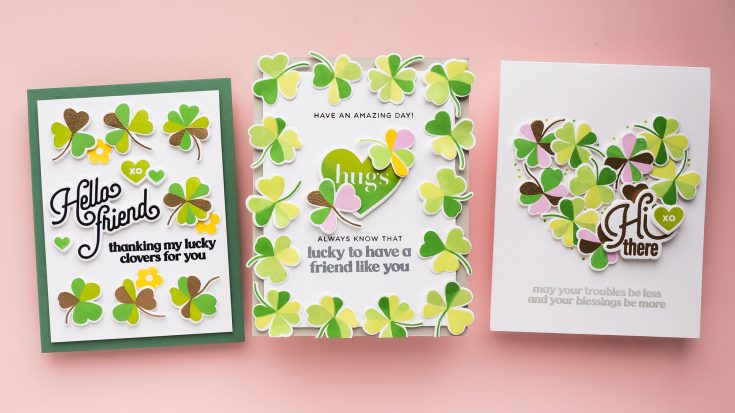
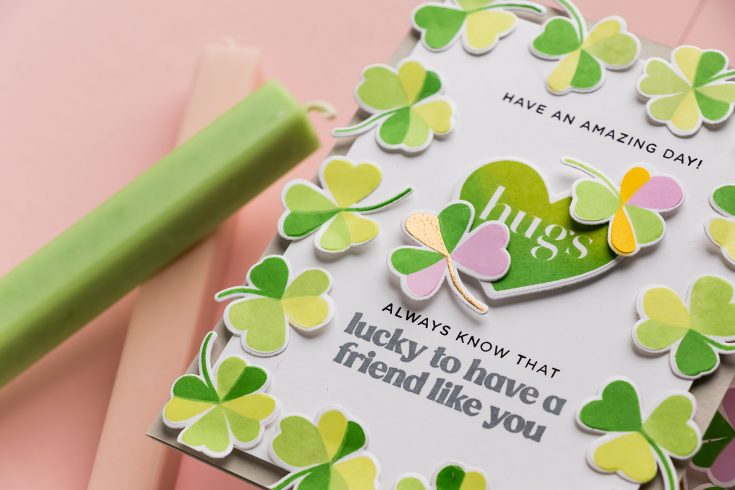
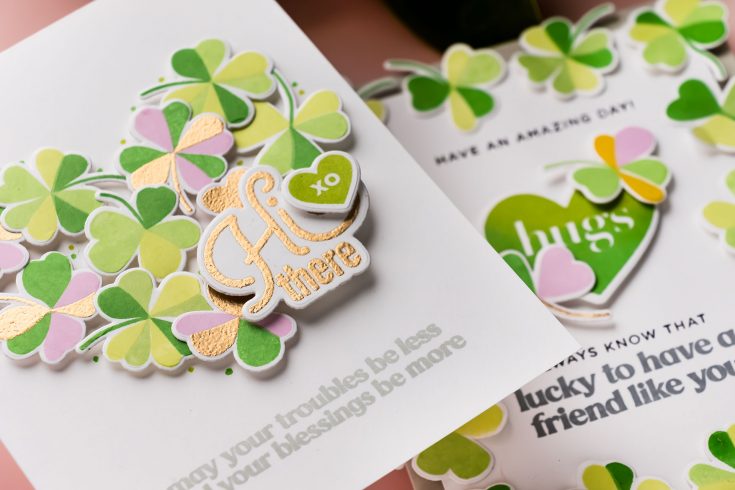
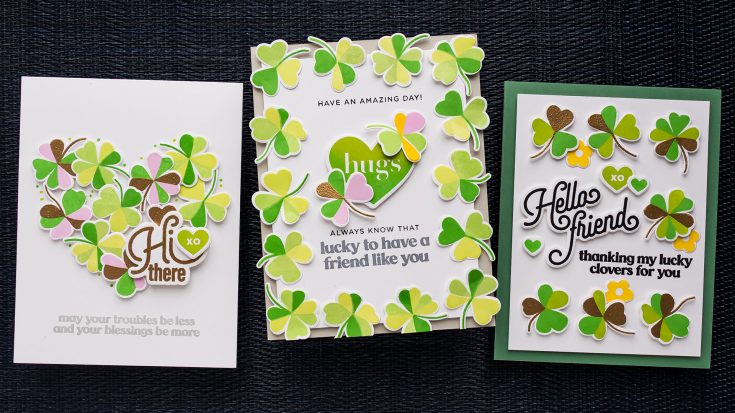
Idea One: Create a Frame with Small Die Cuts
The first card design uses small stamped images to form a decorative frame. Start with a panel trimmed slightly smaller than your card base. Arrange the die cut images around the edges, allowing some to overlap the panel and extend beyond the border.
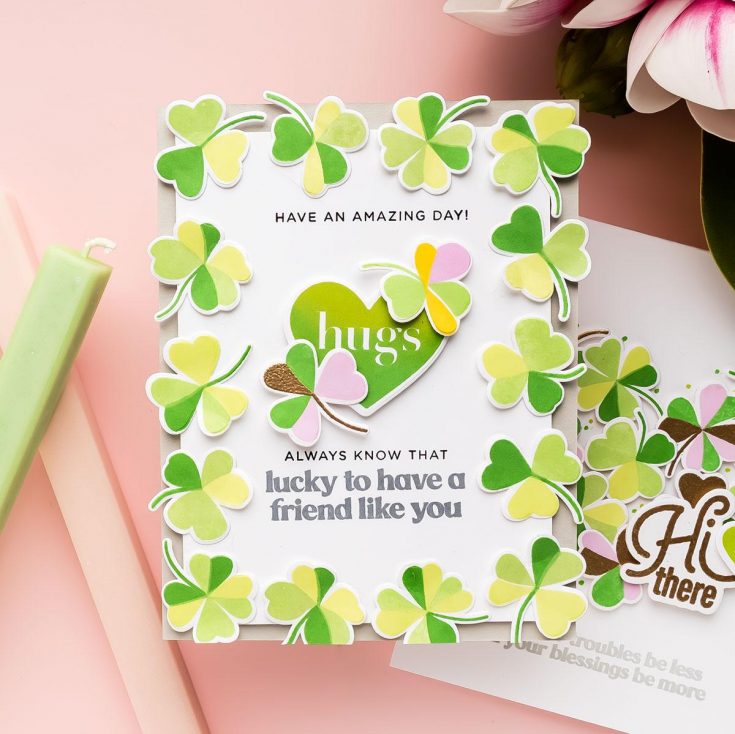
Once you are happy with the placement, adhere the images in place. Extending a few elements past the edge adds dimension and movement to the design. After mounting the panel onto a card base, simply trim any pieces that interfere with the card standing flat.
Finish the center with a bold sentiment to anchor the composition. This approach works beautifully for seasonal icons, florals, or any repeated small motif.
Idea Two: Build a Clean and Modern Grid
Grids are a classic way to showcase small stamped images. Arrange your die cuts in evenly spaced rows and columns to create structure and balance. Even if the images are similar, slight variations in color or orientation add visual interest.
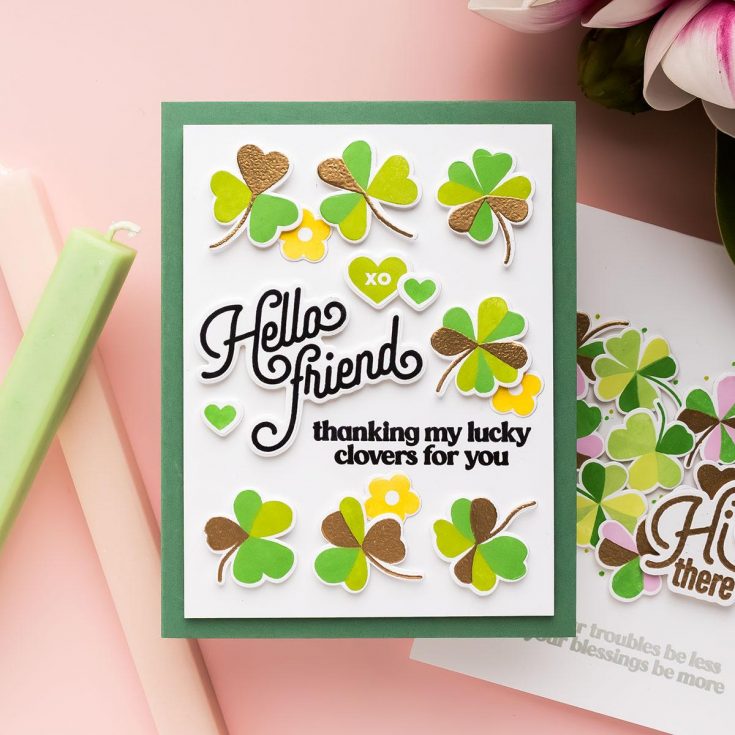
To keep the grid dynamic, remove one section and replace it with a sentiment. This breaks up the repetition and draws attention to the greeting. You can also introduce additional small elements from other stamp sets to enhance the story of the card.
For example, adding tiny flowers between clovers creates the feeling of a field scene and brings in a complementary color. Mount the finished panel onto a coordinating card base for a polished result.
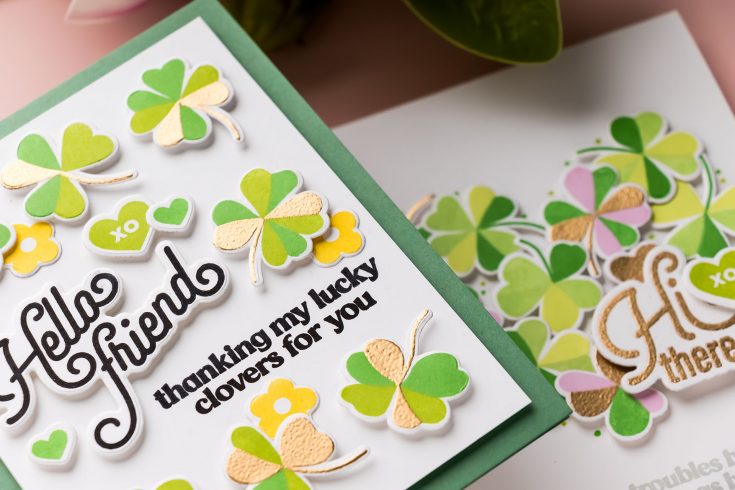
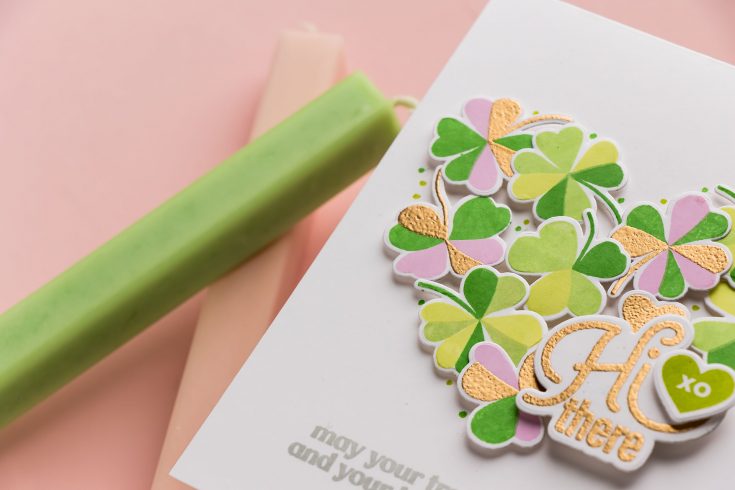
Idea Three: Form a Shape with Small Images
Small stamped images are perfect for building custom shapes. Use a die cut shape, such as a heart or circle, as a placement guide. Lay the template on your card base and arrange your small images inside the open area, slightly overlapping for a full look.
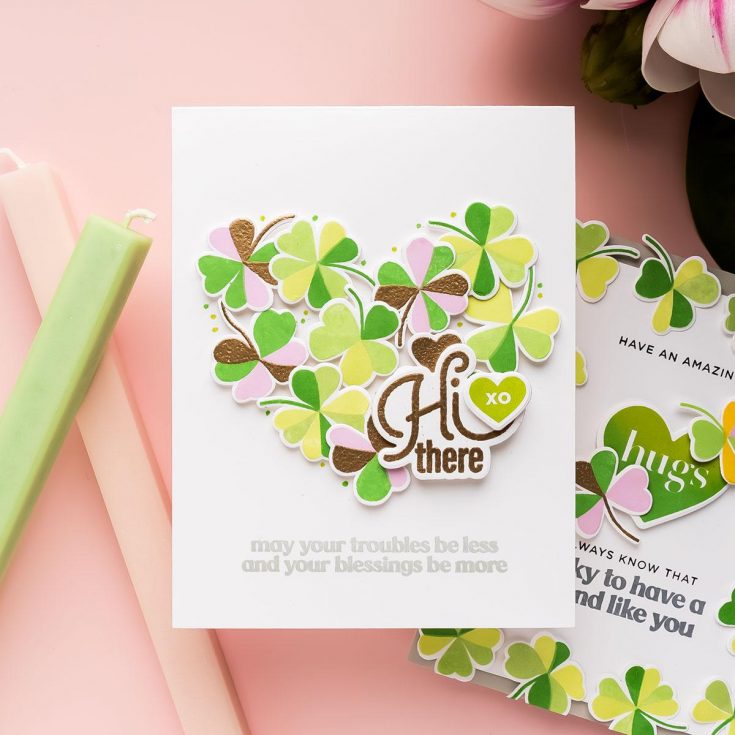
Once adhered, remove the guide to reveal the shape formed entirely from the stamped elements. You can refine the design by filling small gaps with tiny stamped accents in coordinating ink colors.
This technique is incredibly versatile. Try forming hearts, circles, seasonal shapes, or even letters and words using tiny images. Because the elements are small, they are easy to manipulate into cohesive shapes.
Finishing Touches
Complete your cards with sentiments that complement the overall design. Layered sentiments, heat embossing, or die cut greetings add depth without overpowering the small images. Mount your panels with foam adhesive for dimension and pair them with coordinating cardstock bases to tie everything together.
Why These Techniques Work
Small stamped images become more impactful when used in repetition. Whether forming a frame, building a grid, or creating a larger shape, repetition turns tiny elements into a strong design feature. Adding heat embossing, unexpected color combinations, or layered sentiments further enhances the final result.
If you have small stamped images in your collection that rarely get used, I hope these three ideas inspire you to pull them out and experiment. With a little planning and repetition, those tiny images can become the star of your next handmade card.
WATCH THE VIDEO:

SUPPLIES:
|


Ways to support Ukraine:
If you are looking for ways to support Ukraine, we encourage you to visit this page on Yana’s blog:

A big thank you to YOU, our reader — and to Yana for being our guest!
Sale alert!
Enjoy 24% off our in-stock exclusives this weekend only with code BDAY24 at checkout! Thank you!


There are no comments.
Leave the first?