This Floral Card Floats?! Clear Base Technique You’ll Love: Yippee for Yana

Hi friend! Please join me in welcoming back the oh-so-talented and amazing Yana Smakula! (Please note: our dear friend Yana is Ukrainian. To show support to our brothers and sisters in Ukraine, please see Yana’s post HERE.)
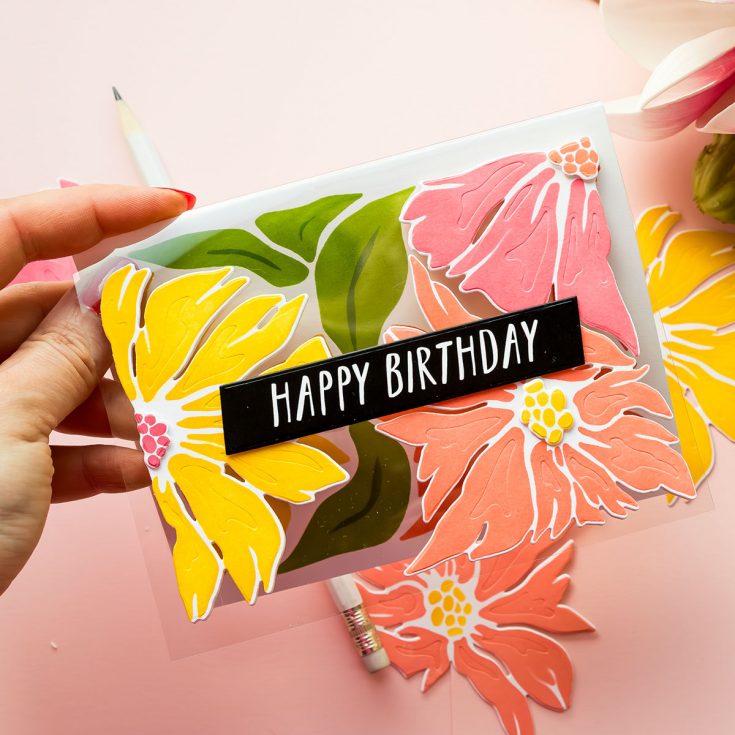
Hi everyone! Welcome back for another Yippee for Yana episode. Today I’m sharing a fun and unique cardmaking project — a clear card base card featuring ink-blended florals. If you’ve never made a clear card before, this is a great technique to try, and I’ll walk you through the entire process step by step.
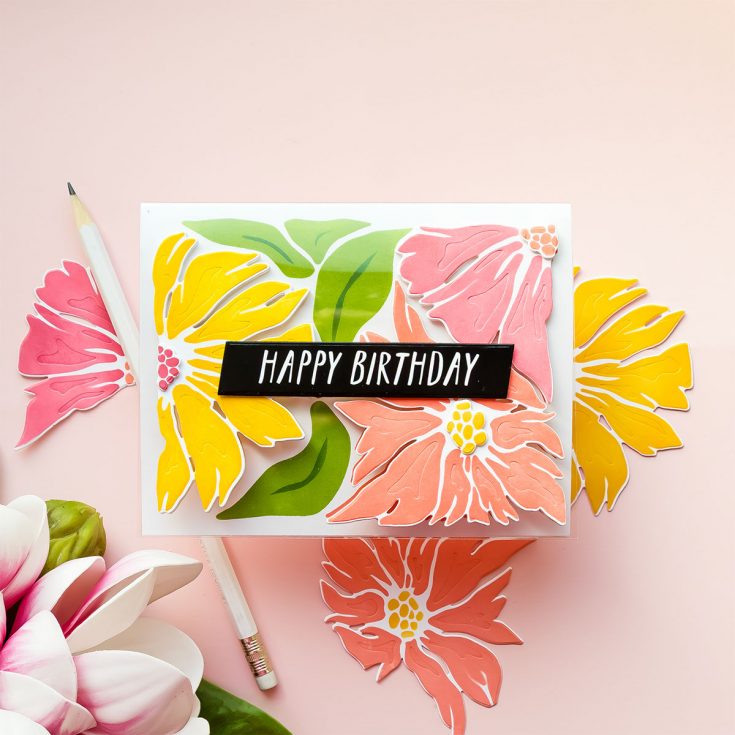
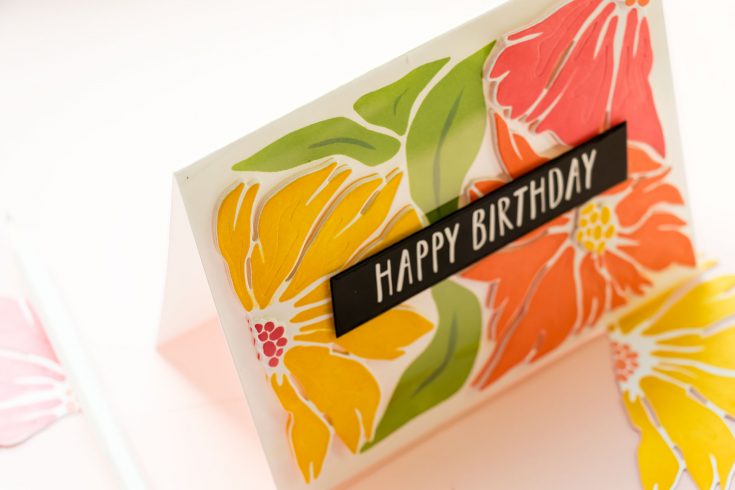
This card combines the beautiful Simon Says Stamp Friendly Blossoms Stencils with coordinating dies to create a layered floral design that appears to float on the front of the card.
Create the Ink-Blended Background
I started by creating an A2 top-folding card base from white cardstock. This panel goes inside the clear acetate card base and serves as both the background and a place to write a personal message.
Using the Simon Says Stamp Friendly Blossoms Stencils, I ink blended the floral design directly onto the front of the cardstock panel. Before blending, I added masking paper to the back of the panel to keep it clean.
For the first stencil layer (the flowers), I used:
- Honey ink for the large flower
- Rhubarb ink for the second flower
These stencils include helpful labels for each element, making alignment simple and intuitive. Because the stencil design is quite detailed, I recommend blending gently or even tapping the ink onto the surface to avoid shifting the stencil and to preserve fine details.
Next, I layered in the leaves using Pearfection ink. For the flower centers, I reused the same ink colors but switched them around for a more playful and balanced look.
The final stencil layer adds extra details, including leafy vines and an additional flower. I used Field ink (a darker green) for depth and Salmon ink for the final bloom. Masking certain areas during this step helps keep colors clean and prevents unwanted blending.
Die Cut the Floral Elements
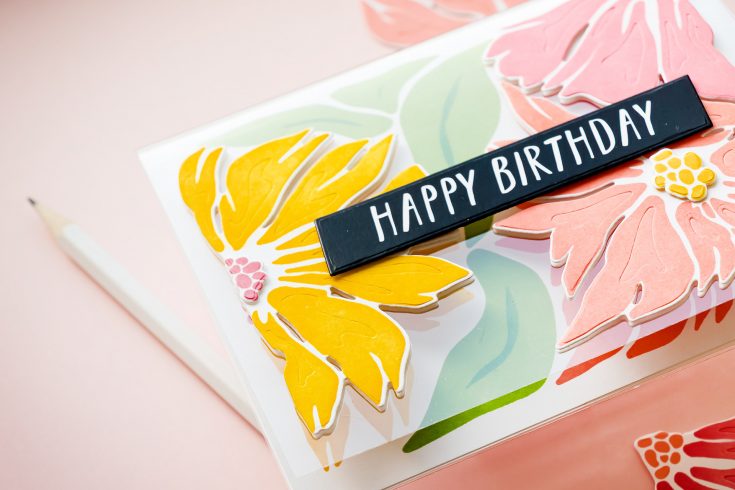
To create dimension on the card front, I repeated the ink blending on a second panel — focusing only on the flowers since those would be die cut.
I used the Simon Says Stamp Friendly Blossoms Dies to cut out the floral elements. These dies not only cut the shapes but also add subtle embossed details, making the flowers look more polished and dimensional.
I also die-cut flower centers and adhered them using thin foam adhesive squares.
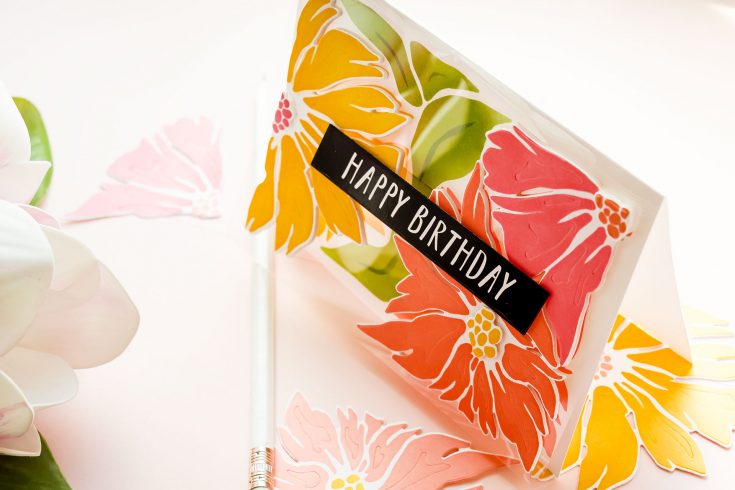
Assemble the Clear Card Base
Now for the fun part — assembling the clear card.
I placed the ink-blended cardstock card base inside the clear acetate card base. To secure the two together without visible adhesive, I used a sentiment strip and adhered it to the back of the card. Then I added double-sided adhesive behind that area to attach the layers seamlessly.
For the front design, I adhered the die-cut flowers using foam adhesive squares to create dimension. Because the card base is clear, the back of the foam adhesive would normally be visible from the inside.
To solve this, I added extra die-cut pieces to the inside of the card, aligning them behind the front flowers to completely hide the adhesive. This simple trick keeps everything looking clean and professional.
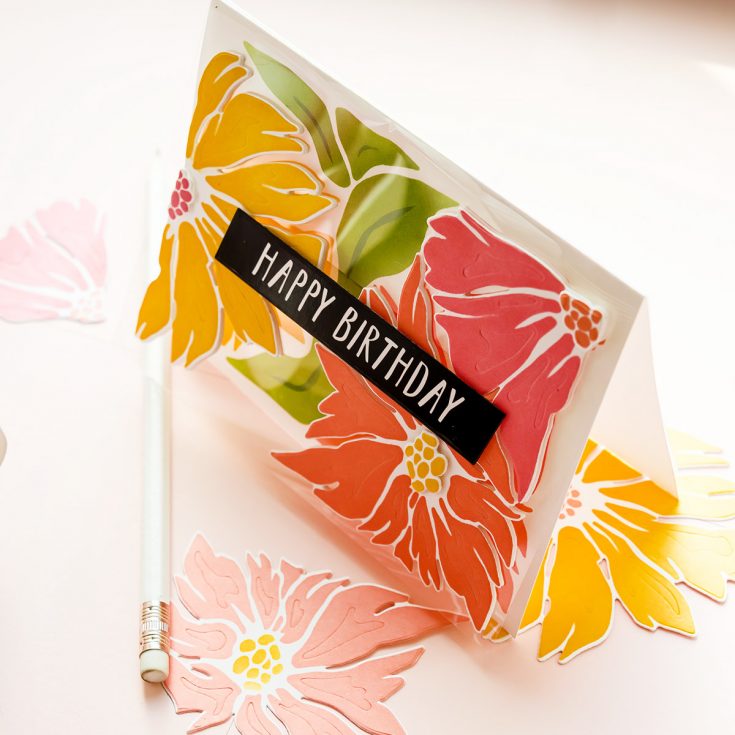
Add the Sentiment
I finished the card with a “Happy Birthday” sentiment, die cut using the Simon Says Stamp XL Easy Strips Slanted Rectangle Dies. I carefully positioned the sentiment so the adhesive sits only on top of the flowers, ensuring it remains hidden from the inside of the card.
Finished Card
The result is a stunning, clear card with floating florals, vibrant ink blending, and a clean, polished interior. You still have plenty of space inside to write a personal message, and the added sentiment on the back gives the card a thoughtful finishing touch.
Clear card bases are a fantastic way to add interest and dimension to your cardmaking projects. If you’re looking for a fresh idea, this technique is definitely worth trying.
Thanks so much for joining me today. I hope you feel inspired to create your own clear card with the Simon Says Stamp Friendly Blossoms collection!
WATCH THE VIDEO:

SUPPLIES:
|


Ways to support Ukraine:
If you are looking for ways to support Ukraine, we encourage you to visit this page on Yana’s blog:

A big thank you to YOU, our reader — and to Yana for being our guest!


This turned out beautifully! I love the colors you used, Yana. The acetate card really gives a cool effect.
Lori S in PA
Oh wow this is so cool