Merry Christmas Tag using Tim Holtz Fabric by Paula Cheney
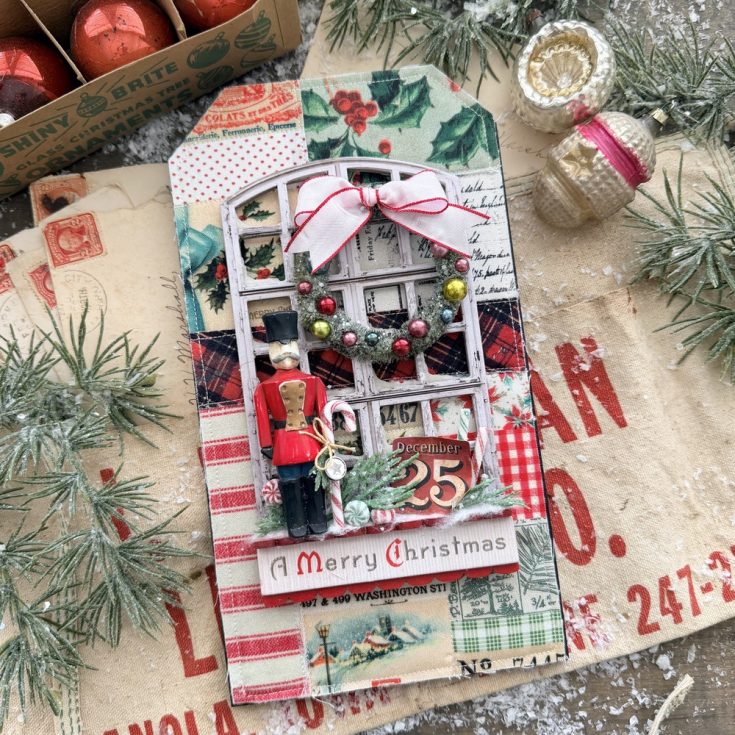
Hello friend! Thanks so much for stopping by our blog today, and please join me in welcoming back special guest Paula Cheney with this JAW-DROPPING tag design! Read on and enjoy!
Patchwork Background
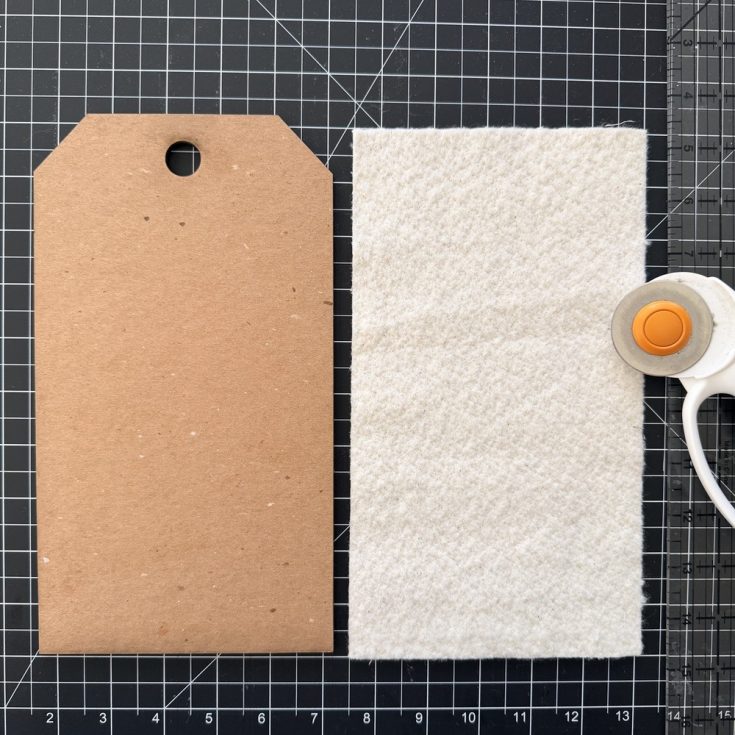


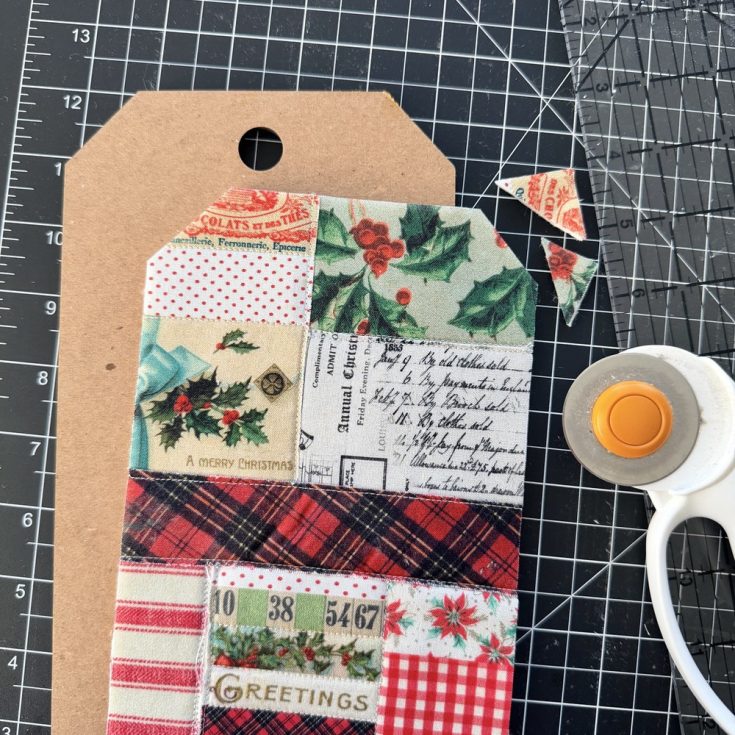
- Cut a piece of cotton batting slightly larger than your substrate. I am using a small Tim Holtz Etcetera Tag (5.5 x 10).
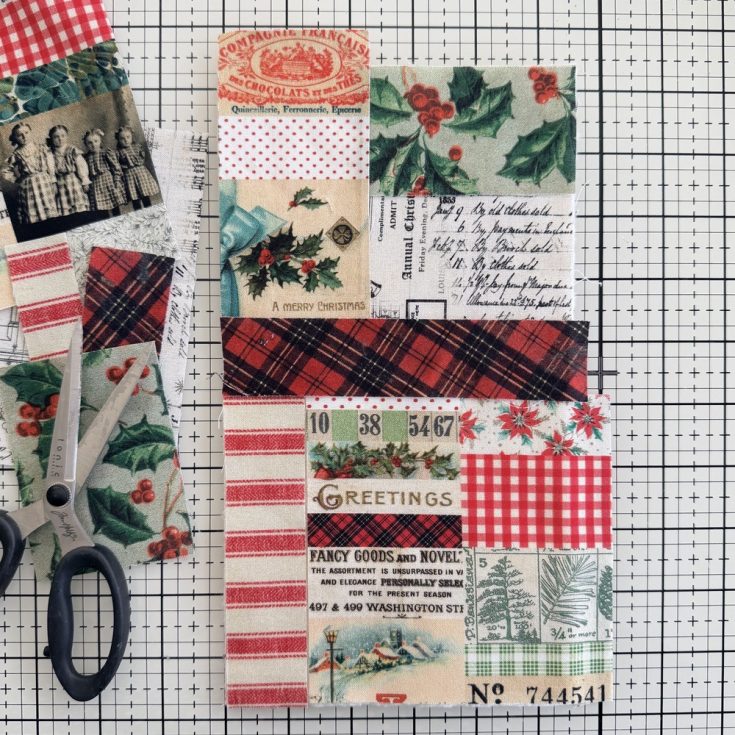
- Cut pieces of Tim Holtz Palette Christmas fabric to create a patchwork over the cotton batting (no glue yet). Because I used the Palette Christmas Collage fabric, it looks like many more pieces than there actually are. Don’t worry about excess fabric that might be hanging off the edge. It will be cut off once you glue the fabric pieces into place.
- Remove the 6 pieces from the batting to prepare to glue into place.
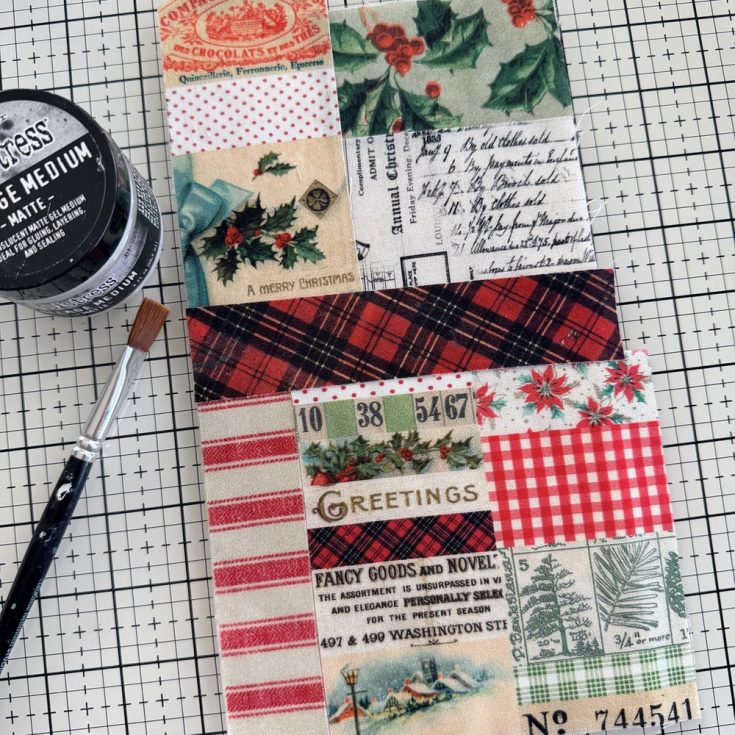
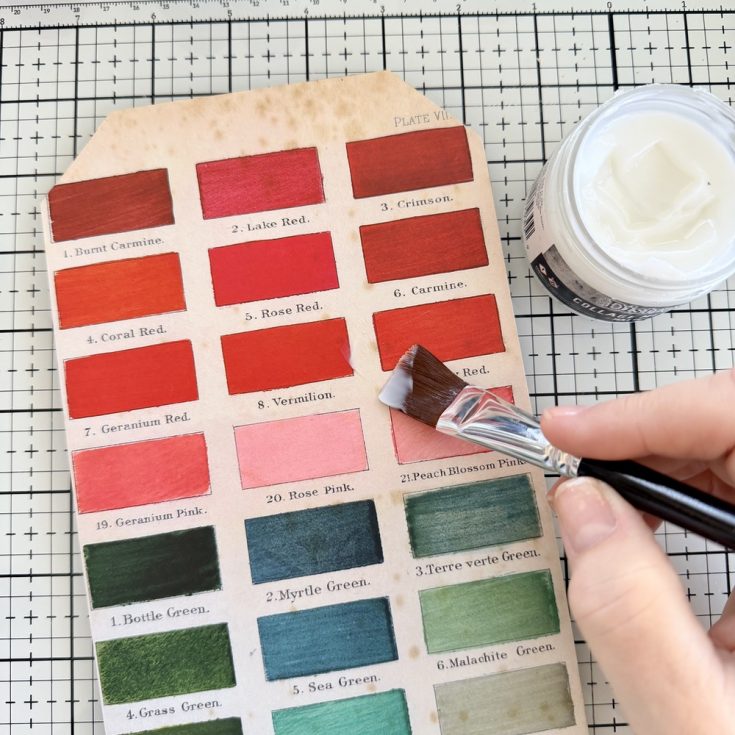
- Use a paintbrush and a light touch to add Collage Medium to cotton batting. The glue is only meant to keep the fabric stable until you go to the sewing machine to stitch. If you will not be sewing, then I would add a little more glue to the fabric pieces before placing them on the batting.
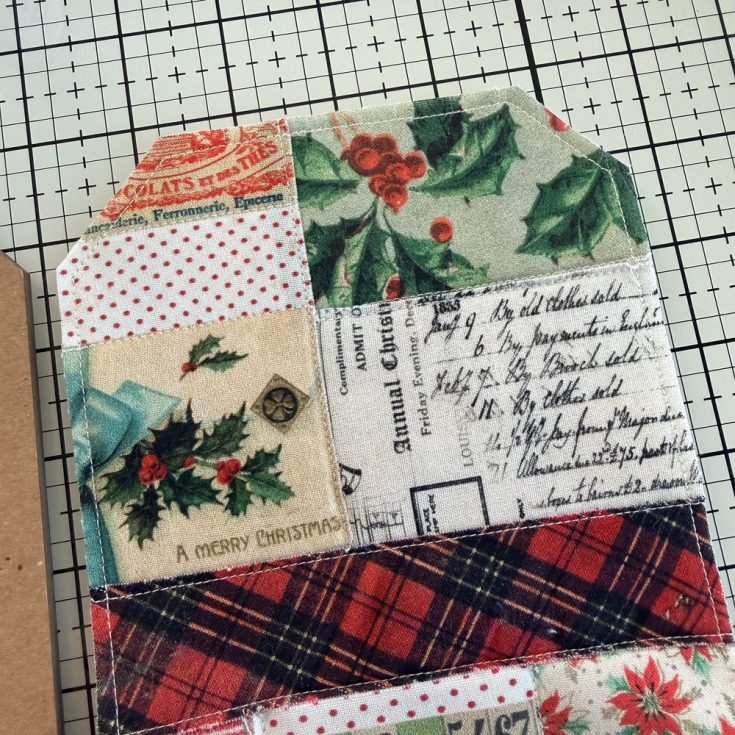
- Use a Rotary Cutter to cut off any excess fabric before going to the sewing machine. Stitch along the edges of the fabric pieces. On the Collage fabric, you can stitch where the fabric changes.
- Go back to the cutting mat and trim the fabric/batting to fit the Etcetera Tag.
- Then back at the sewing machine to sew along the edge of the tag shape.
Etcetera Tag
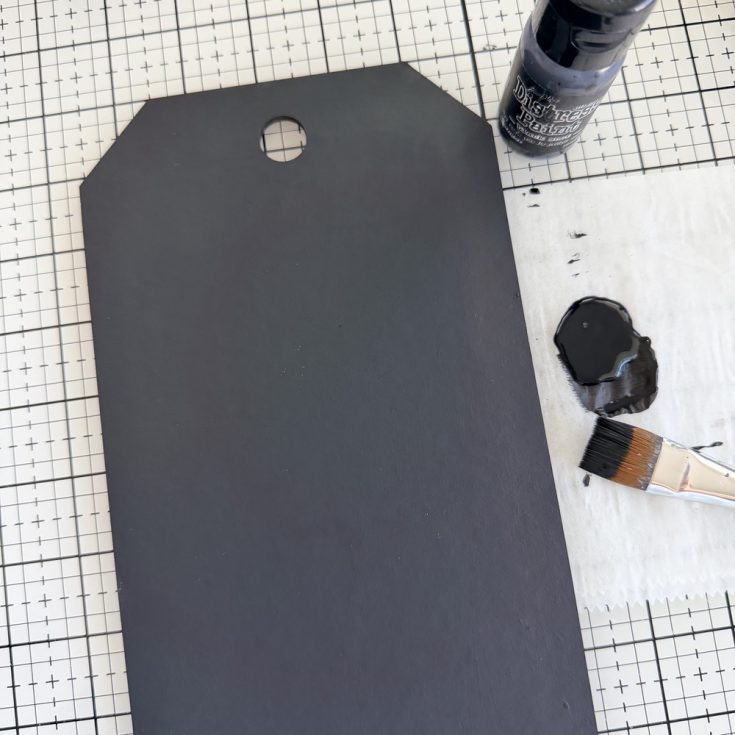
- Paint the Etcetera Tag and edges with Black Soot Paint. Only the edges may be seen under the fabric so it does not really matter if you paint the center. I just got going and couldn’t stop! Let the paint dry.
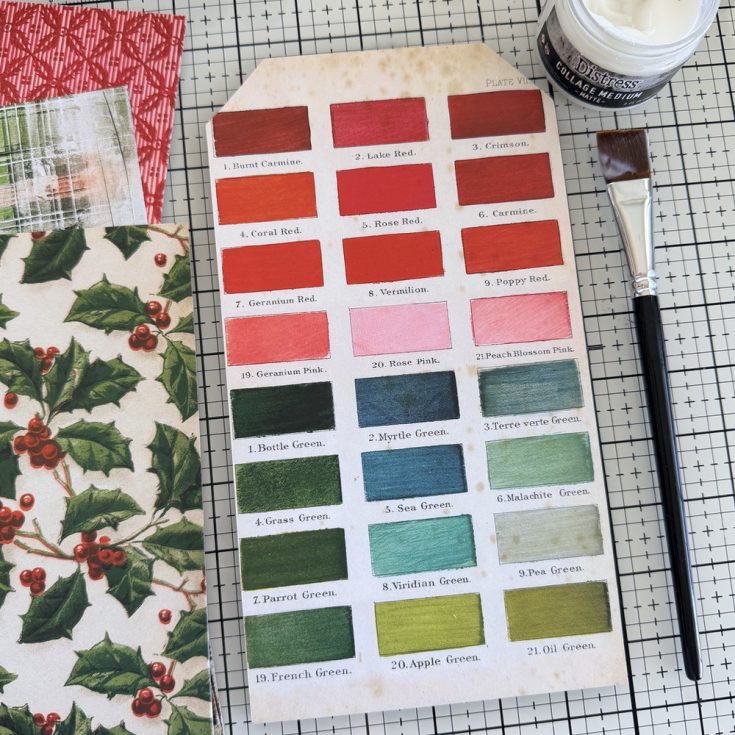
- Turn the Etcetera Tag over and add a sheet of paper from the 2025 Christmas Backdrops. Backdrop paper is 6 x 10” so it fits the small Etcetera Tag almost perfectly.
- Add a layer of Collage Medium over the top of the paper to seal it. Let dry completely before moving to the next step.
- Scribble Walnut Stain Distress Crayon on the edges of the paper. Use a damp brush to move the crayon over the edges of the tag until satisfied with the vintage look.
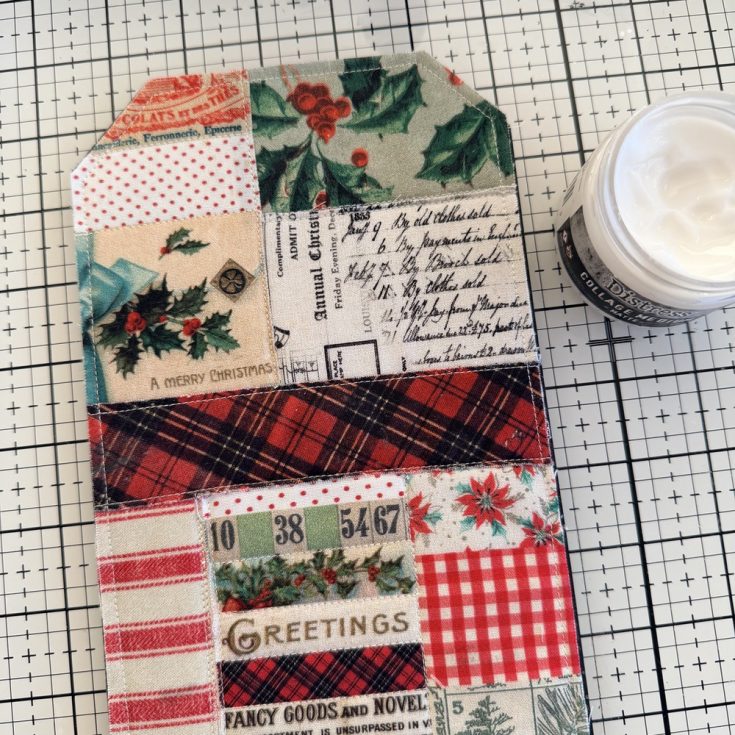
- Use Collage Medium to add fabric to the Etcetera Tag (over the black paint). Press down firmly. Let dry.
Ledge and Window

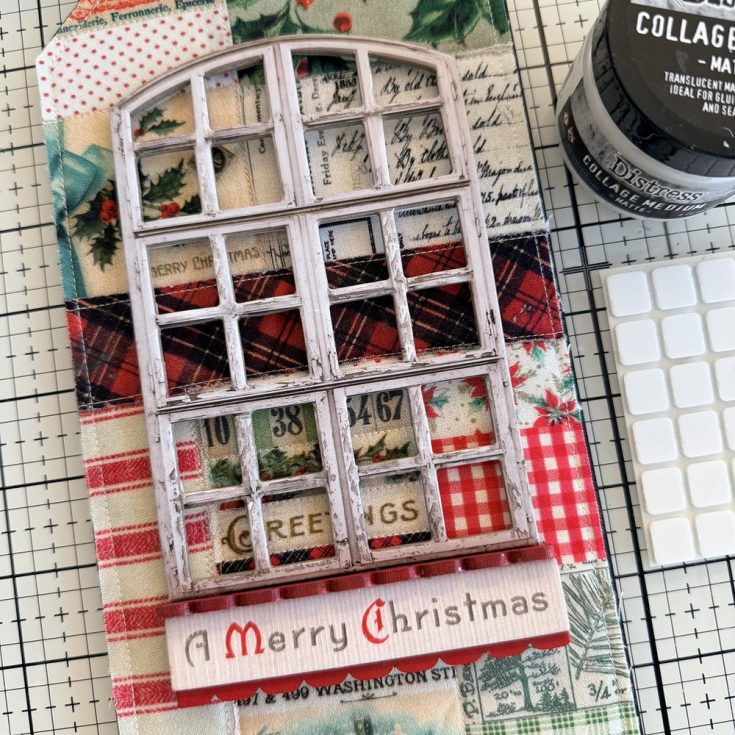
- Use scissors to cut two different widths of Etcetera Scalloped Trim, the same length as the Merry Christmas Baseboard sign. Paint both sides and edges of the Trim in Candied Apple Distress Paint. Set aside to dry before assembling the ledge.
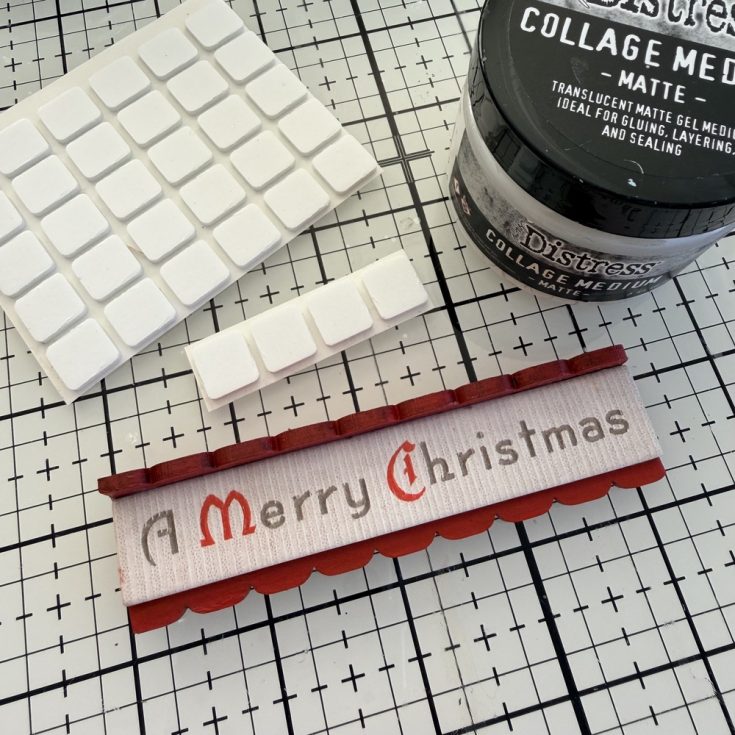
- Use Collage Medium to add the wider Trim over the Merry Christmas sign, so the scallop shows at the bottom. Once dry, add four 3D Foam Squares to the back of the scallop to raise it. Now use Collage Medium to add the narrower scallop to the top of the sign to create the shelf. The two Trim pieces will not touch in the back.
- Cut 3D Foam Squares into thin strips. Add to the back of the large Baseboard window. Adhere the window and the shelf to the fabric panel using a combination of Collage Medium and the previously added Foam Squares.
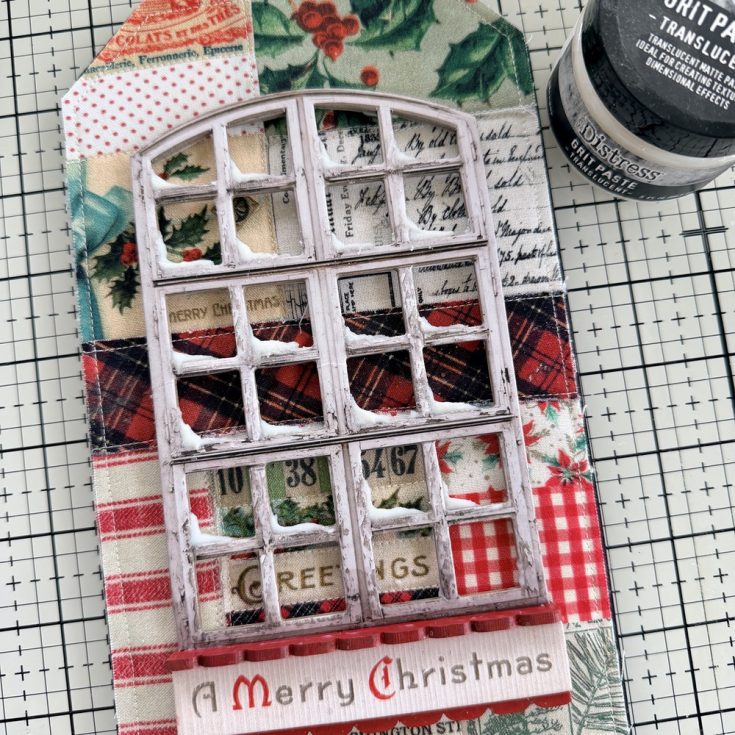
- Using your fingertip, add Translucent Grit Paste to five rows of windowpanes. leaving the bottom row empty. Set aside to dry while you work on the wreath. NOTE: if you do not plan to raise the window with 3D Foam Squares (step 14), then you must add the Grit Paste before adding the window to fabric.
Wreath
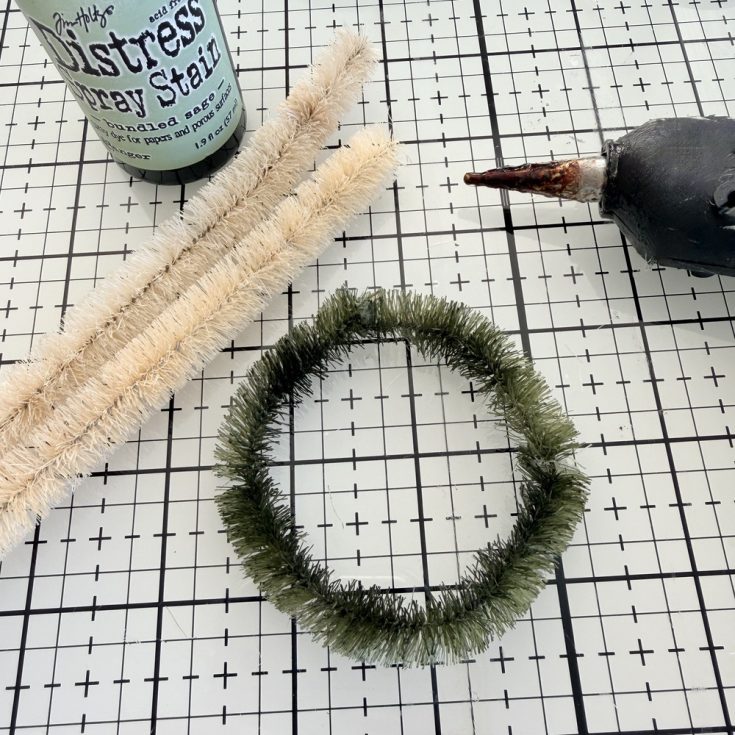

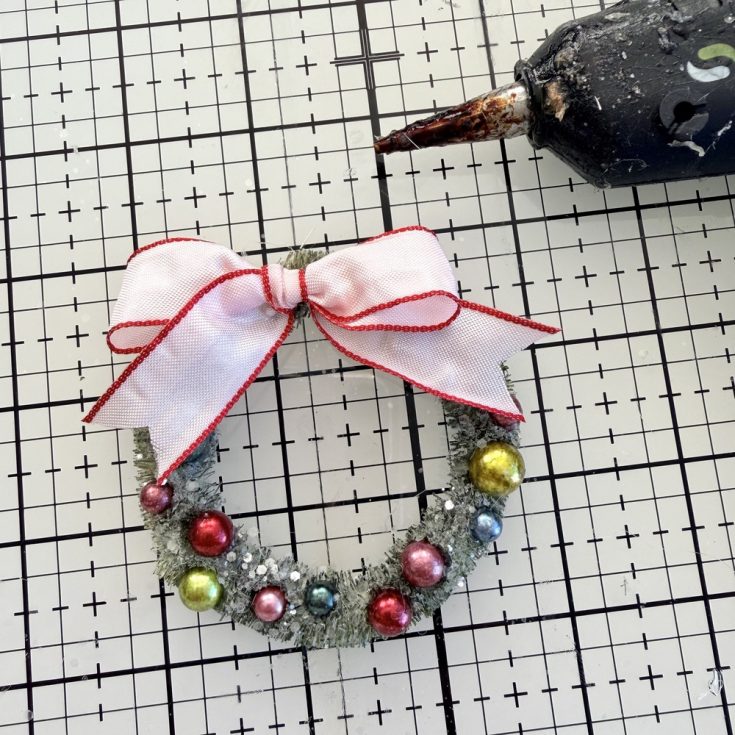
- Spray two idea-ology Garlands with Bundled Sage Distress Stain. Dry with a heat tool. Use hot glue to connect the two colored Garlands into one. To create the wreath, wrap the Garland around a Collage Medium jar. Clip off what is not needed and join the two ends with more hot glue.
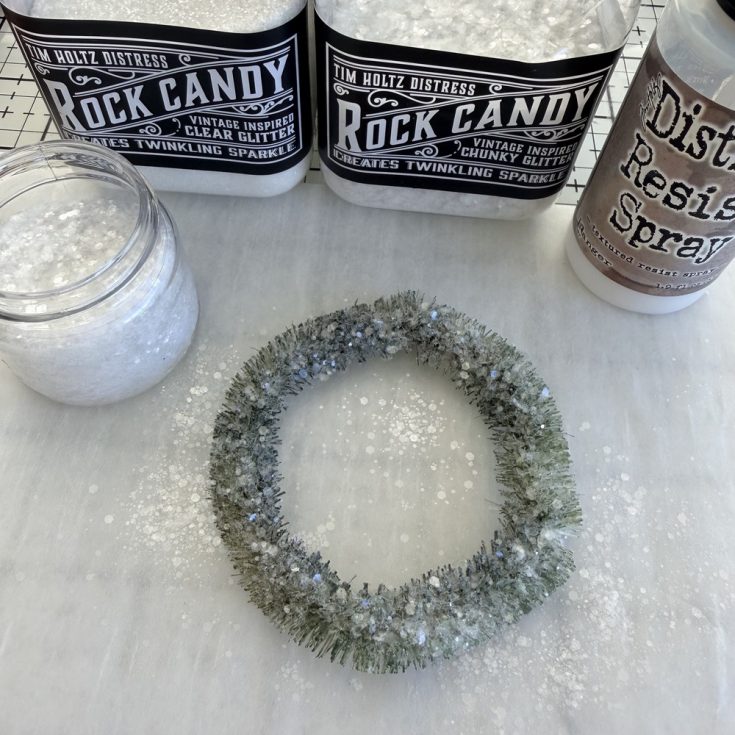
- In a small jar, make a 50/50 mix of both Rock Candy and Rock Candy Chunky. Place the wreath into a Splat Box. Spray with Distress Resist Spray, making sure you get the sides. Move the wreath to a disposable paper and pour Rock Candy mix over the top and sides. NOTE: make sure you quickly clear the nozzle of the Resist Spray after use. Remove the nozzle. Submerse the tube into a plastic cup filled with hot water. Push down on the nozzle and spray into a trash can to clear the tube and nozzle. Change the hot water and repeat until the water is clear.
- Once the Rock Candy is dry, color the smallest sizes of Baubles with Alcohol Ink. I used Willow, Cranberry, Cloudy Blue, and Shell Pink, with a touch of Mushroom added after color the color was dry. Use a hot glue gun to add glue to the wreath, then push the Baubles into the glue. Make a bow using 1/2” – 5/8” wide ribbon.
- Add the bow to the top of the wreath with hot glue.
Embellishments


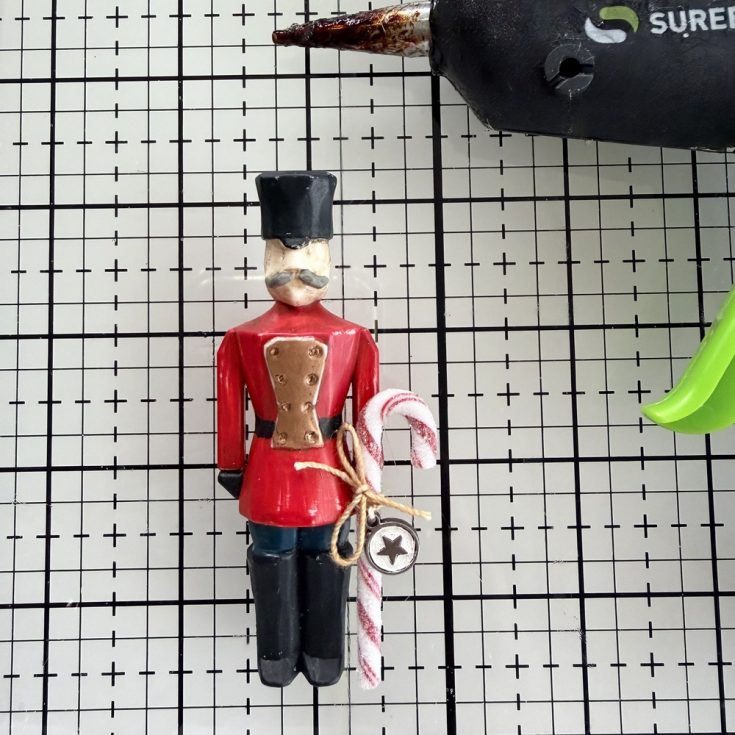

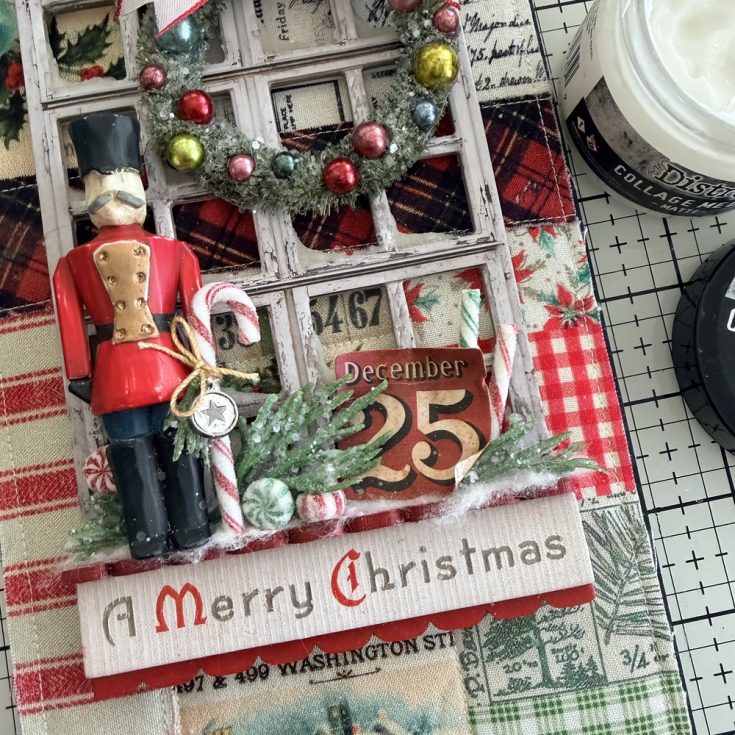
- Paint the large Salvage Figure with Candied Apple, Uncharted Mariner, Hickory Smoke, and Black Soot Distress Paint. Once the paint is dry, shake, then squeeze out about a dime size of Foundry Wax. Using a small paintbrush, quickly paint the center of the uniform. Heat the Foundry Wax with an Embossing Tool just till it turns gold. Do not overheat or it will bubble.
- Scribble Walnut Stain Distress Crayon onto the Studio Glass Mat. Use a damp paintbrush to pick up the crayon and paint over the figure. Some of the paint my wear away from rubbing. I like that look so much that I also took some steel wool to the toy solider.
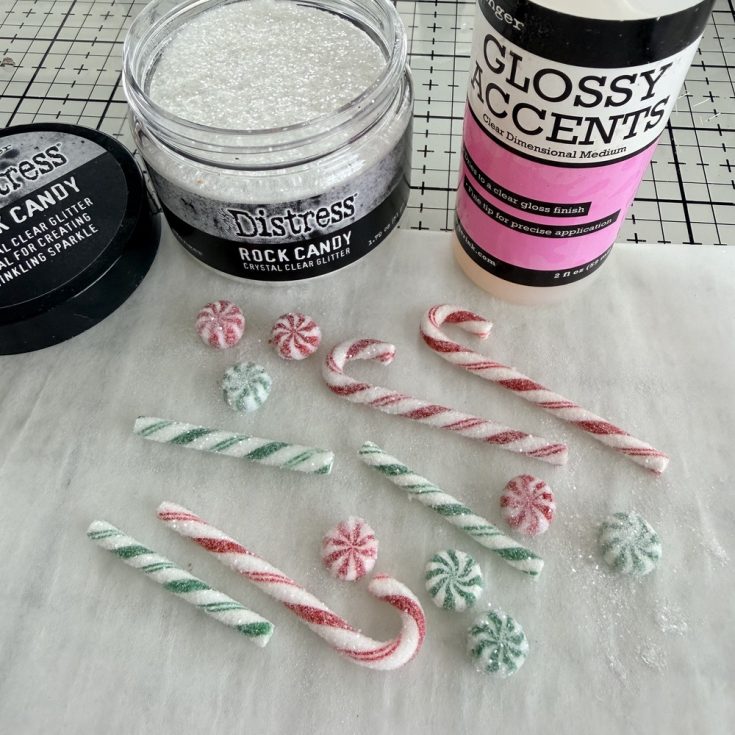
- Use Glossy Accents to add Rock Candy to a few Confections. You will not need as many as I have shown here, but it’s hard to stop once you start!
- Once dry, use string to add a tiny tag from the 2025 Christmas Word Plaques and Tags pack. I scribbled over the tag with a Picket Fence Crayon to get the white center.
- Use hot glue to add the candy cane to the Salvaged Figure.
- Rip a piece of cotton batting the length of the window. Use Collage Medium to add the batting to the top of the ledge. Once it is secure, add the Salvaged Figure and the wreath. Due to it’s texture, I think it’s best to add the wreath with hot glue. The Salvaged Figure may need a combination of both hot glue on his back and Collage Medium under his feet for longevity.
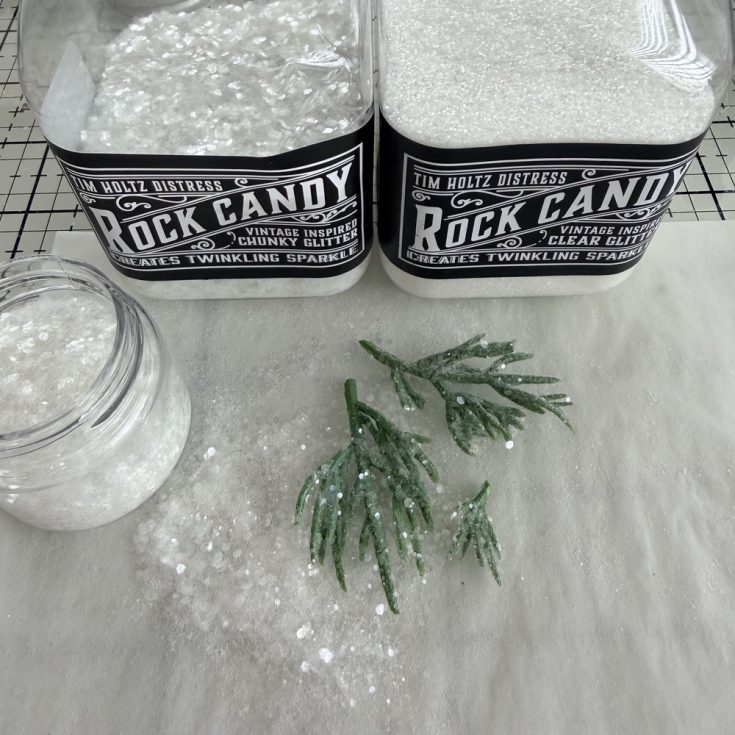
- Faux pine can be altered using the Rock Candy mix. I just clipped a few pieces from something I had on hand, rubbed over it with Glossy Accents, and poured the Rock Candy mix over the top. Super easy and a great way to recycle old Christmas decorations.
- Use Collage Medium to add the embellishments to the shelf, including the faux pine pieces, Confections, and small calendar from the 2025 Christmas Ephemera pack.
SUPPLIES:
|


Thanks so much to Paula for this gorgeous inspiration and to YOU our reader, for stopping by today!


Very cool, Paula. I might not put as many items on my tags but you do you, as Tim says. I like your result, too!
Lori S in PA
So gorgeous! Thanks for sharing Paula !!
Paula this is a wonderful tag!
Wonderful tag!! Thanks for the great instructions and tips!!
Oh wow this is just incredible
This is really Gorgeous!!!
so gorgeous!!
Absolutely gorgeous!