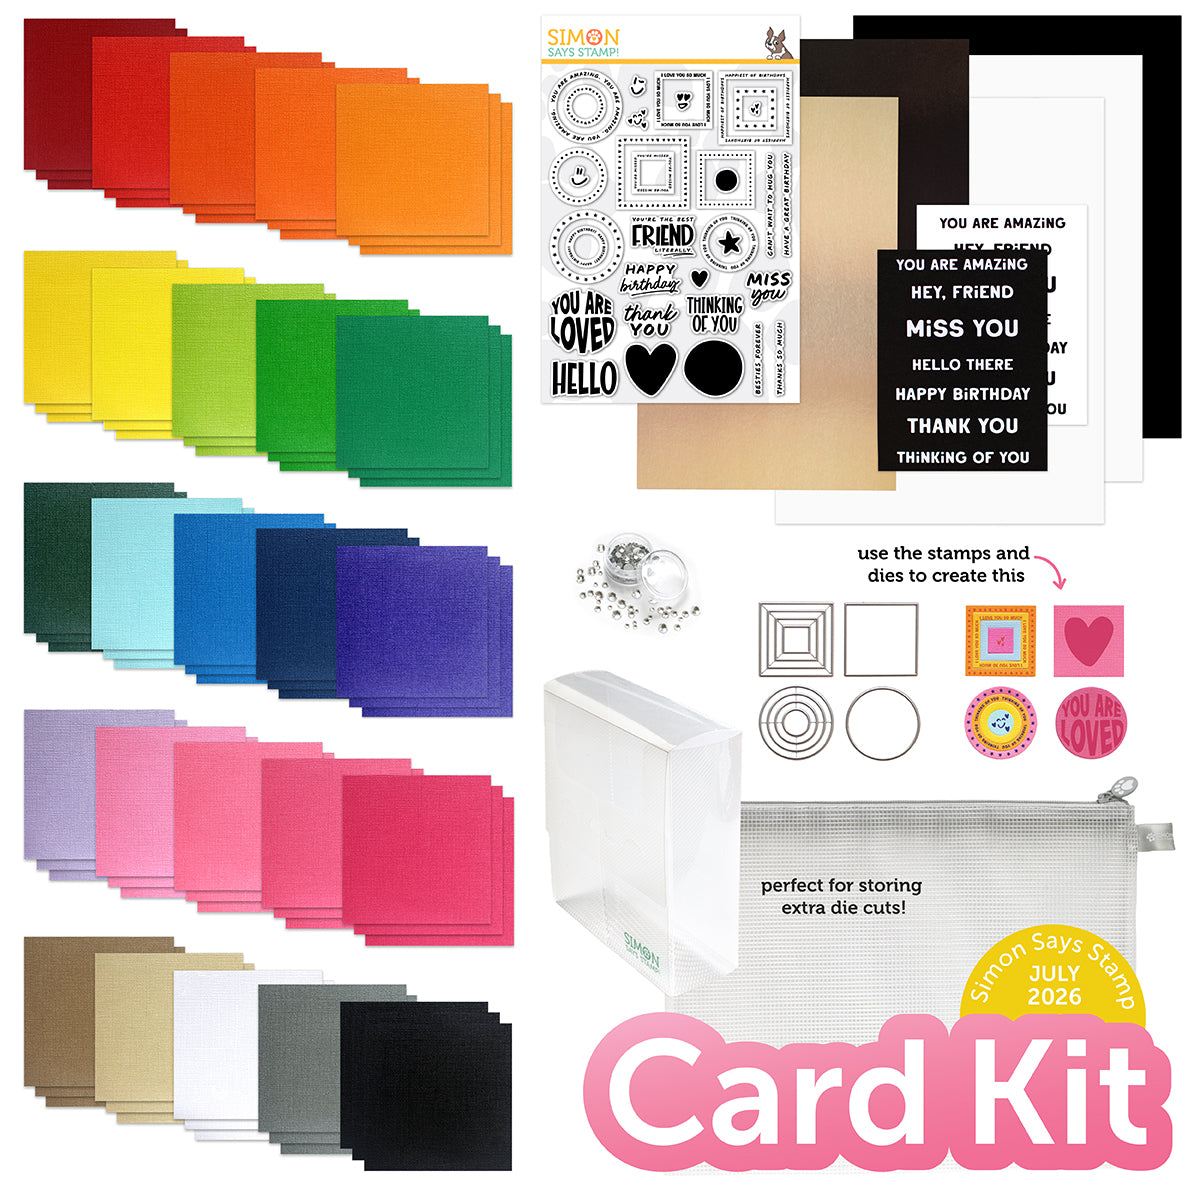
Full of Smiles Cards Two Ways featuring the July 2026 Card Kit
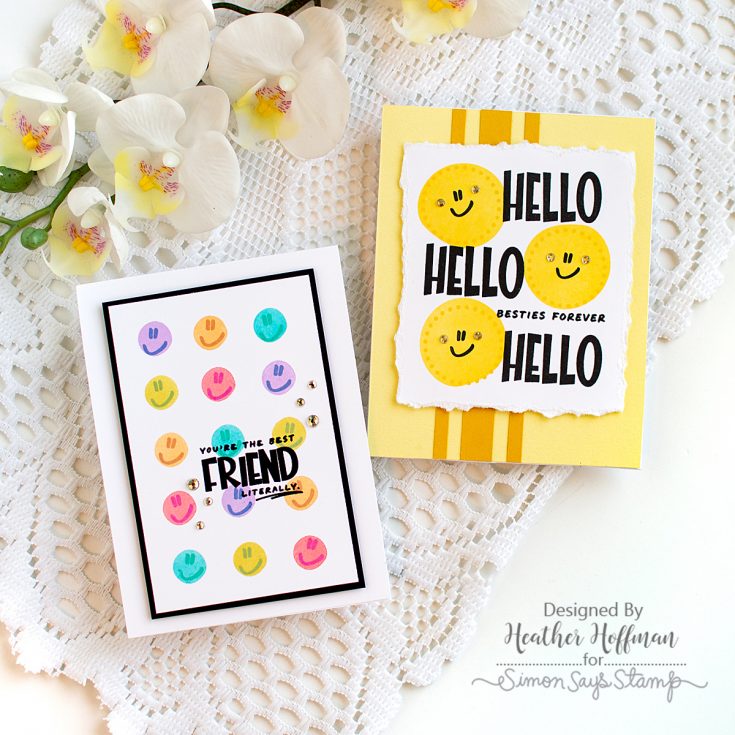
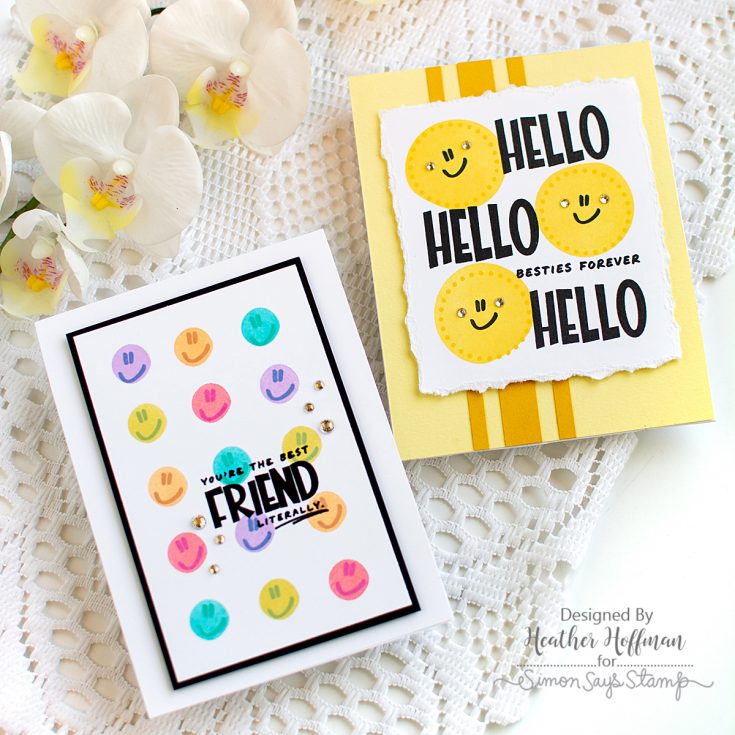
Hi friends! Heather Hoffman here to share two different ways to fill a card full of smiles to let your friend know how much you love them! One version is monochromatic and uses larger circles, and one is full of fun colors and uses tiny circles. Would you believe they both use the same smiley face? They look so different! Both feature the fun Pop Art stamp set from the July 2026 Card Kit – Pop Art!
Card kits generally come with a stamp set, and while the coordinating dies are often available as an add-on (as is the case with this month’s kit), there are so many ways to use stamp sets without any die cutting needed. Repeating images and/or sentiments is one of the best ways!
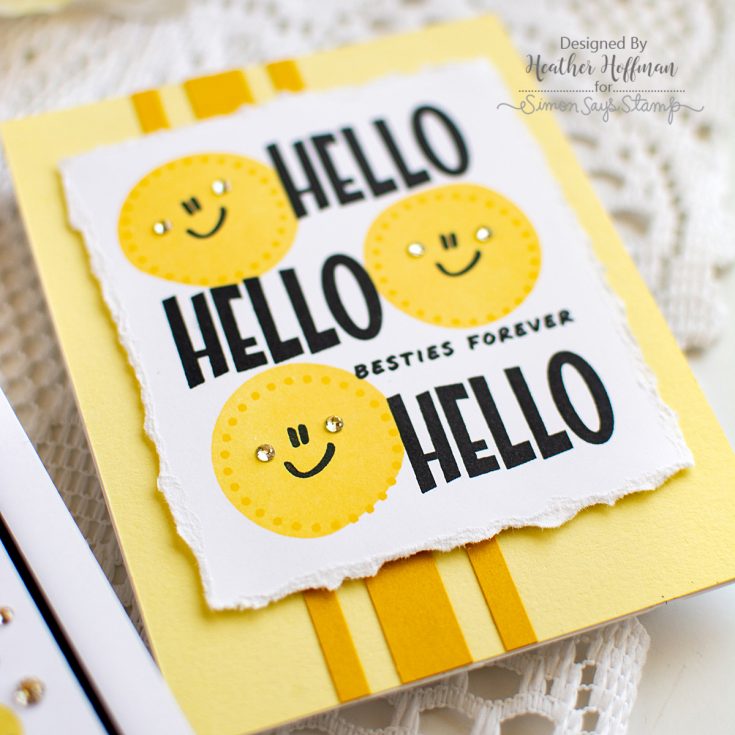
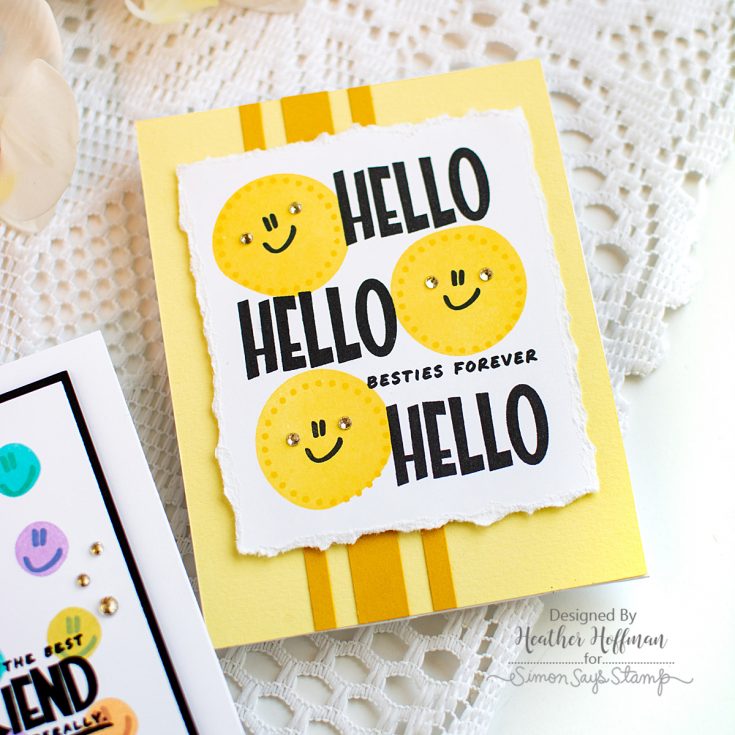
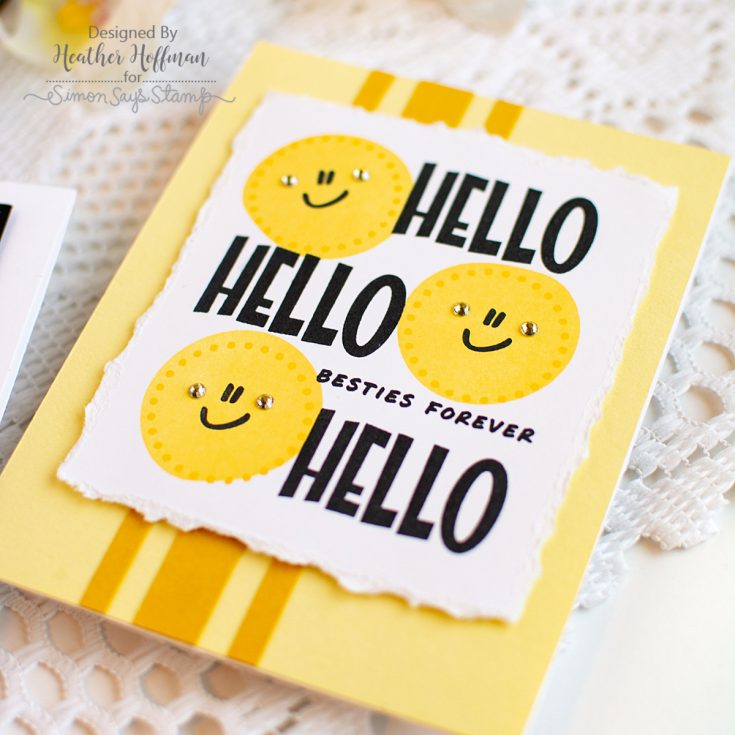
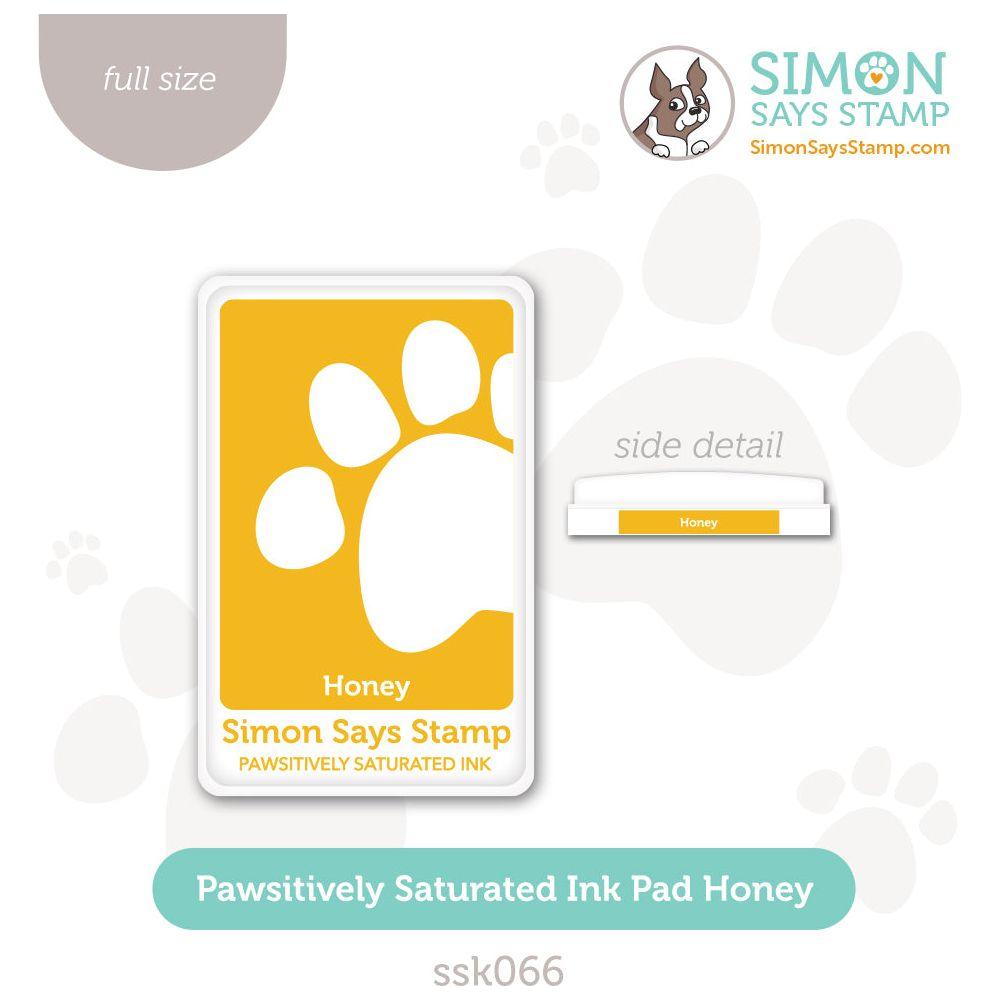
For the first card I went with the stereotypical yellow smiley faces! I grabbed the larger circle from the Pop Art stamp set and stamped it 3 times on a panel of white cardstock with Zest ink, then grabbed the dotted circles and stamped that with Honey ink – not bothering to line up perfectly so it kept a bit abstract. I then stamped the smiley faces and sentiments with Nocturne ink. I tore the edges of that panel, then mounted on a background of Banana Yellow cardstock with some strips of Honey cardstock to pull it all together. And finally, I added a few of those Dazzling Clear Gems in the kit to the smiley faces!
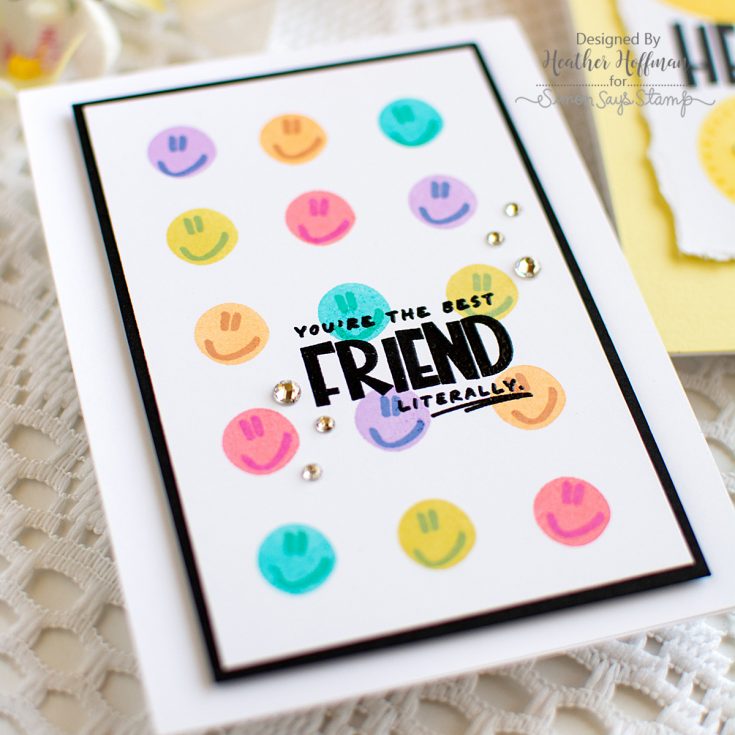
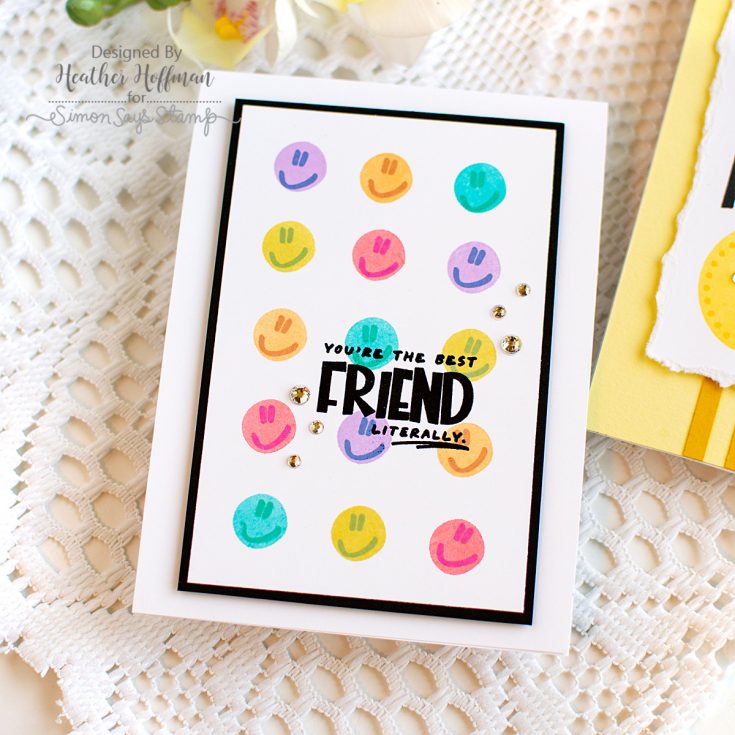
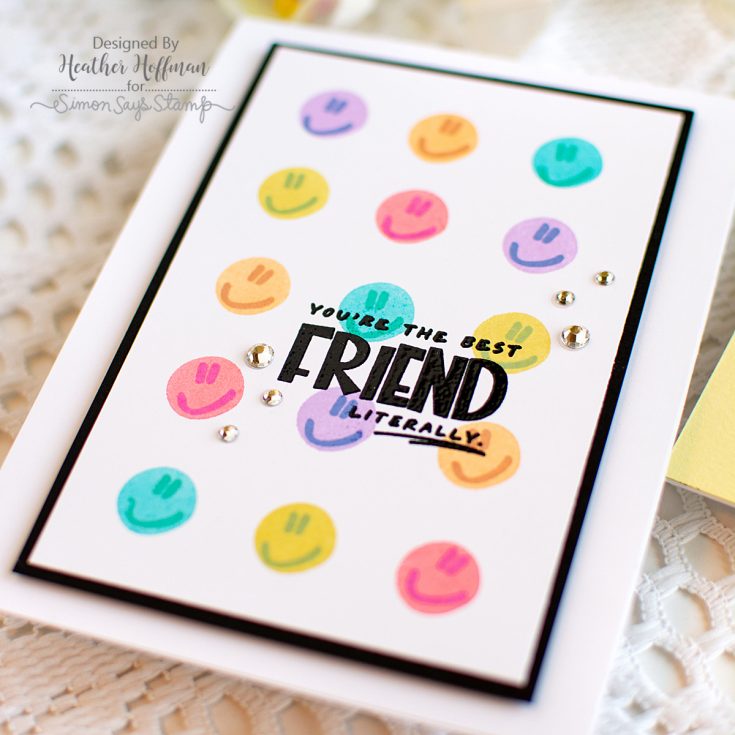
For the second card I broke out the tiny circle and an entire rainbow of fun ink colors. I stamped the circles with alternating Lilac, Cantaloupe, Surf, Wheat, and Blush inks, then added the SAME smiley face over each one with Twilight (on the Lilac), Nutmeg (on the Cantaloupe), Tropic (on the Surf), Artichoke (on the Wheat), and Sweets (on the Blush). The layering of somewhat tone on tone colors makes these look entirely different! I stamped a sentiment directly over the background with Nocturne ink again, then added clear heat embossing to make it pop a bit more over the background. I trimmed that panel down, matted it with some black cardstock, then mounted on a white cardbase. Added another sprinkle of those Clear Dazzling Gems around the sentiment on this card as well!
I can’t get over how cute and different both of these look! The first one looks more like little chubby smiley faces, and the second one reminds me of a smiley face version of candy hearts!
Which version do you like best? Have you ever challenged yourself to focus on a stamp set without the coordinating dies?
SUPPLIES:
|


Thanks so much for stopping by!
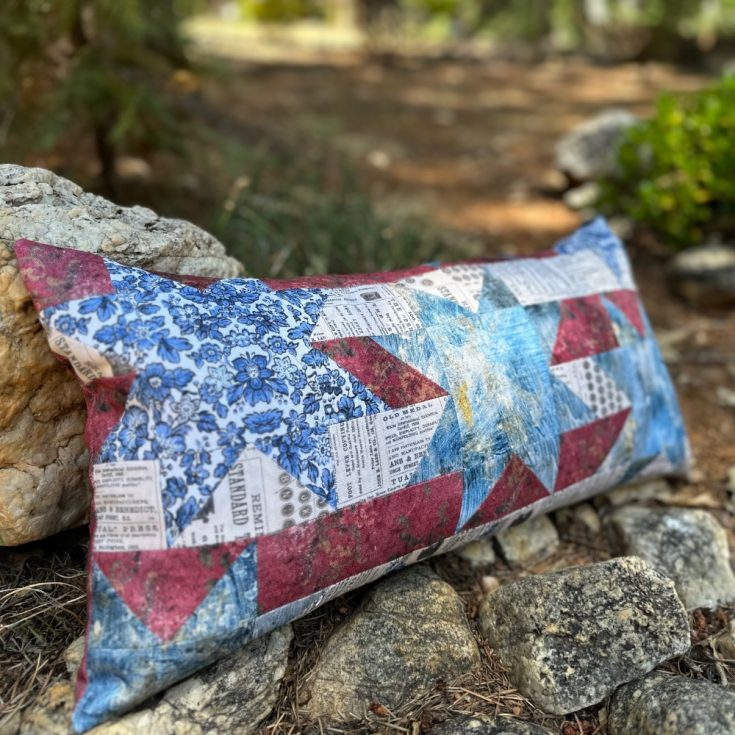
Stars and Stripes Pillow by Richele Christensen
Hi friend! Happy Friday! I’m delighted to welcome back special guest Richele Christensen with this gorgeous patriotic pillow tutorial in honor of our upcoming 250th Birthday! Read on and enjoy!
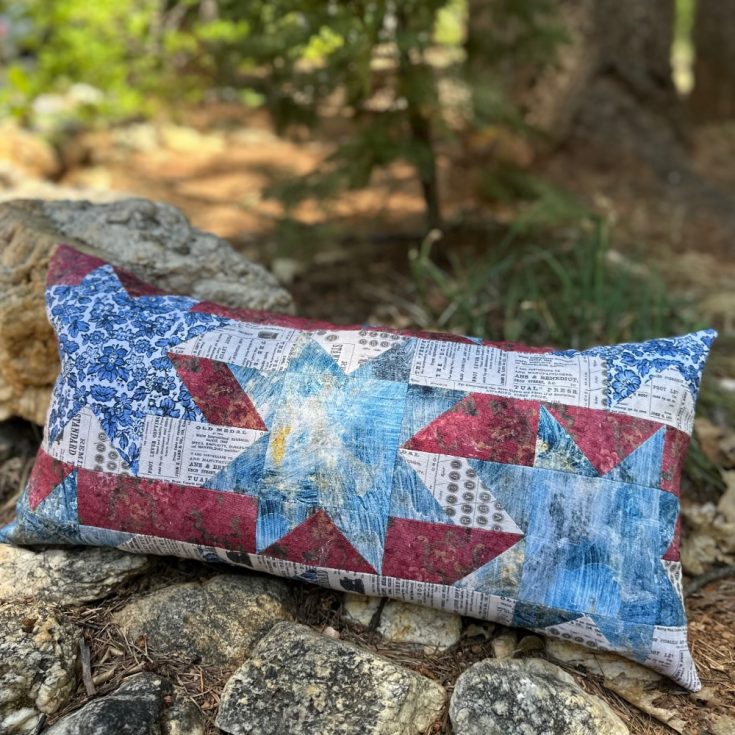
Hello friends! Today I’m sharing a fun pillow for the Fourth of July using the gorgeous Palette Canvas Cloth by Tim Holtz. The Palette Canvas Cloth is a thicker weave fabric and adds beautiful texture to any project. Its also very soft and easy fabric to work with. This fabric comes in 16 of my favorite prints from the Palette collection. You can use Canvas Cloth for pillows, decor pieces, clothes, journals, mixed media and so much more. The pattern for the Stars and Stripes Pillow is by Chrissy Lux of Sew Lux Fabric.
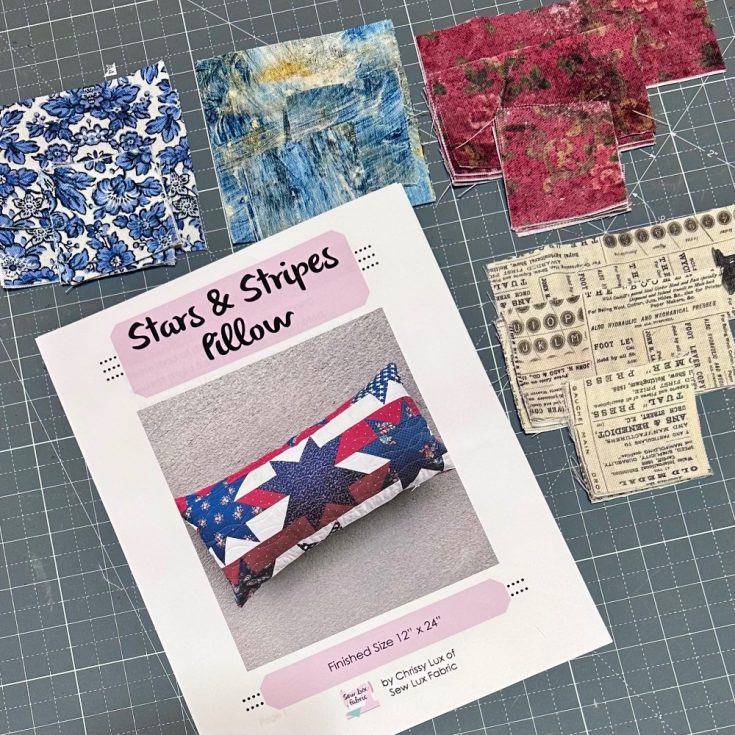
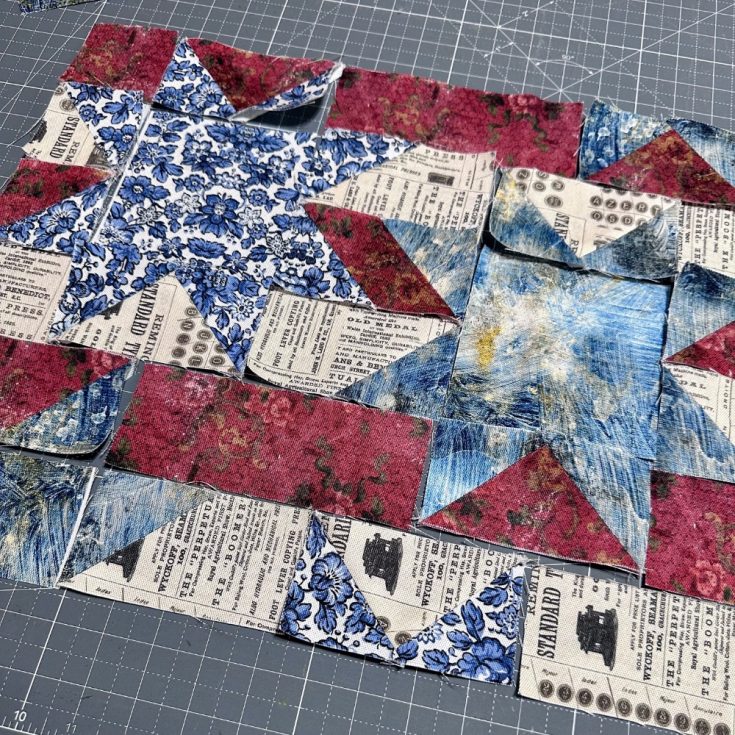
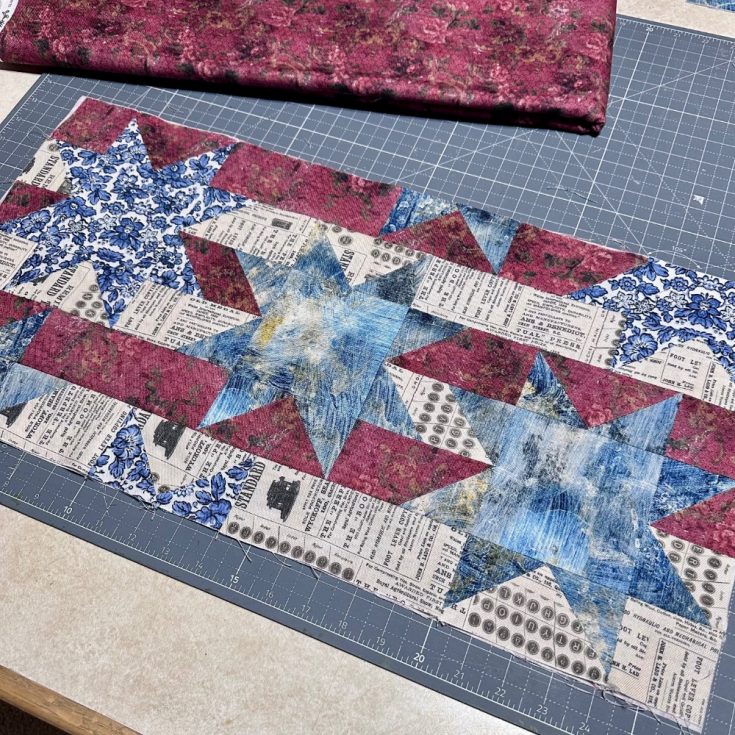
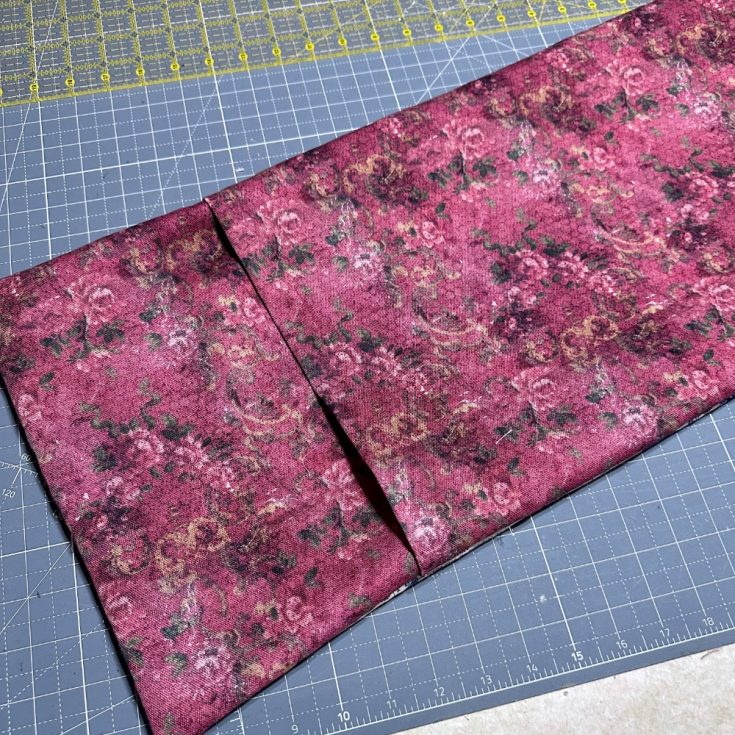
- Start with Palette Fabric Canvas Cloth in Red Tapestry, Neutral Typewriter, Blue Vintage and Indigo Wallpaper. Cut the pieces out as directed in the pattern.
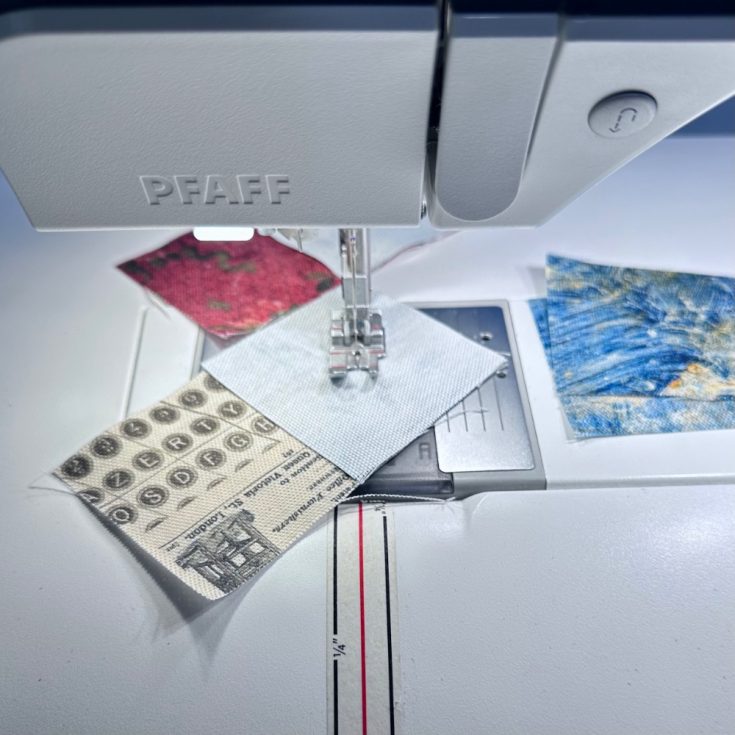
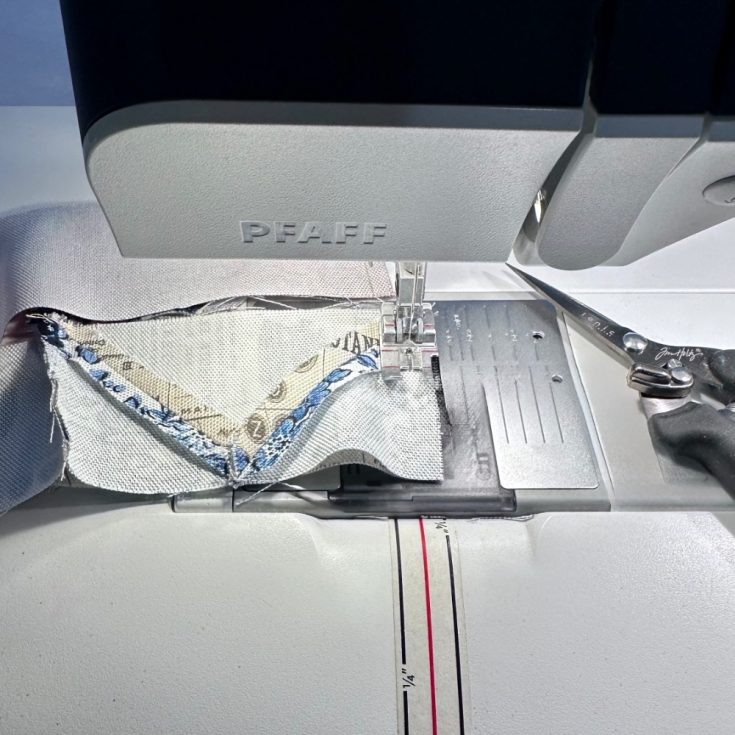
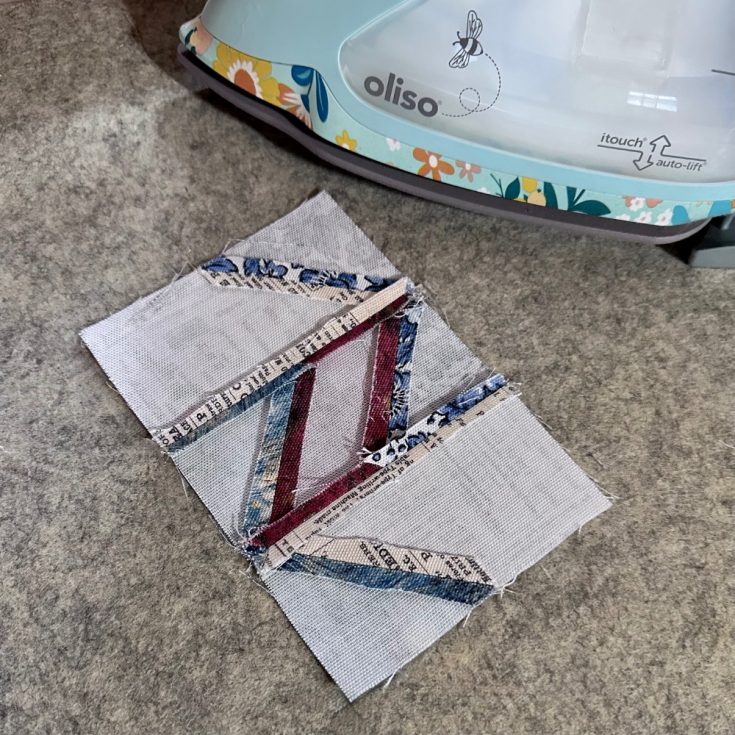
- Sew the flying geese units and the half square triangles together which make up the star points.
- Its very helpful to lay out the pieces as you go.
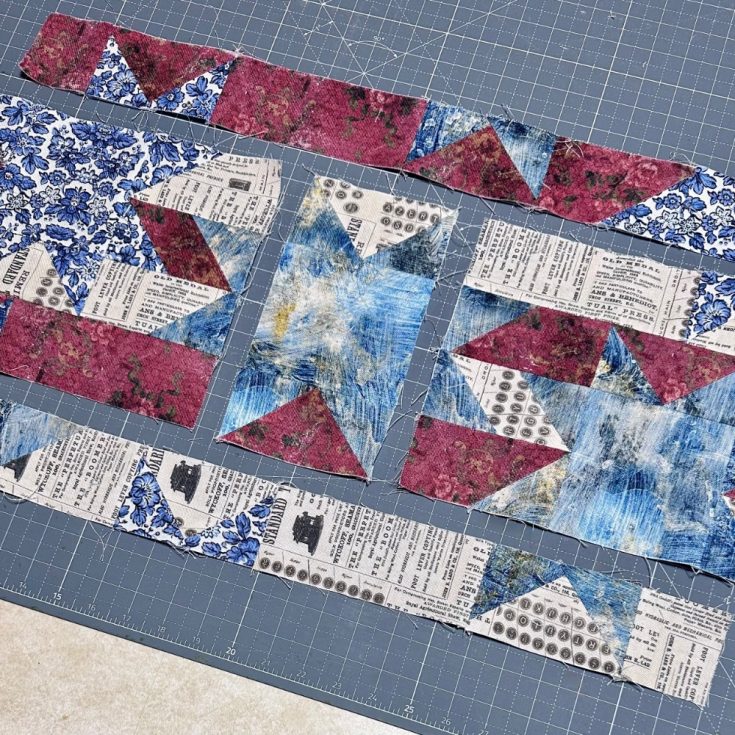
- Once you have all your star points sewn together you will start sewing the sections together as directed in pattern.
- Press your seams open to help with bulk and don’t forget to pin and match up your seams.
- Continue sewing the sections together.
- Once you have all the pieces sewn together give it a good press from both sides. If you want to quilt the pillow top now is the time.
- Create your pillow. I made an overlap backing so I can take the pillow out and wash the cover.
Creating with Palette Canvas Cloth adds beauty and texture to your projects. The fabric has a very soft feel and is easy to work with. Because it has a larger weave it can fray a little so I iron the Canvas Cloth with a spray starch to help.
Thanks so much for stopping by and happy sewing. –Richele
SUPPLIES:
|


NEW for Summer 2026 Lawn Fawn Collection is HERE + NEW Inspiration by Joy Baldwin!
The newest Lawn Fawn release is bursting with summer charm! Welcome back the fan-favorite Mice in the Make Lemonade! collection, meet the utterly adorable Highland Cows! that are already stealing hearts, and discover the perfect Giddy for Gingham paper packs in both 6×6 and 12×12 sizes. Plus, enjoy three gorgeous new cardstock colors, brand-new Tiny Treasures clay pieces, sparkling sequins, coordinating dies, and so much more. This cheerful collection is packed with everything you need for bright, happy crafting all season long!


Also! Join me in a big welcome to special guest Joy Baldwin with an adorable card using newly released items! Take it away, Joy!
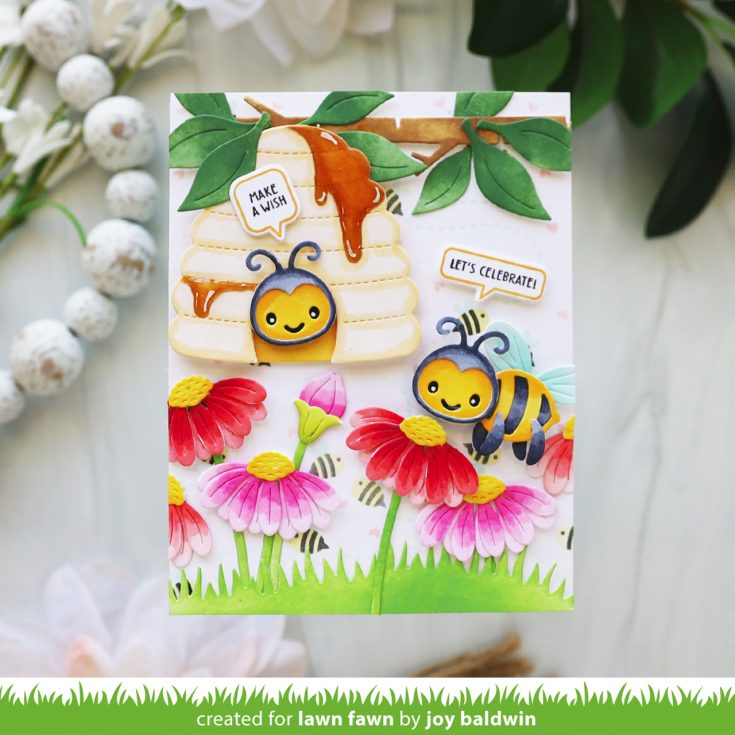
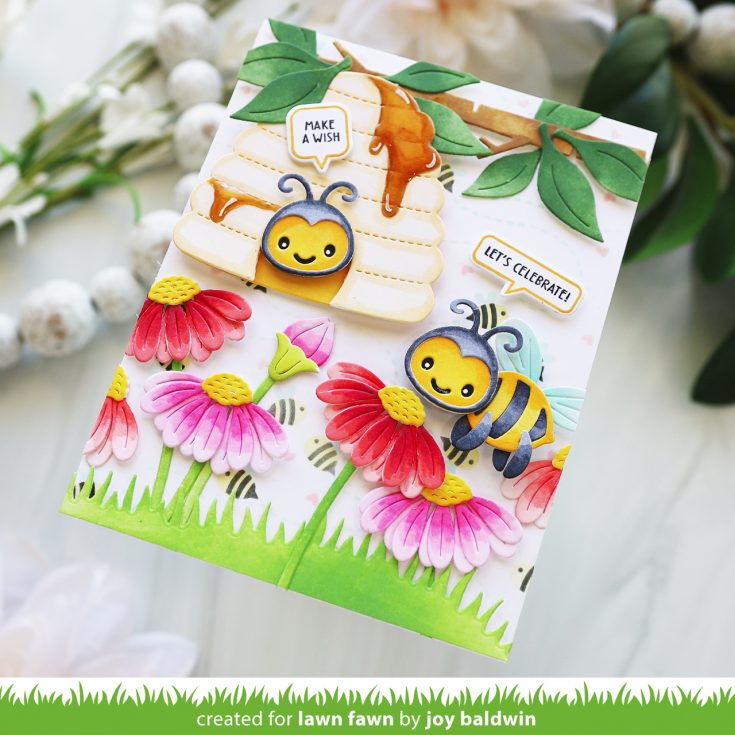
Hey crafty friends! Lawn Fawn has released some absolutely adorable new products, and I couldn’t wait to play with them! I’m sharing a fun card featuring the Build-A-Bee dies and the Bee Happy Stencils from the new release, along with a few favorites from older Lawn Fawn collections.
One of my favorite things to do is mix new and previously released products together. It’s such a great way to stretch your supplies and create unique scenes full of charm.
Using the Build-A-Bee dies to create a scene card is so much fun! The sweet beehive is the perfect home for a darling little bee, while another bee buzzes around the card, stopping to smell the flowers.
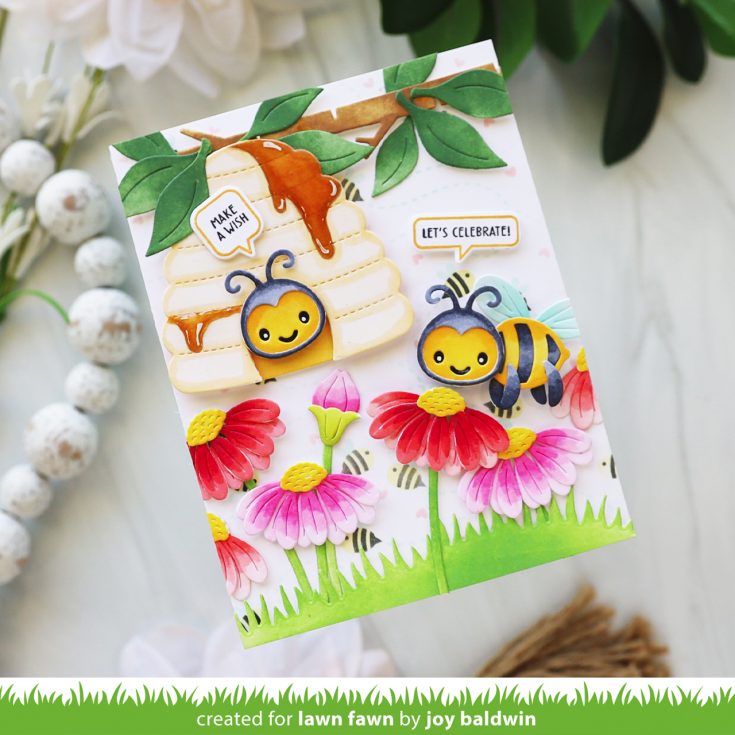
I used a combination of ink blending and alcohol markers to color the bees and hive. For a fun extra detail, I added dripping honey to the hive with my markers, which gives it a sweet, whimsical look. To finish off the design, I brought in a few other Lawn Fawn dies to build out the scene and add even more personality.
To complete the design, I used the Bee Happy Stencils to create a playful background filled with buzzing bees. It’s such a fun way to add interest to the card while keeping the focus on the adorable scene elements.
I love how this card turned out and I hope you did too!
SUPPLIES:
|


Thank you to YOU our reader for stopping by, and thanks to Joy for being our guest!


