Challenge: Don’t cut, just paste!
From texture paste to paste-like paints, molding paste to gesso so heavy it reminds me of paste – this week is all things paste. It’s a staple of great mixed media projects, can add texture or be a great medium for using with liquid colors and stencils. Check out all of our design team’s inspiration then create something yourself!
Anna-Karin went big this week with a 30 x 40 canvas.
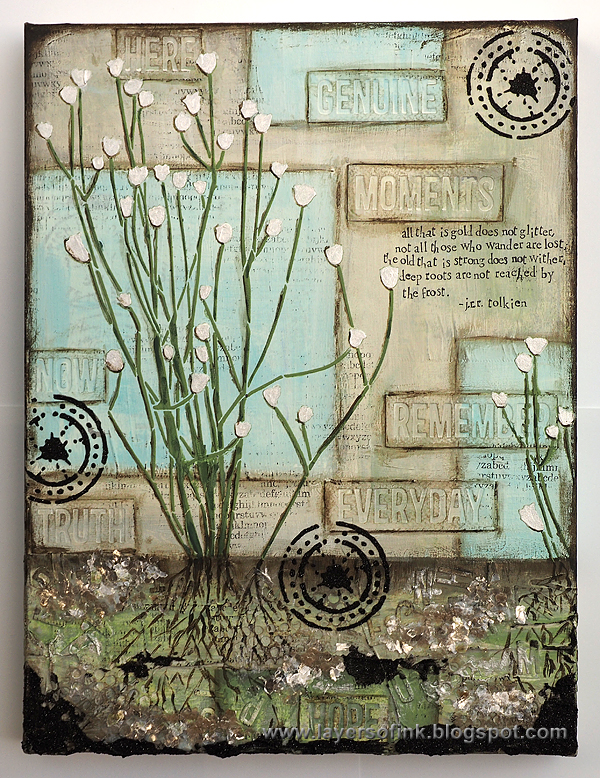
Large stencils work great for large surfaces and StencilGirl’s pretty Nosegay stencil was calling my name. It it is the focal point of this canvas. To create texture, I used three different pastes by Prima: Light Paste, Graphite Sand Texture Paste and 3D Gloss Gel. The canvas was painted with Dina Wakley’s paints and I also added some mica flakes, which worked well with the organic look of the project.
Embossing Paste is one of Suzz’s favorite mediums to play with.

I love making backgrounds using a mix of Wendy Vecchi’s Embossing Paste, Ranger Distress Sprays and this week I added a little twist with some gold leaf. I had created a few tags using these materials and set them aside. This week using paste gave me an opportunity to finish off the tag by added and stamped butterfly on embossing paper/tissue paper.
Ashli is seeing clouds in her paste this week!
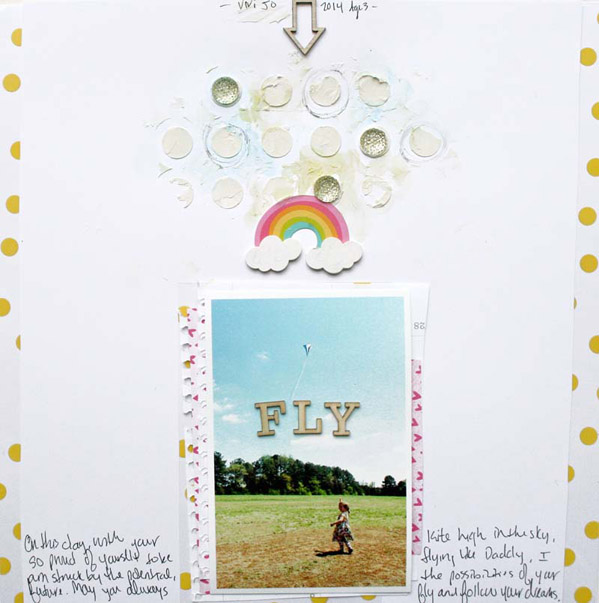
The tone on tone effect of modeling paste can be so lovely… and so very cloud-like! Using the Simon Blocked Circle Stencil, I applied my Modeling Paste. With some watercolor accent, that area is instantly transformed into “clouds!” A wood title and Doodlebug Rainbow finish things off!
Emma loves using paste to create backgrounds!
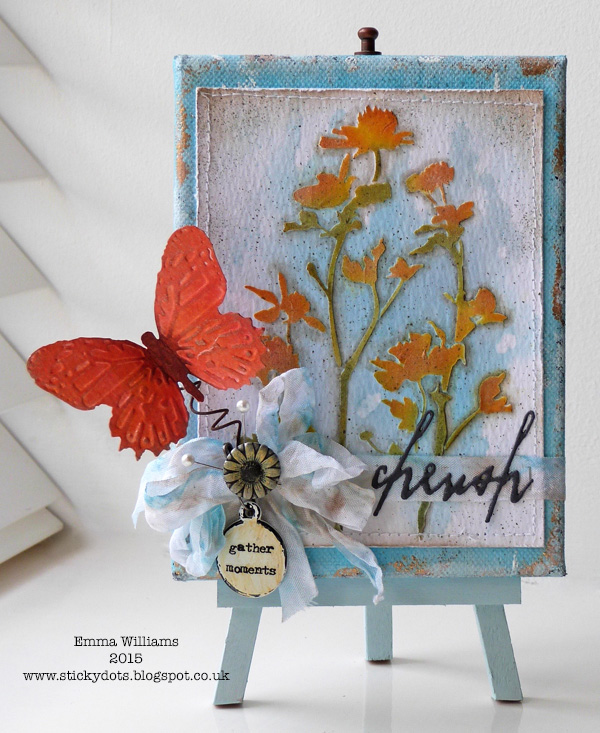
I adore using Texture Paste to make backgrounds for my projects and for this challenge I chose to use the paste together with the Wildflower Layering Stencil to make a background that would become the main focal point of my canvas. I coloured the paste using Distress Inks before adding various Idea-Ology pieces and a beautiful die cut and embossed butterfly to complete the project.
Sandra decided it was time for some collaging.
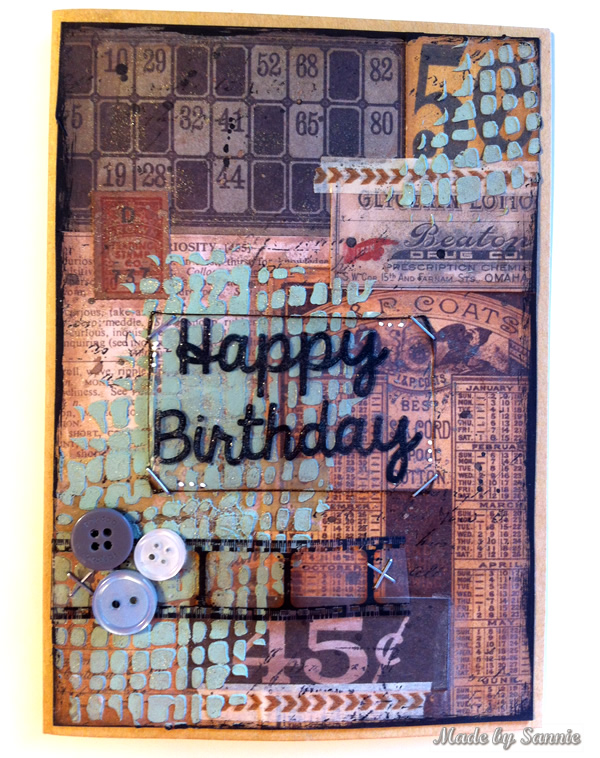
I thought it was fun to use some Thriftshop Ephemra to collage the background for this card. I adhered everything with Multi Medium Matte, but didn’t seal it. I needed the paper still to be porous. To shade the outlines of the pieces I used Loew Cornell Watercolor. Love the way the water color gives it an even more vintage look.
Meihsia created a mixed media canvas with pasted textures on the background.

Modeling Paste is used on most of my projects and I really love to create textures with it. I stenciled the background of this canvas with Tim Holtz Layering Stencil Cargo and Modeling Paste, then colored the texture with various shades of Distress Spray Stain and Distress Paint. Some Prima Flowers were layered and glued to finish off my creation.
Maybe she was just hungry, but modeling paste reminded Andrea of frosting.
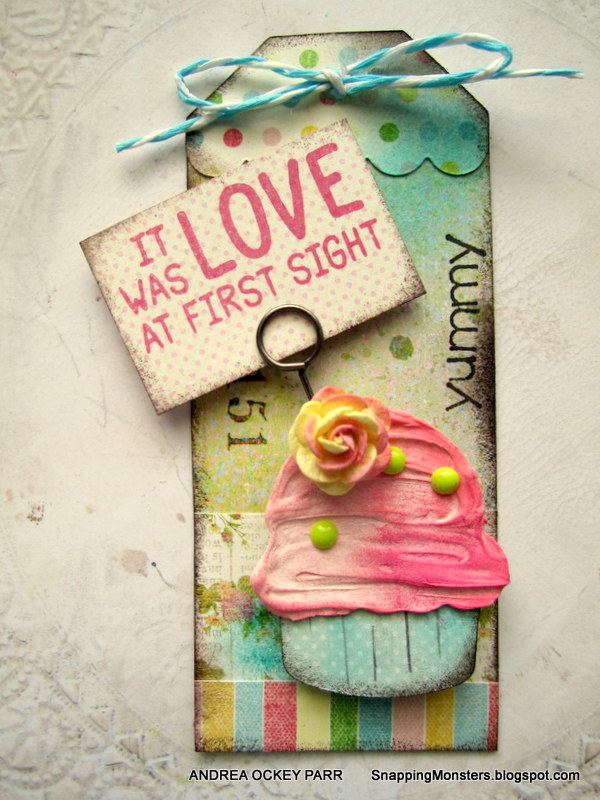
It’s no mystery why I love cupcakes! Fluffy cakey goodness topped with creamy sugar dreaminess? Yes, please! I decided to use modeling paste to replicate the look of frosting. The cupcake was made using a die set called You’re the Sweetest and the frosting was made from modeling paste mixed with Spun Sugar Distress Paint.
Paste is a whole lot prettier now than when Michelle was in school.
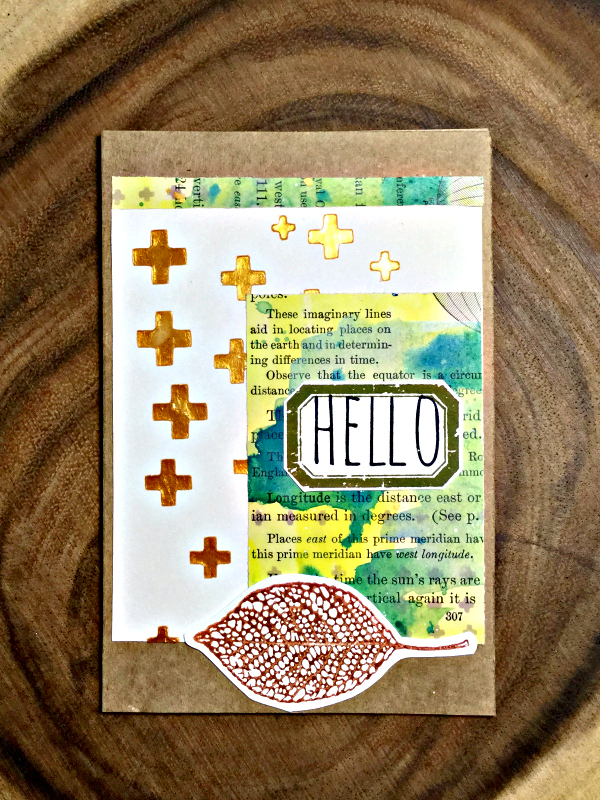
Remember when paste was ugly? Not any more! Wendy Vecchi Embossing Paste is pure Gold! A simple “Hello” card gets pretty fast with this paste.
Cheiron loves using transparent texture paste to let book paper show through on her projects.
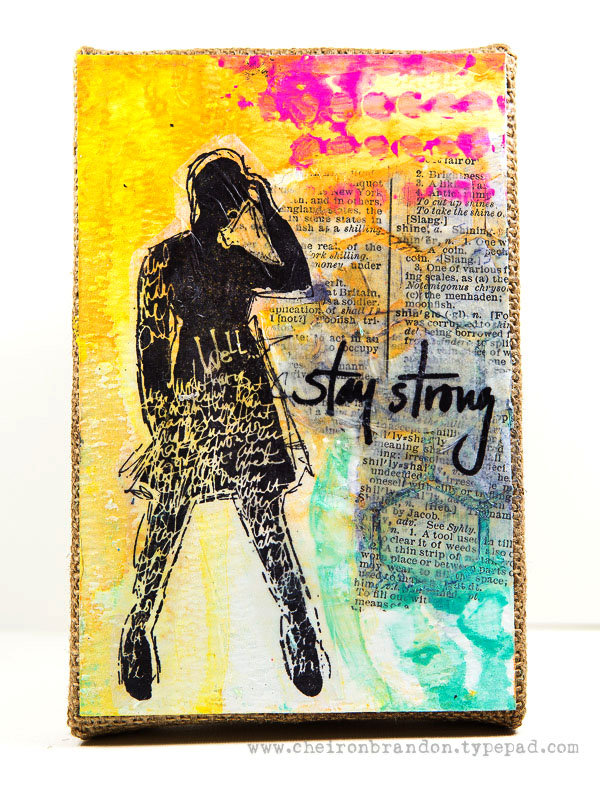
This canvas was made to inspire a friend. I love that one of the words on the book paper I used was shine and I wanted that word to show through the painty layers on my piece. I used Ranger Transparent Texture Paste in matte along with a Dina Wakley Essentials Media Stencil. To create the painty layers, I used Dina Wakley Heavy Body paints mixed with water.
For more inspiration click on our design team’s blog links so you can see more photos (and full supply lists) for their projects. Leave them a little comment love while you’re there so they know how they’ve inspired you too, if you’re so inclined.

As always, Simon Says Stamp is giving away a $50 gift voucher that will go to a random entry chosen by random generator. To qualify all you need to do is create a new project that ties in (in any way!) with our theme and post it, along with a link back to this challenge, and add a link here. This challenge will end at 11:59pm on Sunday June 21st Eastern time. We will also be choosing some of our entries to put in the spotlight – a special honor where we talk about why we loved that entry in particular and award a special badge too! For the full rules, read the “challenge rules” posted in the side-bar here on our blog.
[raw]
[/raw]
Challenge Badge

Spotlight Badge


What glorious pasted creations from the DT. Fabulous inspiration. I have just got home from Sicily and will enjoy making something. ..I have inky withdrawl! X
great challenge, embossing paste is already drying ;-) dt creations are fab as always!
Great challenge and fabulous inspiration from the DT, I love using paste especially glitter paste :)
WOW! Such stunning creations. Love all the layers and embellishments. So beautiful!
Hugs,
Snoopy :D
Thanks for another fabulous challenge ladies! I have been experimenting with white acrylic paint to add texture and depth to my stamped images and that is what I’ve done on the birds on my card. If this is not allowed please let me know and I will delete my entry. As always awesome DT inspirations and thank you for that too xx
Gorgeous work by the DT! Thanks for another wonderful challenge, see you again soon. :)
As always, great inspiration by your design team!
Amazing and inspiring pieces from the team!
Wow….such amazing pieces by the team and the other entrants. I used UTEE on my project as a goopy texture medium. I hope that counts as a paste-like product.
<3 J
jwoolbright at gmail dot com
HerPeacefulGarden.blogspot.com
I love all the DT embers’ inspirational pieces this week. I got carried away pasting all kinds of ephemera and scraps unto my art journal page this week. Blessings!