About a Face (Double Vision) with Tracy Evans
This is our long time design team member Tracy Evan’s final project as part of our design team – please help us wish her well in her creative adventures! She has an absolutely amazing tutorial to share!
Hello everyone, Tracy Evans here with a tutorial for my quirky gatefold card. When I first thought about the face challenge the wording ‘DOUBLE VISION’ kept playing around in my mind and that as they say is how my creative process began.
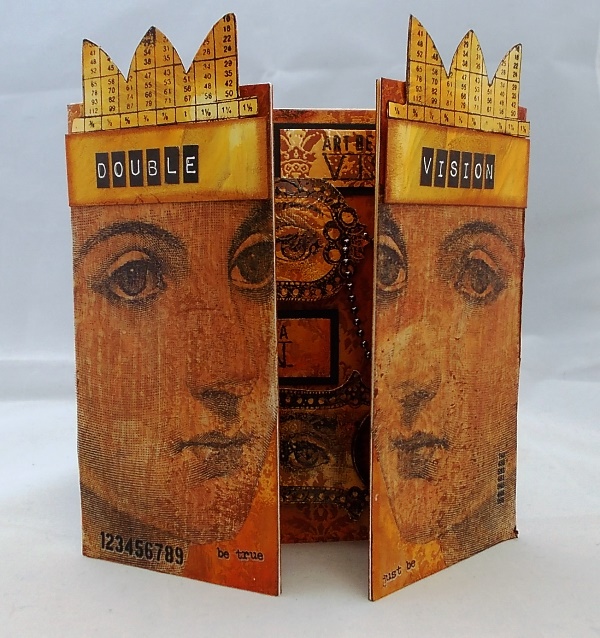
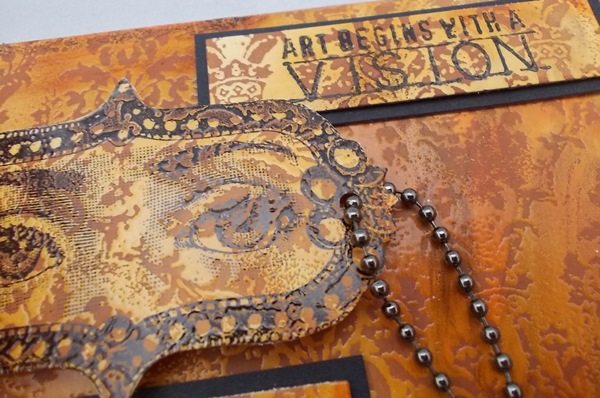
I knew I wanted to incorporate two faces in some shape or form and a gatefold card gave me the perfect platform to add the face from Tim Holtz Stampers Anonymous Classics 5 Stamp Set. This is the front of my design.
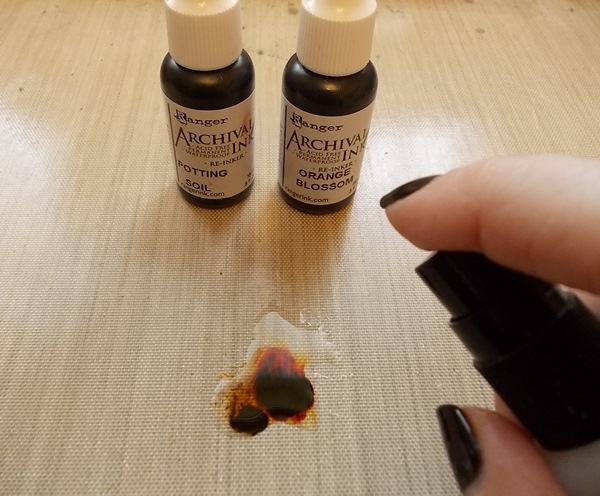
We are going to begin with Wendy Vecchi’s Archival Re-inker technique but take it a little further with a little more detail added into the mix. Begin by simply applying a drop of Orange Blossom and Potting Soil Re-inkers to a Non-Stick Craft Sheet and then spritz with Rubbing Alcohol.
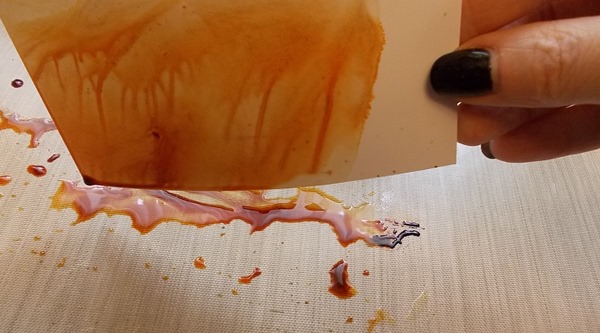
Cut two pieces of Ranger Speciality Stamping Card to fit the front of your gatefold card, two for the inside along with a square piece for the central inside panel (I cut my card 10″ x 5″, and scored in from both edges 2.5″ to create the gatefold) and then mop up the Re-inker mix with these pieces. Repeat this process with a further piece of card which will be used for stamping purposes at a later stage in the step by steps. Remember the second application of ink will be paler in colour than the first.
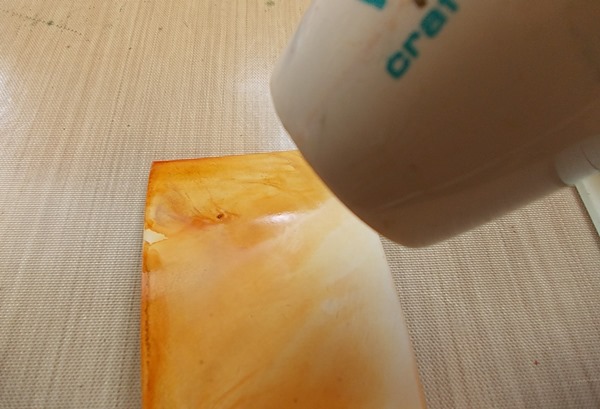
Once you are happy with the coverage of ink heat set with a heat tool. Once completely dry rub over the inked pieces with an anti static bag.
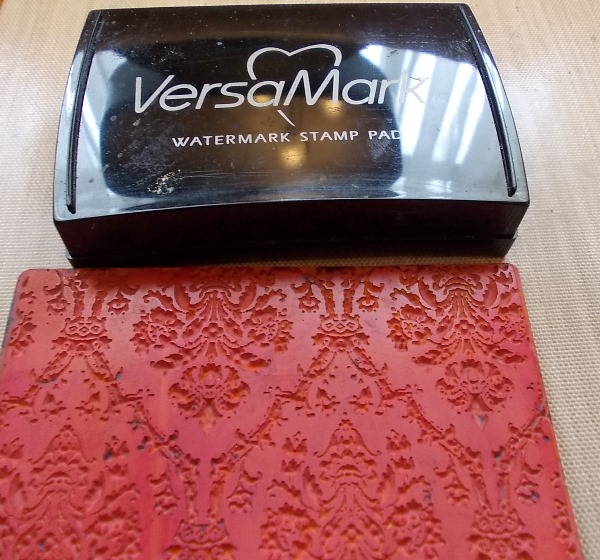
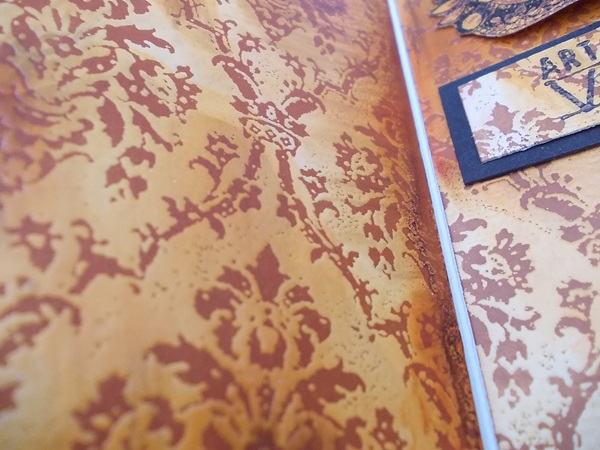
Place the Wallpaper background stamp uppermost onto a flat surface and apply VersaMark ink to the stamp.
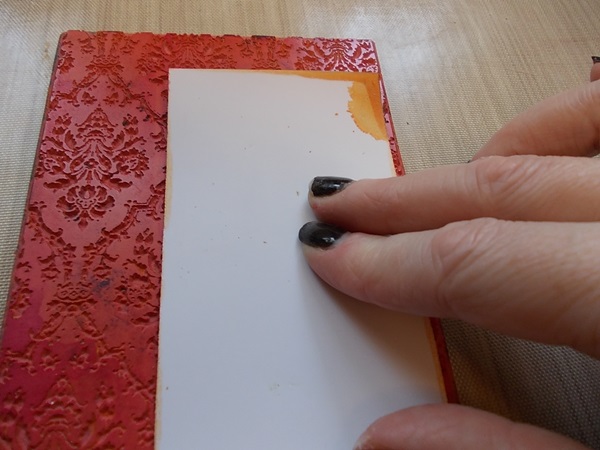
Press the card that we coloured with Archival Re-inkers onto the inked background stamp.
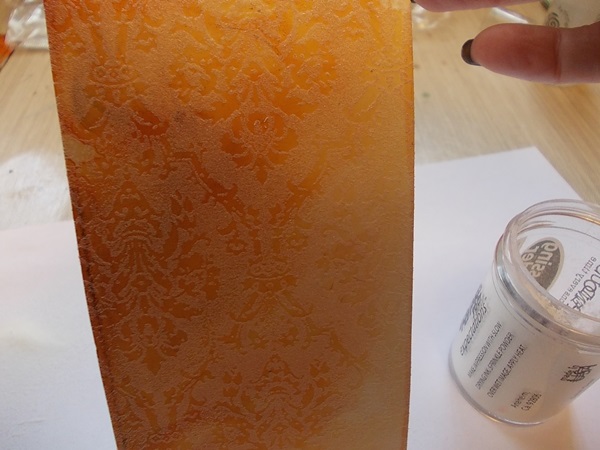
Sprinkle with Clear Embossing Powder, tipping off the excess onto a scrap piece of paper.
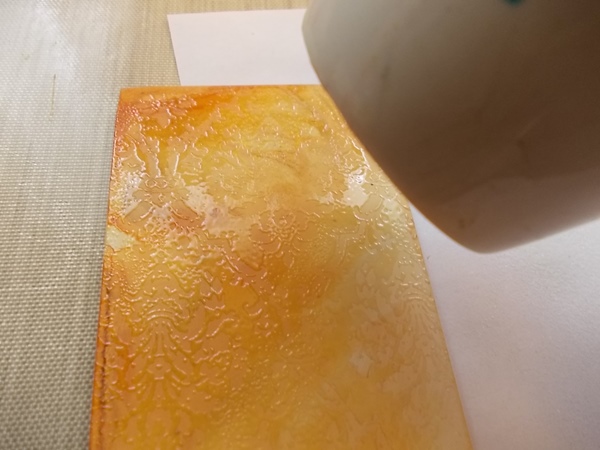
Heat the embossing powder with a heat tool to melt, remembering not to overheat the powder, simply melt until the image appears glossy.
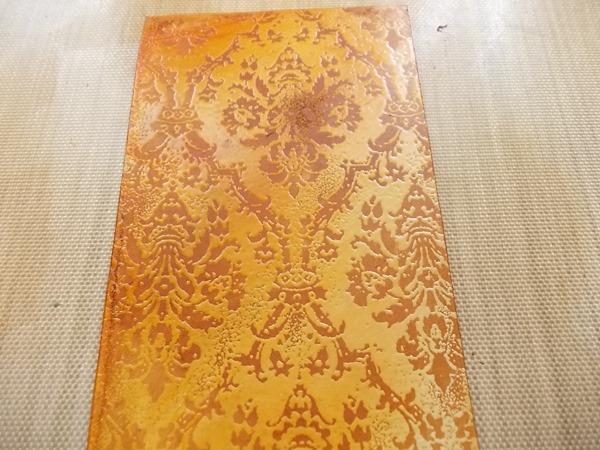
This picture shows the glossy detail once heated.
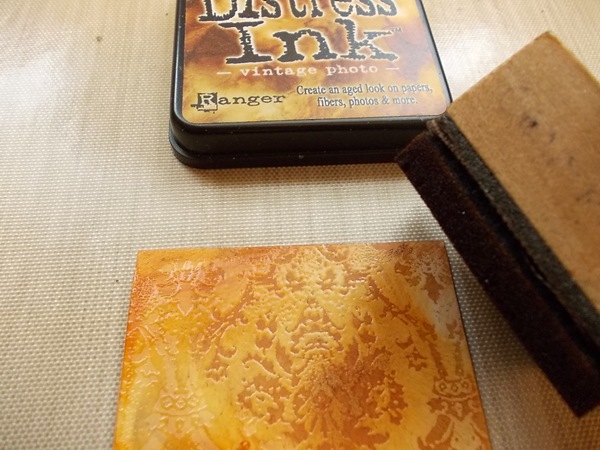
Apply Vintage Photo Distress Ink over the image, adding more ink as you blend to give a good depth of colour to the design.
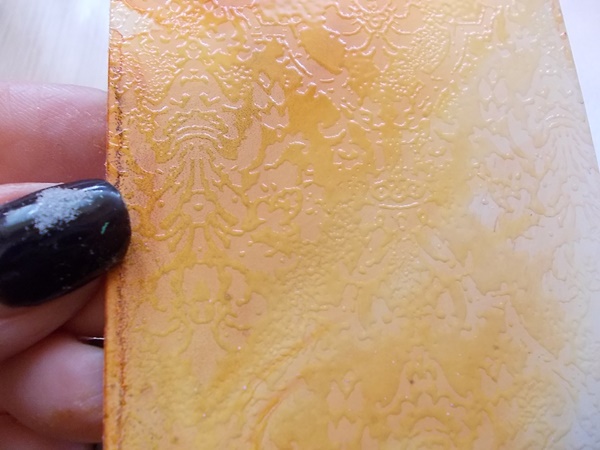
As you can see from this picture the ink settles in the areas where there is no embossing and really lifts the design from the background.
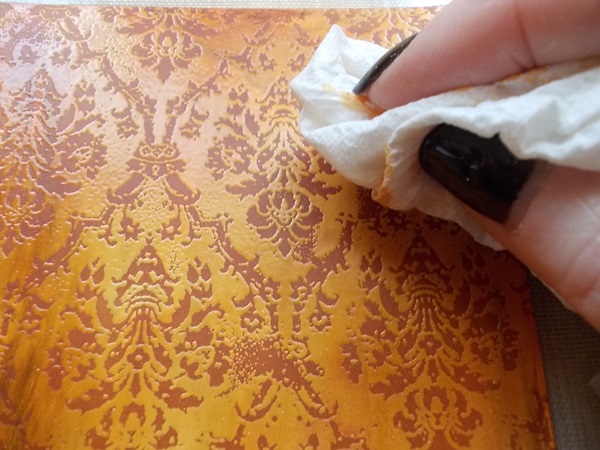
Rub over the design with a piece of dry kitchen towel to remove any excess ink from the embossed areas.
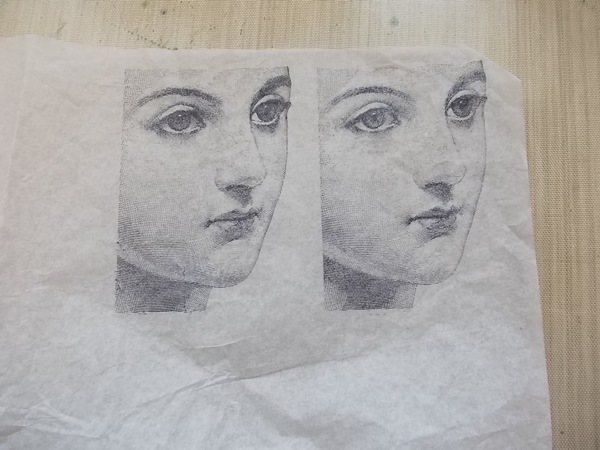
Stamp the face image twice onto a piece of white tissue paper. Cut out each of the images.

Affix the face images onto the Re-inker coloured pieces using Multi Medium Matte, taking care to smooth out the images as much as possible. At this stage I also turned one of the faces over so that it was facing in the opposite direction, hence my title DOUBLE VISION! Set the pieces aside to dry.
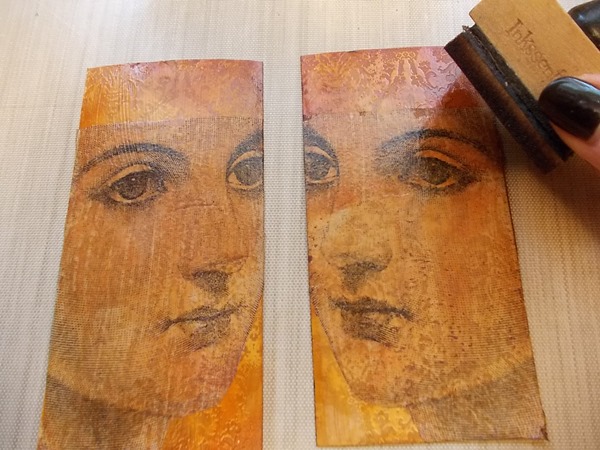
Once completely dry apply Vintage Photo Distress Ink over the face images and around the edges of the card.
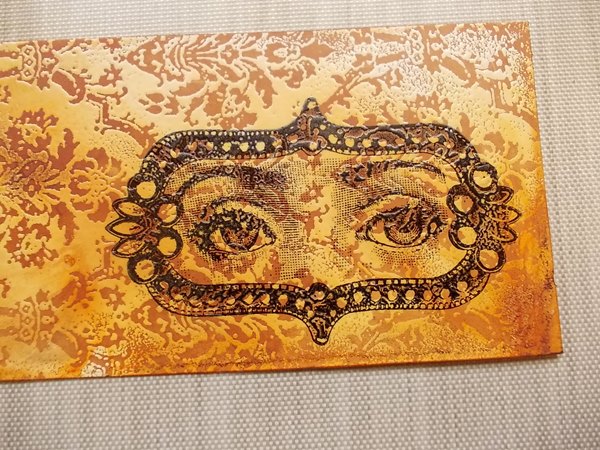
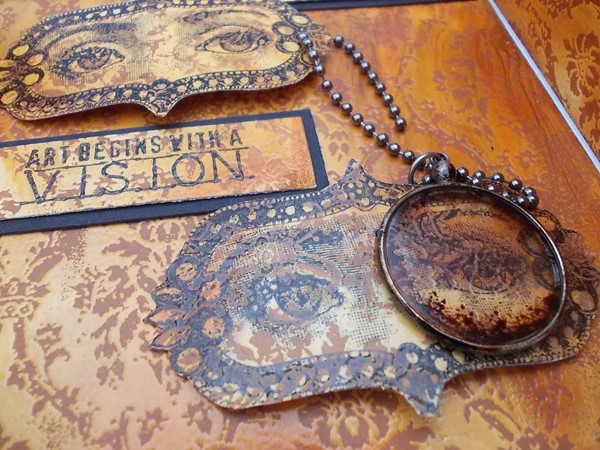
Stamp the face stamp twice from Wendy Vecchi’s An Eye For Art stamp set onto a piece of Re-inker coloured card, cut out and add to the centre of the gatefold.
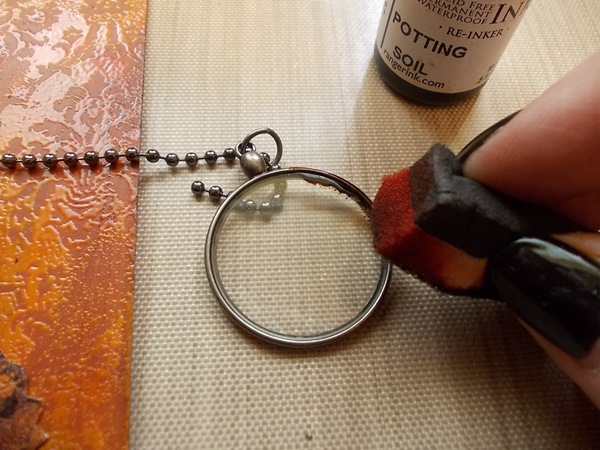
Take a Monocle, apply Potting Soil Archival Re-inker around the edges using a piece of Cut ‘n’ Dry Foam .
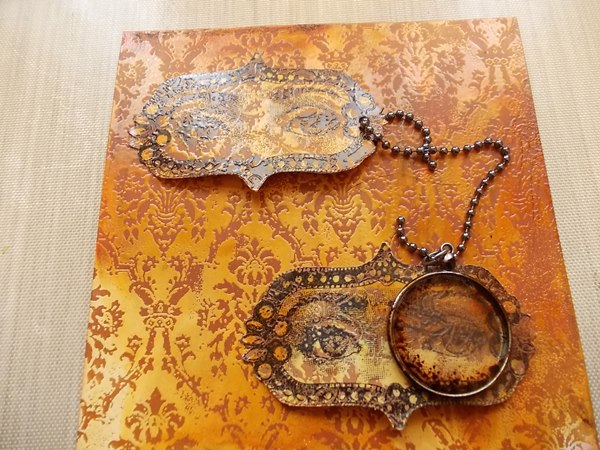
Adhere the Monocle to the face image as shown adding a length of Ball Chain for added interest and texture.
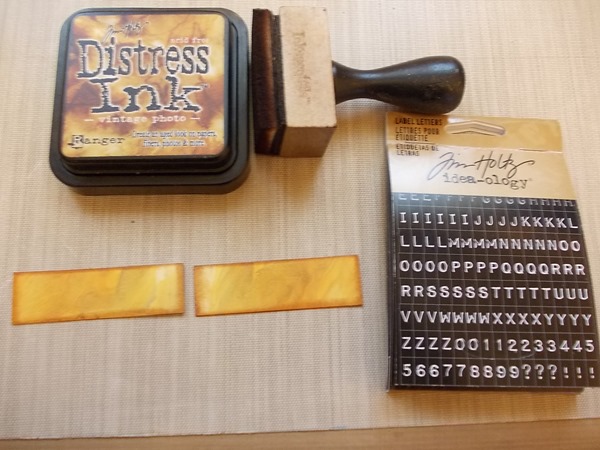
Cut two strips of coloured card to fit the width of the face images on the front panels, apply Vintage Photo Distress Ink to the edges of the strips and add DOUBLE VISION using Label Letters and then affix to the card front.
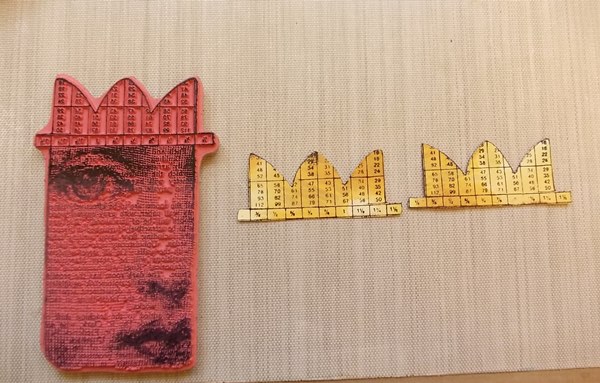
Stamp the crown from the Wendy Vecchi It’s Face Art stamp set onto Re-inker coloured card, cut out each crown and add to the two faces on the front of the gatefold.
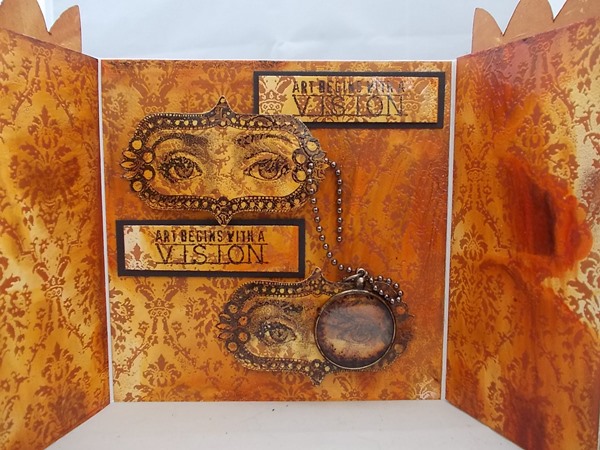
Here is the inside of the gatefold completed.
To complete my design I have also added subtle touches of Numbers and Words Remnant Rubs to the front of the card.
I hope you enjoyed this tutorial and I have inspired you to get inky and create something with those face stamps!

Thank you again to Tracy for all of the beautiful inspiration that she shares! Be sure to check out her blog and stay in touch with her creative adventures. We wish her all the best! Now guess what? it’s your turn! Join us this week in the challenge and show us how you’re inspired by a face.
Products Used:
Tim Holtz Stampers Anonymous Classics 5 Stamp Set, Tim Holtz Stampers Anonymous Wallpaper and Wood Stamp Set, Tim Holtz Idea-ology Monocles, Tim Holtz Idea-ology Ball Chain, Tim Holtz Idea-ology Label Letters, Tim Holtz Idea-ology Numbers Remnant Rubs, Tim Holtz Idea-ology Words Remnant Rubs, Vintage Photo Distress Ink, Wendy Vecchi Orange Blossom Archival Ink Re-inker, Wendy Vecchi Potting Soil Archival Ink Re-inker, Wendy Vecchi It’s Face Art Stamp Set, Non-Stick Craft Sheet, VersaMark Stamp Pad, Clear Embossing Powder, Multi Medium Matte, Cut ‘n’ Dry Foam
Challenge Badge

Spotlight Badge


Great tutorial. Love the project.
Thanks Carol x
Stunning! Beautiful! I love this. Will miss your work here.
Thanks so much Marci x x x
Ohh my.. wonderful techniques and great tutorial, Tracy!!
Thanks Shilpa x x
Wow. This is gorgeous!
Thanks for sharing your creative process!
Thanks Kathi x
This is an awesome tutorial! Thank you! :)
Thanks Katy x x
This is a beautiful project, Tracy. I love the Tri-fold idea. Such a great design. Thanks for the inspiration.
Thanks Michelle x
This is one of the most gorgeous and remarkable pieces of art I have ever seen on a blog! I have all these stamps – they are my favourites of all time; but I had forgotten that I had both those Wendy Vecchi ones on wooden mounts, actually from when I started crafting about 2 years ago! I would not have thought of putting them together in this beautiful way! What a talented lady you are! I have loved this tutorial. You have inspired me to get out those beautiful stamps and create with them again! Julie Ann xxx
Thank you so much for your lovely comment Julie, I really appreciate your lovely kind words x x
This is a wonderfully insoiing oroject, Tracey! Love all that you do! What is special about the Ranger speciality Stamping paper?
Thanks Denise, I will message you regarding the paper x
Inspiring project, l meant to say! Doh!
A fantastic card and a superb tutorial Tracy, stamping the main faces on tissue is such a clever idea, love this project and the way you finished it, with the ball chain and monocle, looks brilliant too! You will be missed!
Such a beautiful card Tracy and a brilliant tutorial too (as always), I love how you mirrored the face on the outside and the inside is just amazing. Wonderful colours too. So sorry that you are leaving but hopefully you will still be showing fabulous creations on your blog. Anne xx
MAGNIFICENT piece of art work, full stop……..
Oh Tracy! What an amazing project to conclude with! Your attention to detail is always impressive and I loved everything about this piece. You have such a great eye for design (no eye pun intended) and I’ve very much enjoyed serving on this team with you. Can’t wait to continue to see where your creative vision takes you! Thanks for this brilliant tutorial with so many great ideas!
amazing work!
Tracy this is a stunning project and an absolutely wonderful tutorial!Love your works!Good luck for your creative Journey!!!
Such a fabulous card and its fantastic tutorial Tracy, thank you very much for this and all the wonderful inspiration you offer to everyone of us on blogland. You’re a so talented lady, you will certainly miss the team here!!! I wish you the very best, and will continue to follow you as I already do on your blog or elsewhere. Coco xxx
Absolutely stunning! I love how you combined the techniques and elements to make this work of art!
Wow fabulous creations! Very bright job! Thanks you shares this with us – it is great to learn anything new how to do every time :)
Hi Tracy, this is gorgeous……Sorry to hear you are leaving the team Tracy, I’m sure they will miss you…..Good luck in all your new crafting adventures…I will be following you :) :) :) Xxxx
I really enjoyed this tutorial I WILL be doing this, so creative. Thank you.
Fantastic project as always Tracy! You never disappoint! I love your attention to detail! Thanks for sharing your creative process!
Hi Tracy, long time since I have seen your work… I am finally on high speed now and can really play… I LOVE this piece you have created…it is wonderful. I love every single part of it… you are so very creative. Love it much… Love, Light and Peace…Bonnie
This is gorgeous, Tracy!! Thanks so much for the step by step pictures so I can give it a go for myself!
*mwah*
Steph
Simon Says Stamp!
Wonderful tutorial! I’m really sad I have to go out now, when I want to get to my craftroom lol.
I love it!! Great tutorial – I am going to have to make one alot like yours- consider that a gigantic compliment!
As always, a wonderful, wonderful piece of artwork ~ it’s just a stunning project and a fabulous tutorial. You’ll definitely be missed here on the team and I’ve enjoyed my short time working alongside you but I know we’ll stay in touch!! :) Good luck with your creative journey, Tracy…. xx
Wow, wow and wow again… absolutely fabulous mirror image of my favourite face, and that embossed damask background is glorious! Love the monocled eyes on the inside – an altogether fantastic card, Tracy.
Alison xx
This is FANTASTIC! Thanks so much for all the details of how you made it!
This is fantastic Tracy and your tutorial is so great! Love all the cool effects you got with those stamps here and gorgeous textures and details.
This just is wow! i love how this opens up and the beautful patina on the embossed surfaces. Gorgeous! You will be sorely missed. I am so happy to have been on the design team with your inspirational art!
such an amazing tutorial!!! You will be SO VERY missed!!!
Love the richness you have created in the backgrounds with the resist stamping. What is even better is I have realised I own all of these stamps so from your inspiration to my desk lol! Wonderful project and step outs x
This is so fabulous Yracy. I love the way you have used these stamps and the inside is wonderful.
TFS and best wishes
Hugs Annie x
Absolutely gorgeous piece Tracy! This is a real stunner. Love your work! Karen.x