Artsy Stamp Accordion with Anna-Karin
Hello everyone! It’s Anna-Karin here today with a tutorial about artsy stamps. I love artsy stamps and they are often very versatile and can be used for many different things: backgrounds, focal points, embellishments and more. We’ll be doing all three of these techniques in the tutorial.
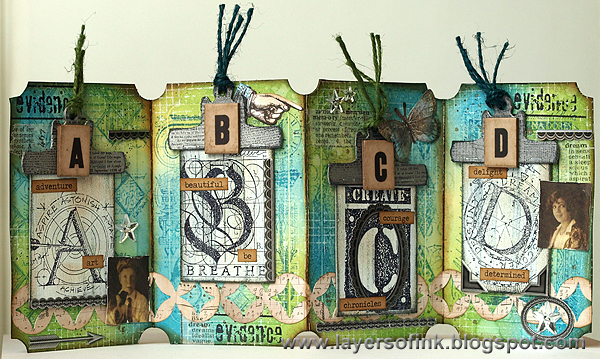
My first thought when starting with this tutorial was to use Stampers Anonymous Classics stamps, which are great examples of artsy stamps. The Classics sets are re-releases of older wood-mounted stamps and all the twenty sets available are gorgeous. I made an accordion booklet using Tim Holtz new Sizzix Big Ticket as my base.

This is the front of the booklet, tied with an Elastic Loop. Let’s start.

Cut two pieces of manila cardstock and carefully measure the die. Fold once, and then fold just a narrow flap on the other edge of the paper. Make sure that the paper is placed just inside the side cutting lines on the die. Run through your die cut machine and repeat once more so that you have four pages. You can cut off the flap on the second set, since we only need one to attach them together. If the score blade cuts through the paper, try replacing one of the cutting pads with a crease pad.

I wanted a vibrant background and inked the cardstock with Salty Ocean, Shabby Shutters and Mowed Lawn, using an ink-blending tool. Ink the panel that will be the front too.
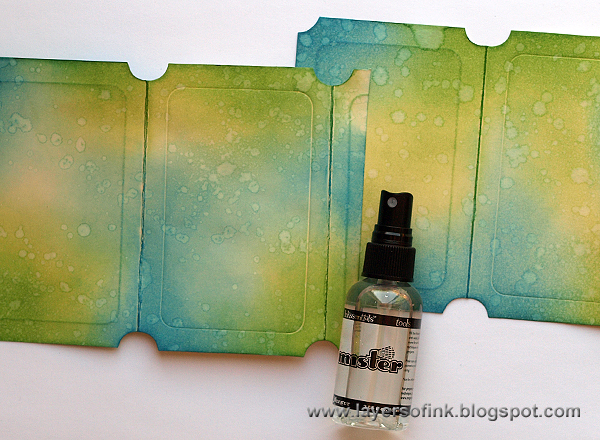
Splatter water droplets on the background by misting water in your hand and flicking it on the paper. The Distress Ink will react with the water to create a great textured effect. Dry with a heat gun.
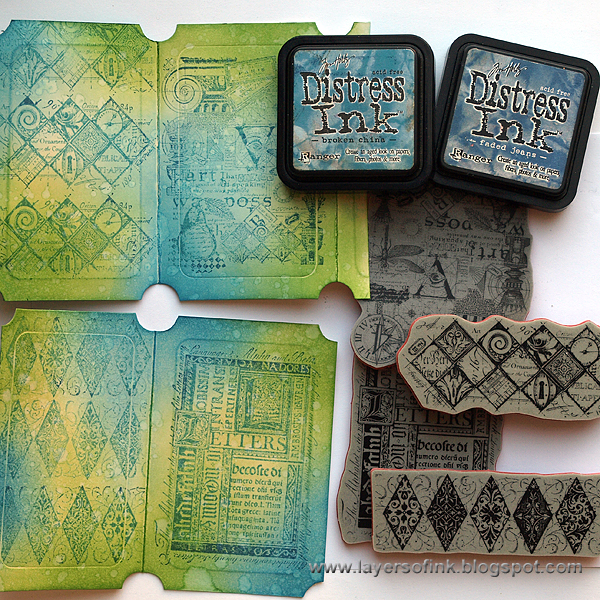
I picked out some large artsy stamps from my Stampers Anonymous sets. These come from: Classics #3 and Classics #7. Ink them with Broken China and a little bit of Faded Jeans and stamp on your backgrounds. Some of them are so large that you only need to stamp them once, some of them need to be stamped more than once. You can also use small stamps to cover a whole background. These stamps are pretty detailed, and by stamping them with similar inks as used on the background you get a great tone-on-tone effect and the details won’t overwhelm the project.

On the front, I used these two stamps. I liked the way that pretty arch formed an entrance into the project.

I wanted more texture and a little bit of white on the project and stamped a Tim Holtz graph stamp here and there using Picket Fence paint. Always clean your stamp immediately after using it with paint.

I love seeing how a background appears from just plain paper, ink and stamps. For a finishing touch, splatter a bit of Walnut Stain ink here and there. Smear it on your craft sheet, mist once with water, pick up with a paint brush and tap the brush to create splatters. I also stamped ‘evidence’ in a few places.
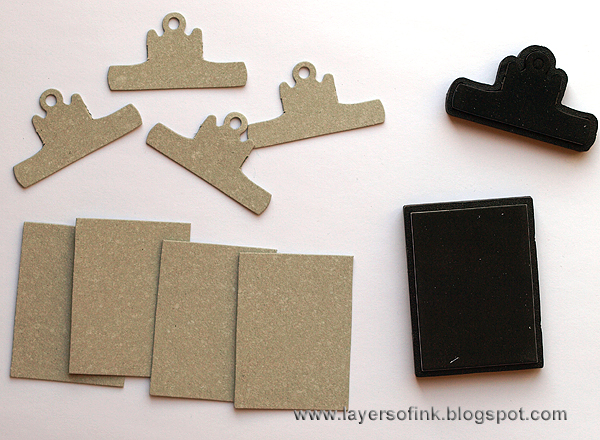
I really like the stamps on Classics set #14 and #15, consisting of ornate monogram letters and various words starting with that letter. These stamps are great both for backgrounds and as focal points, and perfect for art journaling, for example. I wanted to use A-D and decided to make small clipboards as a base for them to be stamped on. Die cut four mid-sized rectangles from grungeboard using Sized Rectangles and four tops.

Paint the tops with silver paint and the boards with two coats of Picket Fence, letting them dry in between. I also cut a narrow rectangle for a sentiment on the front.
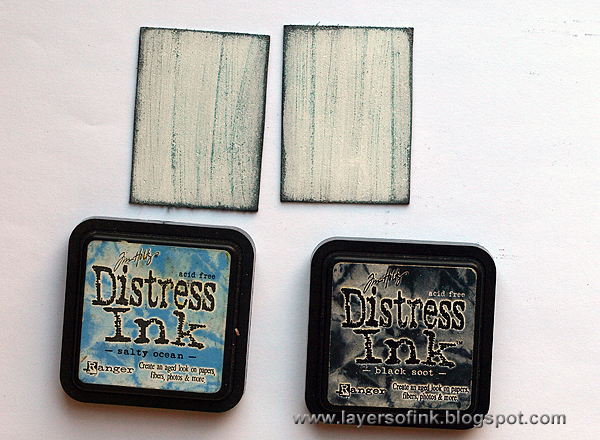
For a distressed look, sand the boards and ink first with Salty Ocean and then with Black Soot, not covering all the blue. Wipe with a moist cloth and the ink will just remain in the sanded scratches. Later, I also added a little bit of brown. Do the same with the tops, but only using Black Soot.

Stamp with the top with the text background stamp from Classics #20 (I have the wood-mounted version of this stamp, Newspaper Scraps Background). Stamp each panel with a monogram stamp.

I used a printed photo from Menagerie on the front, which I thought fit with the message of the booklet and with this great sentiment. The pages were embellished with Mirrored Stars, Chit Chat stickers, Industrious stickers and a die cut strip of Courtyard Frameworks.

The small Industrious photo corner stickers are so cute and fit perfectly on my sentiment panel.

The top of the clipboard was stapled to the board and tied with a piece of jute. I looked through the Chit Chat stickers to find words fitting my theme and starting with the same letters.
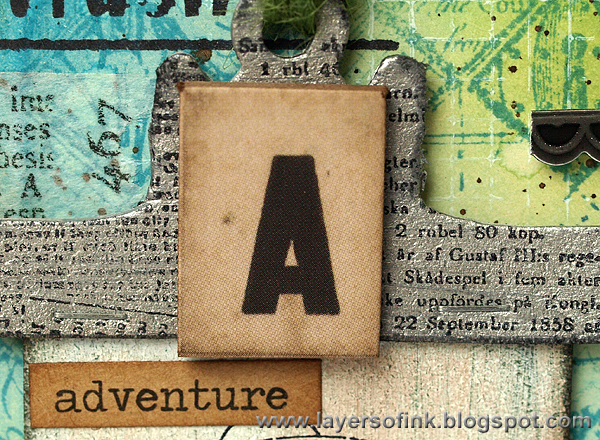
Each clipboard was also embellished with an Alpha Chip. The part to the right on the text stamped on the top of the clipboard is old Swedish text, I love such little details. There are also a few pieces of tissue tape here and there.
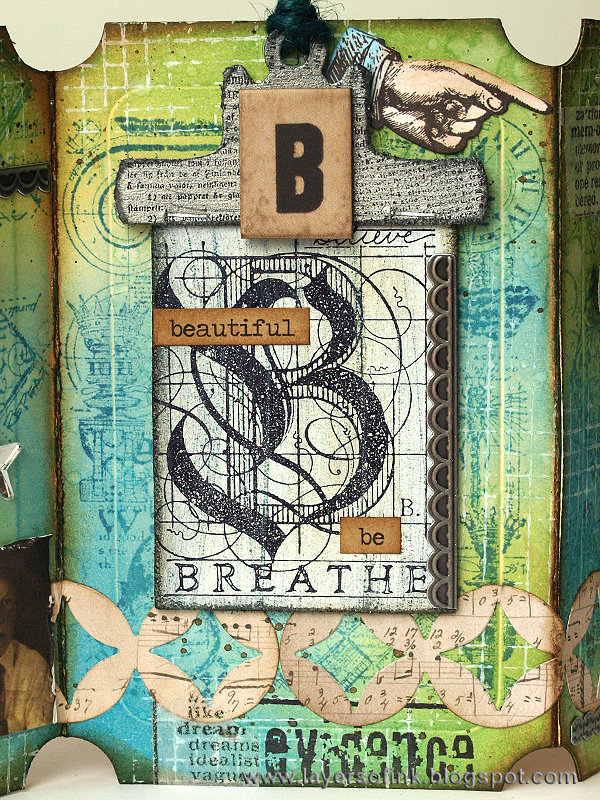
The ‘B’ on this panel is so pretty. I added a die cut strip of Courtyard Frameworks along the base of the whole booklet, as a border tying the pages together. The hand is an ephemera piece, which was inked.

I placed an Industrious oval frame around the C and another Industrious sticker as a border.
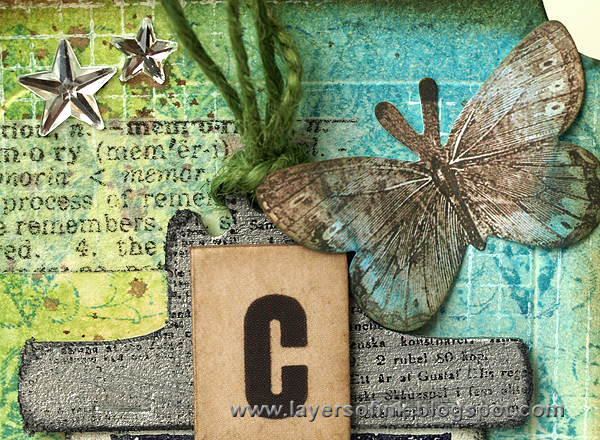
The butterfly is another ephemera piece, inked with Salty Ocean.

On the last panel, I used another ephemera photo. Note that the tissue tape repeats the ‘dream’ of the focal stamp. A star was placed within an oval sticker as a final touch.
I hope you enjoyed this tutorial and that it inspired you to ink up those wonderful artsy stamps.
Happy stamping!
– Anna-Karin

Thank you Anna-Karin for the inspiring tutorial! Now it’s your turn – join us this week in the challenge!
Supplies:
Surfaces: Ranger Manila Cardstock; Tim Holtz Idea-ology: Grungeboard, Menagerie 8 x 8 in paper stash
Dies: Sizzix: Big Ticket, Sized Rectangles, Courtyard Frameworks, Clipboard Top and Bottom
Stamps: Stampers Anonymous: Classics #3, Classics #7, Classics #11, Classics # 14, Classics #16, Classics #20; Stampers Anonymous Tim Holtz: Graph & Croc
Ink: Ranger Archival Ink: Jet Black; Distress Ink: Broken China, Salty Ocean, Faded Jeans, Black Soot, Gathered Twigs, Shabby Shutters, Mowed Lawn, Walnut Stain
Paint: Ranger Distress Paint: Picket Fence; Adirondack Silver Dabber
Embellishments: Tim Holtz Idea-ology: Chit Chat Stickers, Symphony Tissue Tape, Mirrored Stars, Thrift Shop Ephemera Pack, Borders Industrious Stickers, Frames and Trims Industrious Stickers, Jute String, Alpha Chips, Elastic Loops
Tools: Sizzix Big Shot; Tim Holtz Idea-ology Tiny Attacher
Challenge Badge

Spotlight Badge


Awesome artsy little album!
This is such a beautifully detailed project: the perfect showcase for ‘Artsy Stamps’. Julie Ann xxx
A great little booklet with wonderful stamping. Love the colors, too. Gorgeous!
Lovely artsy piece Anna-Karin, loving those colours and the background stamping, very eye catching. You have showcased the stamps beautifully . Tracy x
This is great! I enjoyed seeing how you pulled everything together.
Great project! I’m speechless! I love it , totally I love it! Wonderful tutorial! Thanks for sharing with us! BArbarayaya
Wow! Love every detail, those little clipboards really showcase the stamps. Thanks for sharing Anna-Karin!
Stunning Anna-Karin! It’s very pretty! Love this tutorial! The ticket die is so cool! Hugs, Sandra
How fabulous! Love all the details and thanks for the step-outs. Will pin to enjoy again another day.
Totally gorgeous… I really have some serious inky envy and deprivation. Love them.
Stunning Anna-Karin! The blue green color scheme makes me happy. The details and layers bring this piece alive. Thanks for the tutorial.
fabulous!!
This is AMAZING! You are always so skilled at combining various elements and you used so many inspiring techniques on this one that I can’t help but be excited to try some myself. Thanks for the beautiful project and motivation to try some new things!
So beautiful! I love the background stamps you used! Very artsy! Thank you for the tutorial!
A fabulous tutorial and an amazing project! Thanks so much for the how-to.
Wow, first you see the form and colours; great! And then all those lovely details and technics: super!
I love this! It is so beautiful and has so many wonderful details. The whole booklet is well thought out. Love the colours, the stamps, everything about it, and a great tutorial too. Thank you for the inspiration. Maddy x
WOW wow WOW
THANK YOU for sharing ALL the EXCITING techniques you used to create your AWESOME ARTSY accordion Anna-Karin!!! I have SO MUCH to learn and look forward to trying them all, using each and every step you have shared today :)
What a great tutorial Anna Karen! So many interesting details. I can’t wait to try them out.
Thank you! Thank you! Thank you! :)
Gorgeous creation, Anna-Karin. Love all the beautiful details and great tutorial. :)
Absolutely stunning, Anna-Karin! I adore all the details of this fabulous little album and thank you for sharing such a great tutorial. Just beautiful…. :)
OMG, this is stunning. I love all the little details you added, and the color combination is simply awesome. TFS
Stunning Anna-Karin – totally stunning. I adore this!
fabulous!
So completely beautiful – colours, stamping, embellishing – perfection!
Alison x
WOW, the details on these are amazing. The whole project is beautiful.
such a beautiful piece and an awesome tutorial!
Gorgeous! I love the colors design and everything! Beautiful tags and wonderful tutorial!
Stunning project! I love all the die cut goodness and inky background! So much fantastic details to take in! Thanks for the inspiration!
Thanks for the detailed instructions on making this card. It is wonderful.
Love, love this! From the rich colors to the designs you used, and the tag accordion? Brilliant!
Learned so much from this…thank you…I am so ready to break out into new techniques!