Paper Rose: You are Gorgeous Inside & Out
Hi friends! Happy Tuesday! Please join me in a very big welcome to first time guest blogger to Simon Says Stamp, Donna Lewis! Isn’t her card just lovely? Be sure to read on to learn more and enjoy!
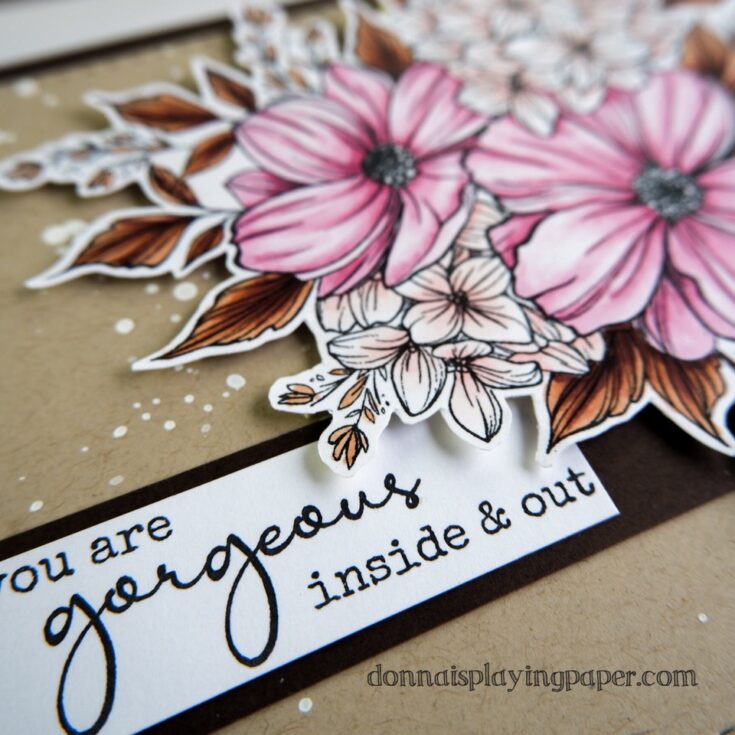
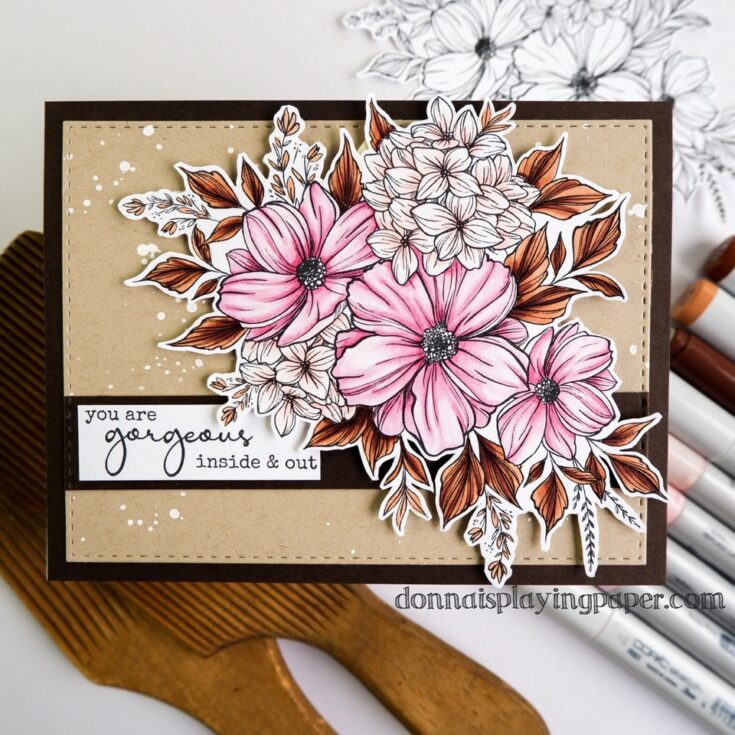
The inspiration for this card is the Milly’s Bouquet stamp itself. It is such an elegant design that I knew I wanted a ‘grown up’ color scheme. What is more grown up than brown? I paired this with pink for a pop of color, and a pretty touch that seems to be a requirement of all my cards.
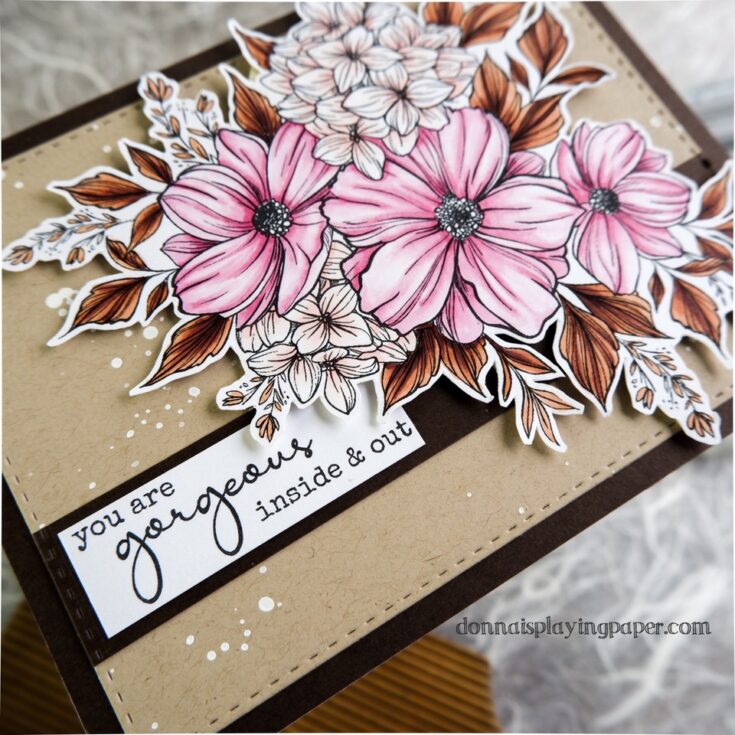
I used my colorless Copic marker a lot in the making of this card, using it tip to tip with my colored markers, so that I could fade to white. The background was spattered with watered down white gouache to soften it.
SUPPLIES:
|


Thanks so much for stopping by, and thanks to Donna for being our guest!
Studio Monday with Nina-Marie: Recipe Flip Book Featuring Doodlebug!

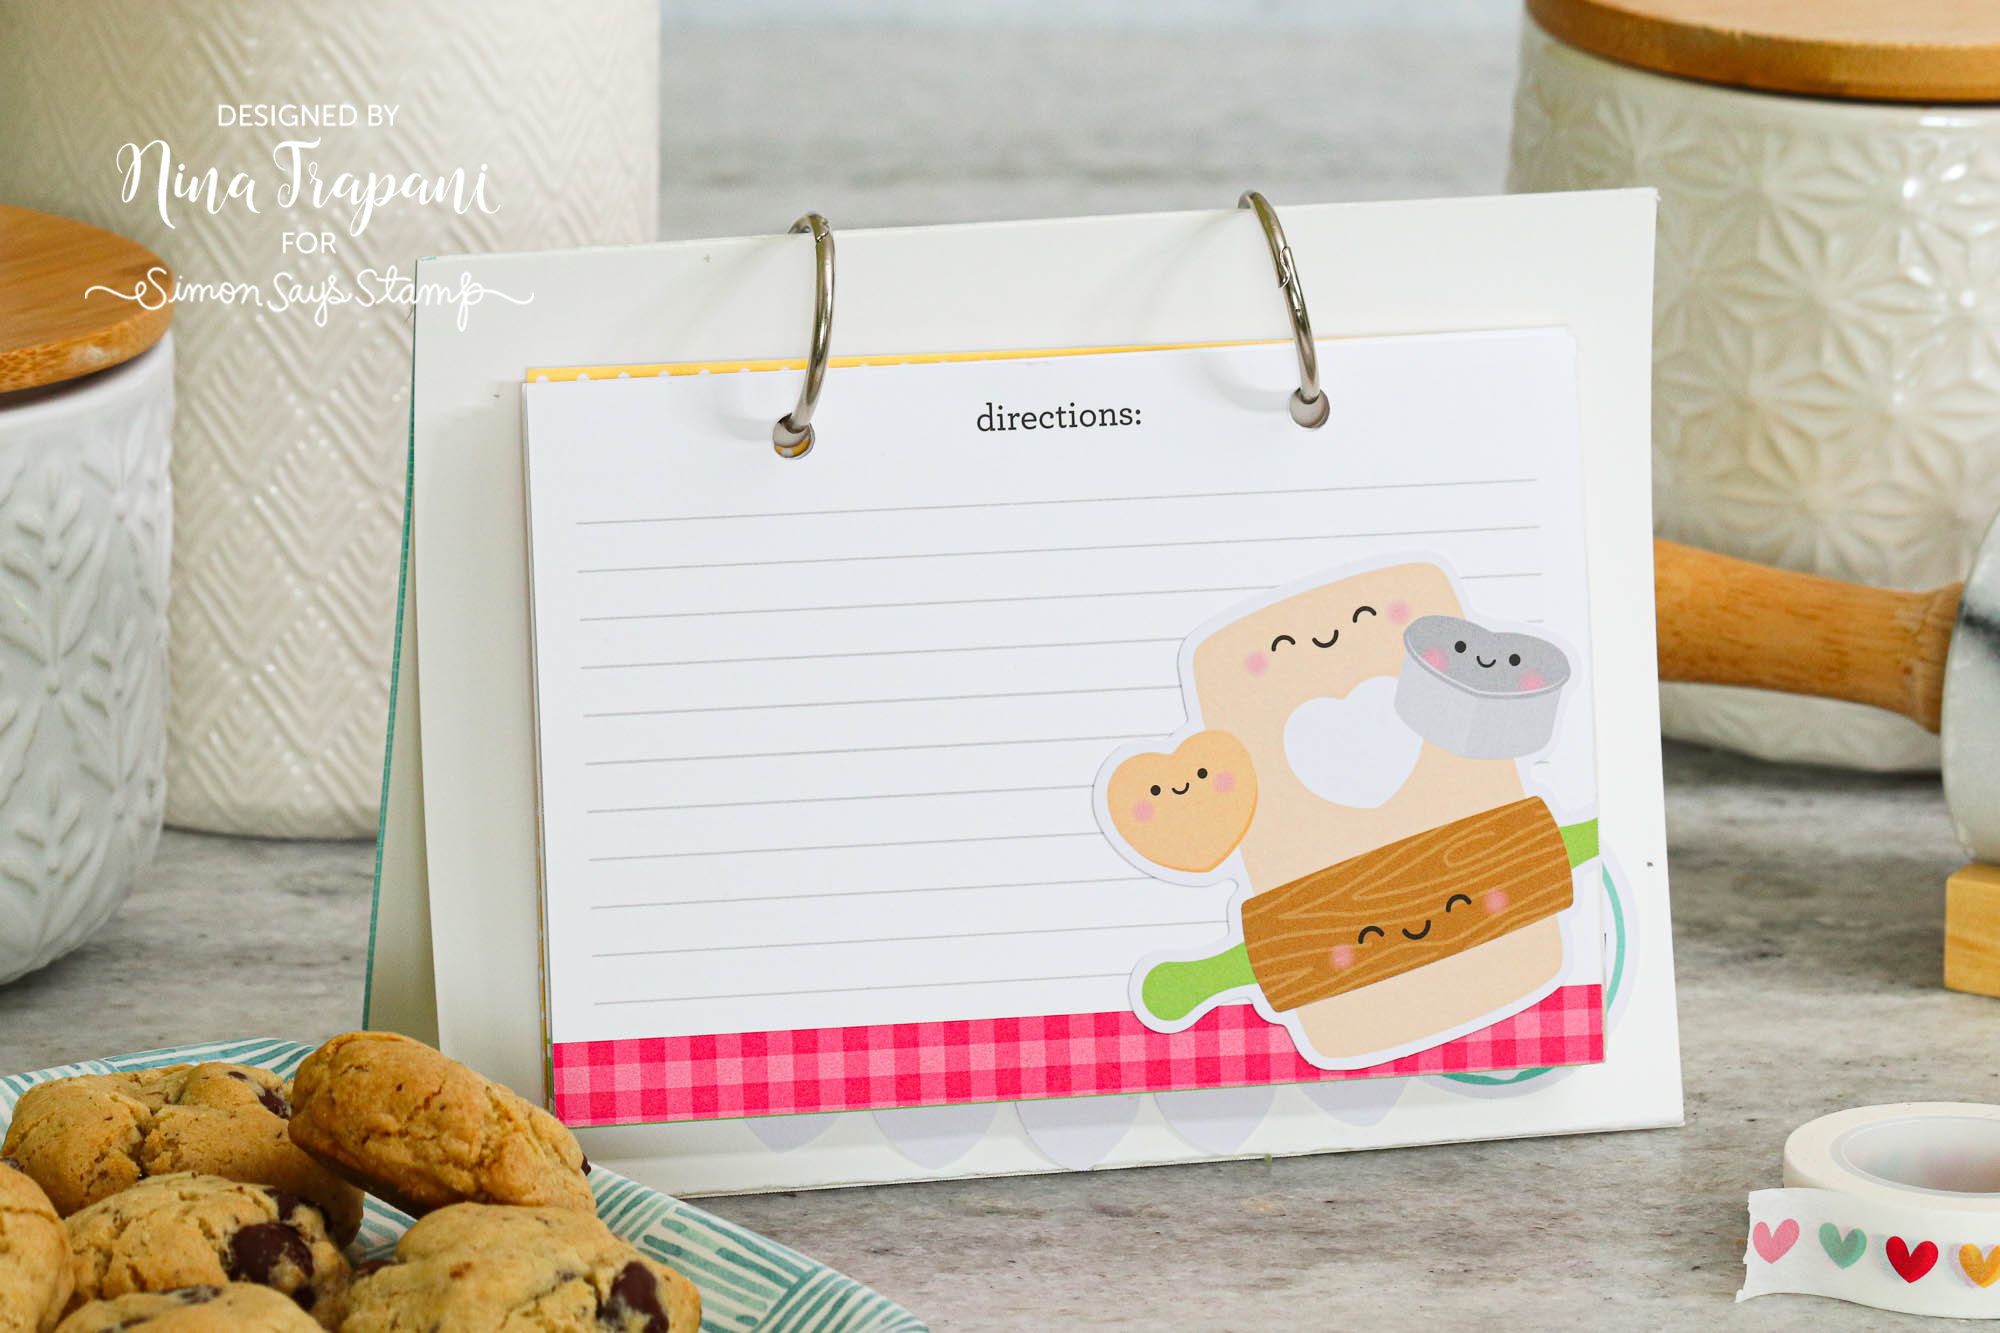
Hello crafters, it’s Nina-Marie Trapani here with you! Have you seen the darling Made with Love collection from Doodlebug? If you haven’t, you’re going to fall head over heels for it right now, because I’m using many items from the collection to make this sweet recipe flipbook!
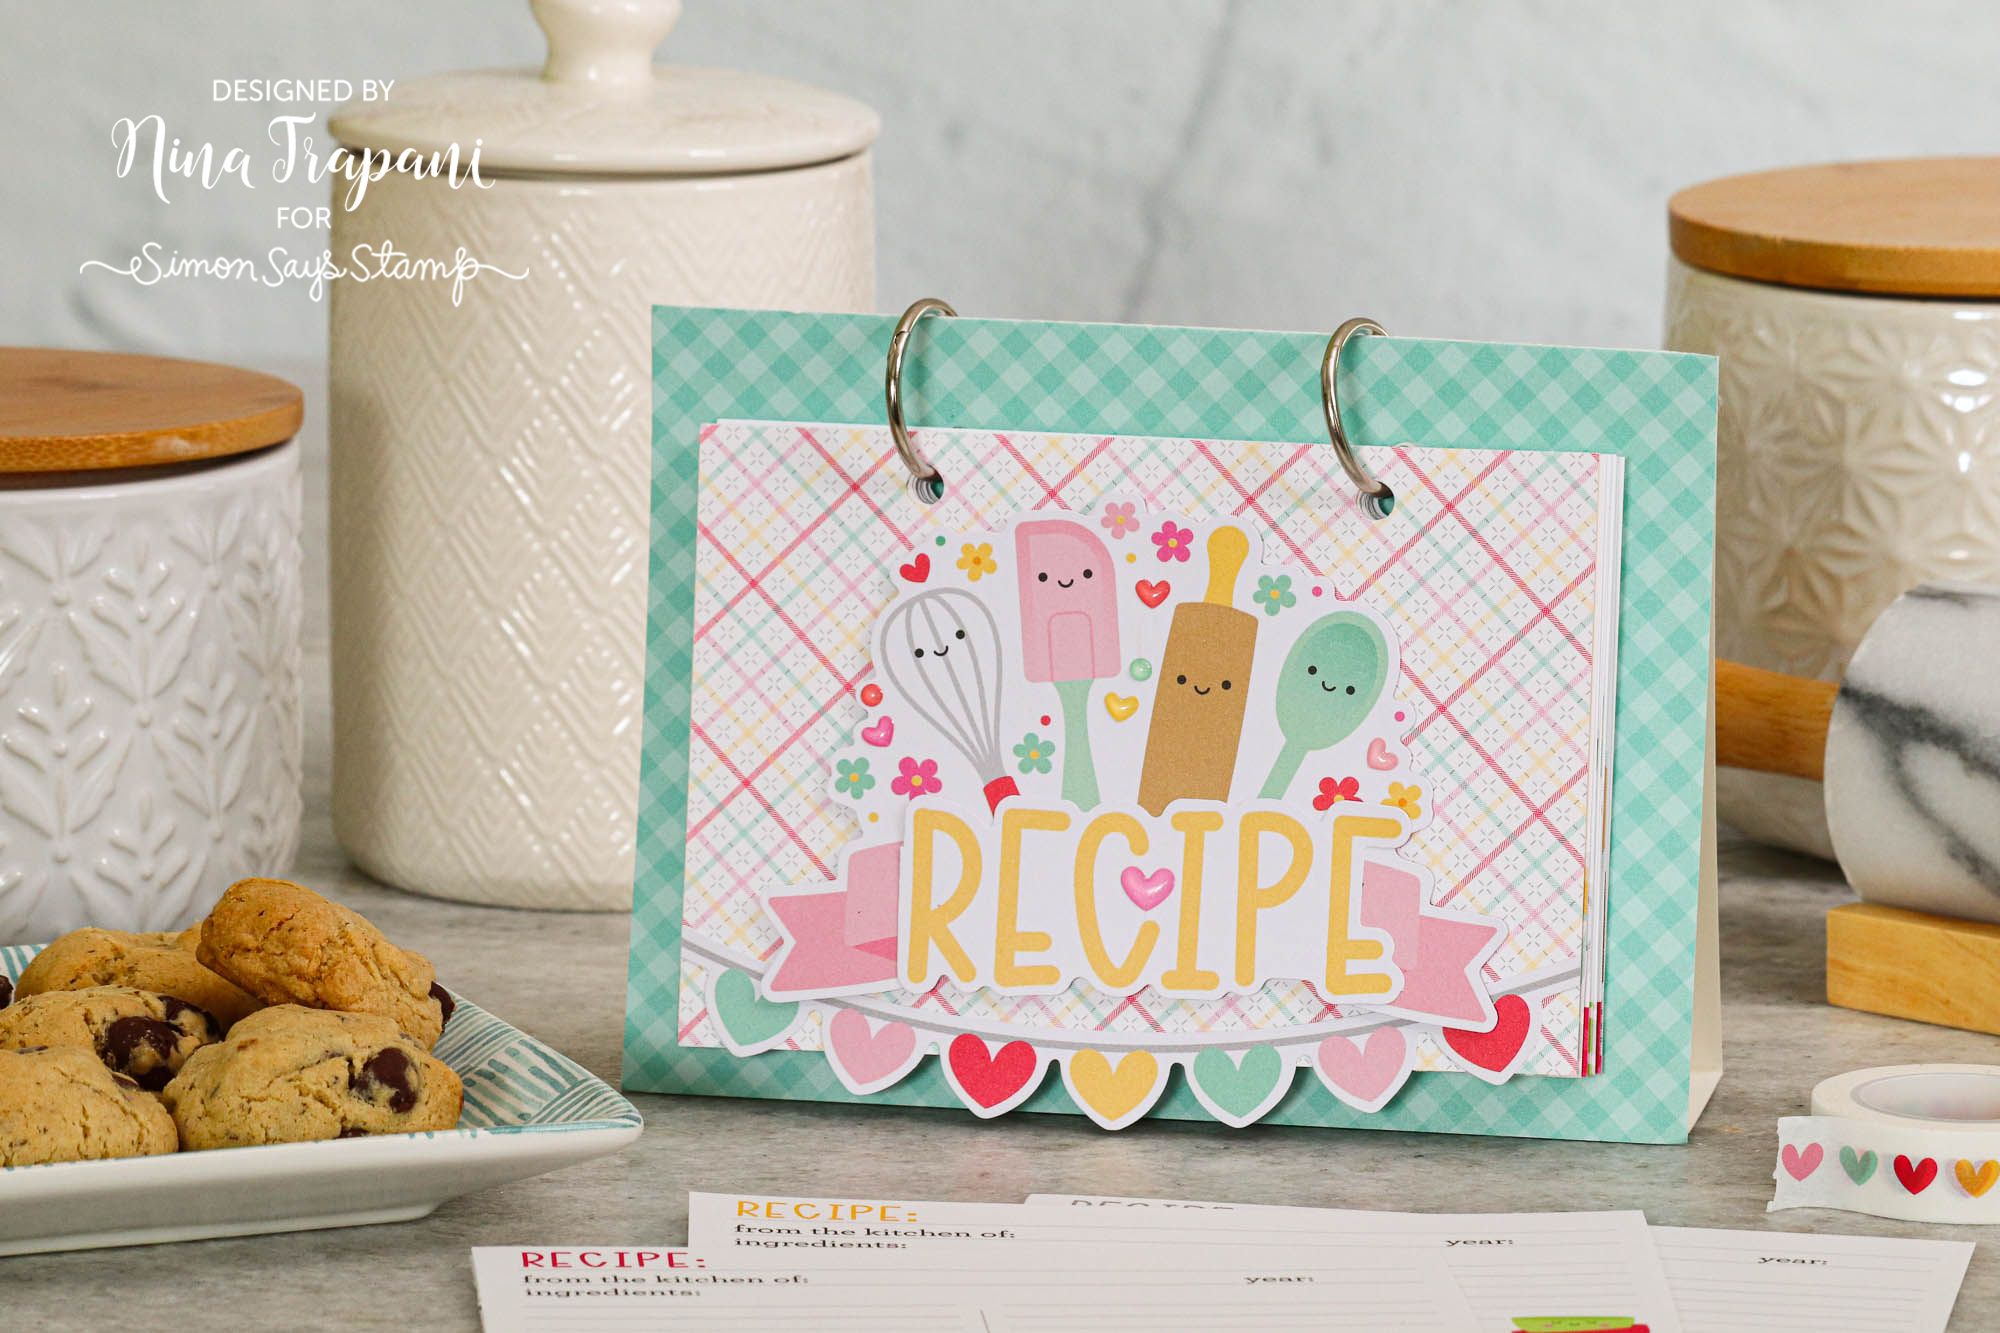
The flipbook is easy to make – in the video, I will show you how to cut, score and fold your cardstock into the little tent. I also used Tim Holtz Mini Book Rings to create the flip effect. The cover for my book was made with pattern paper from the Made with Love 6×6 pad and the Made with Love Chit Chat die cuts!
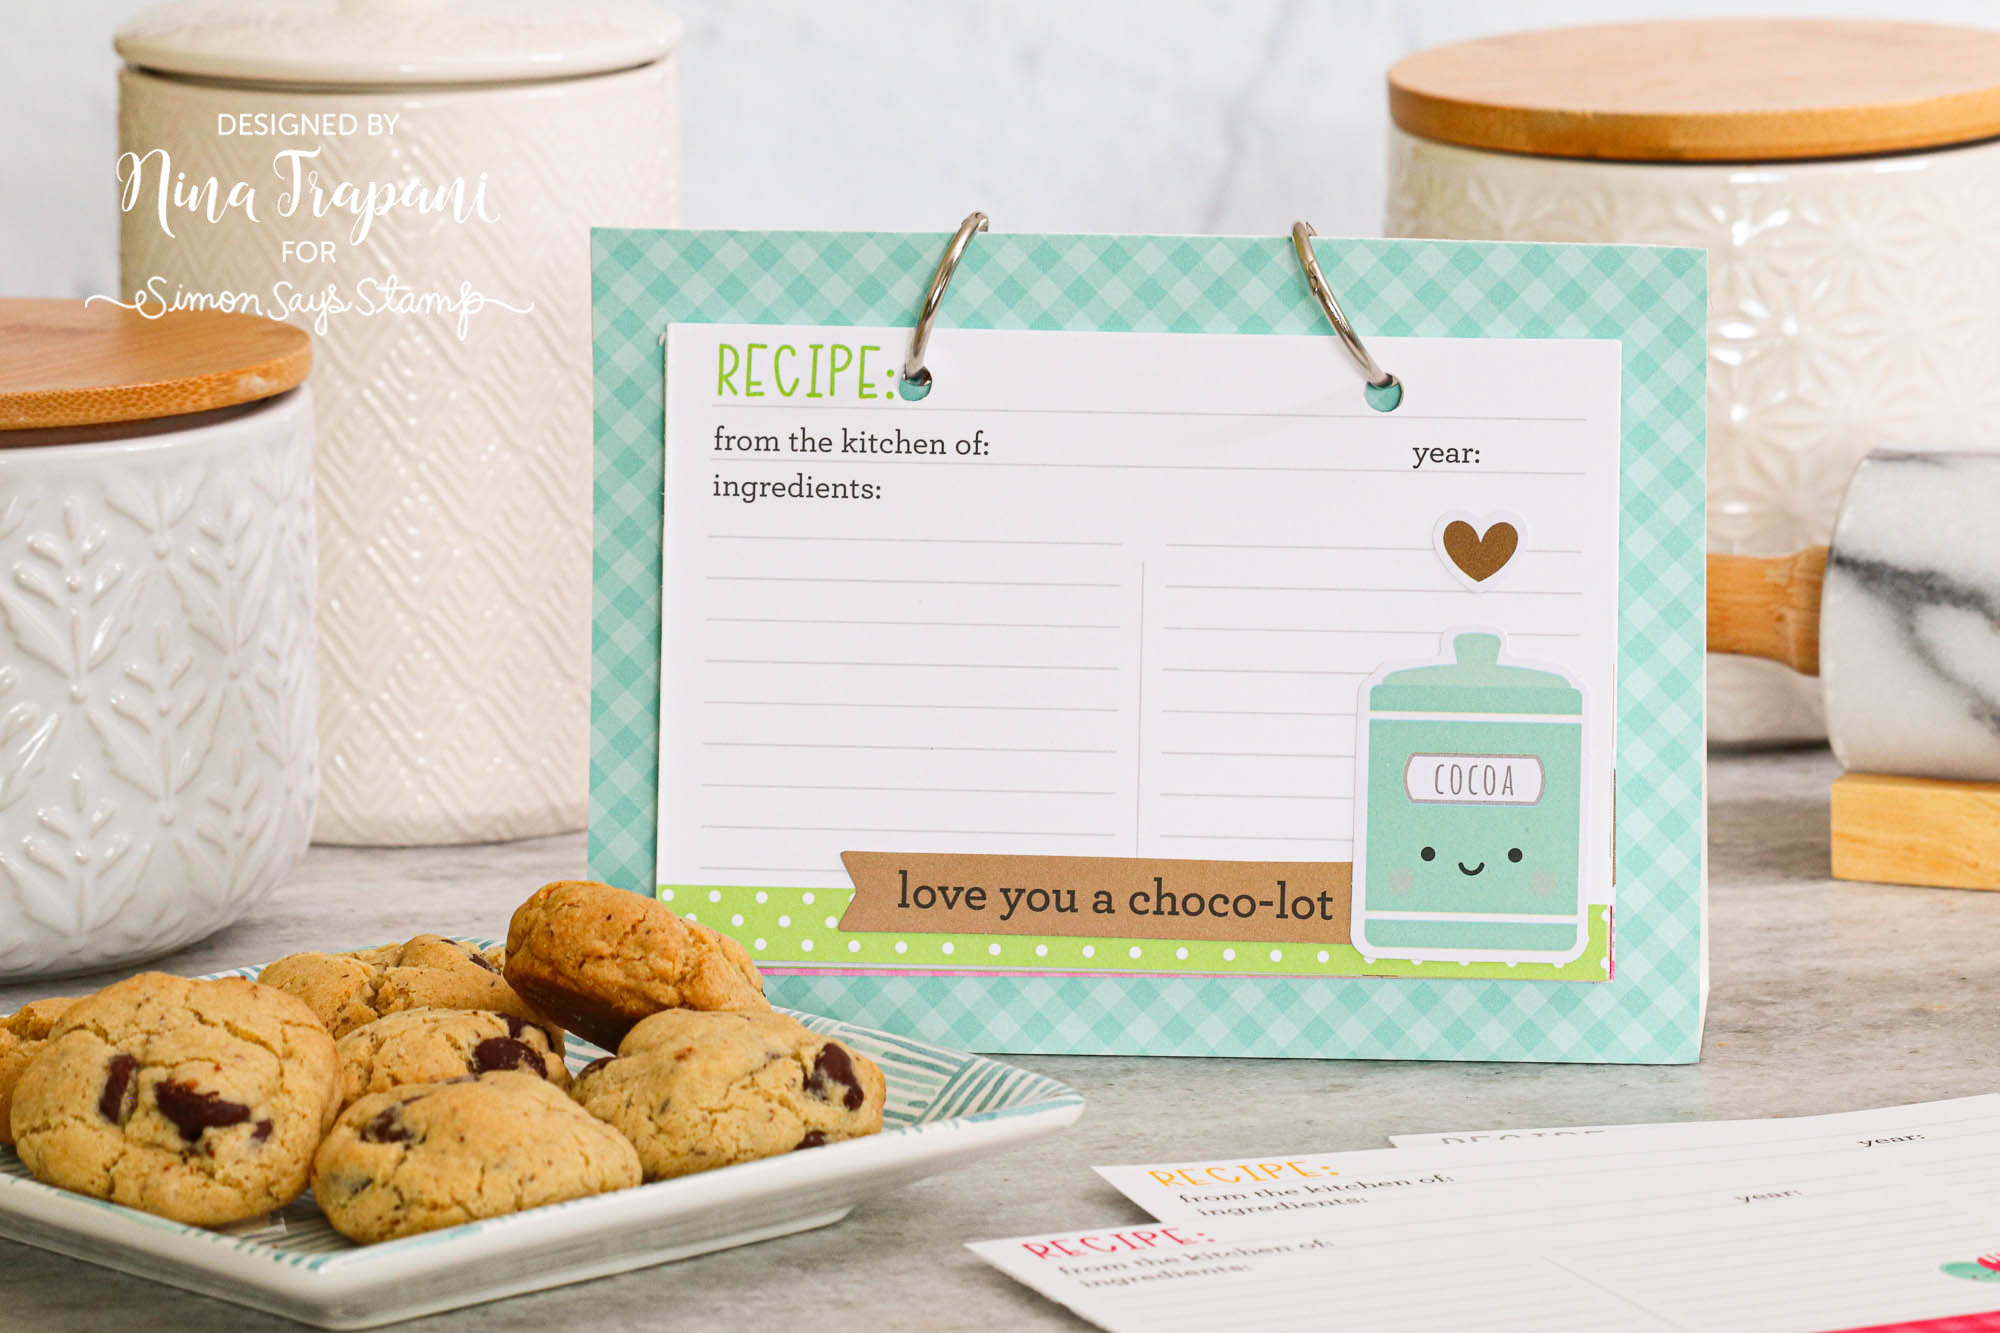
I love the new Recipe Cards and using the Made with Love Odds & Ends, I decorated each of the cards; even though each recipe card already has a printed icon on it, adding elements over top really transforms these cuties into custom cards.
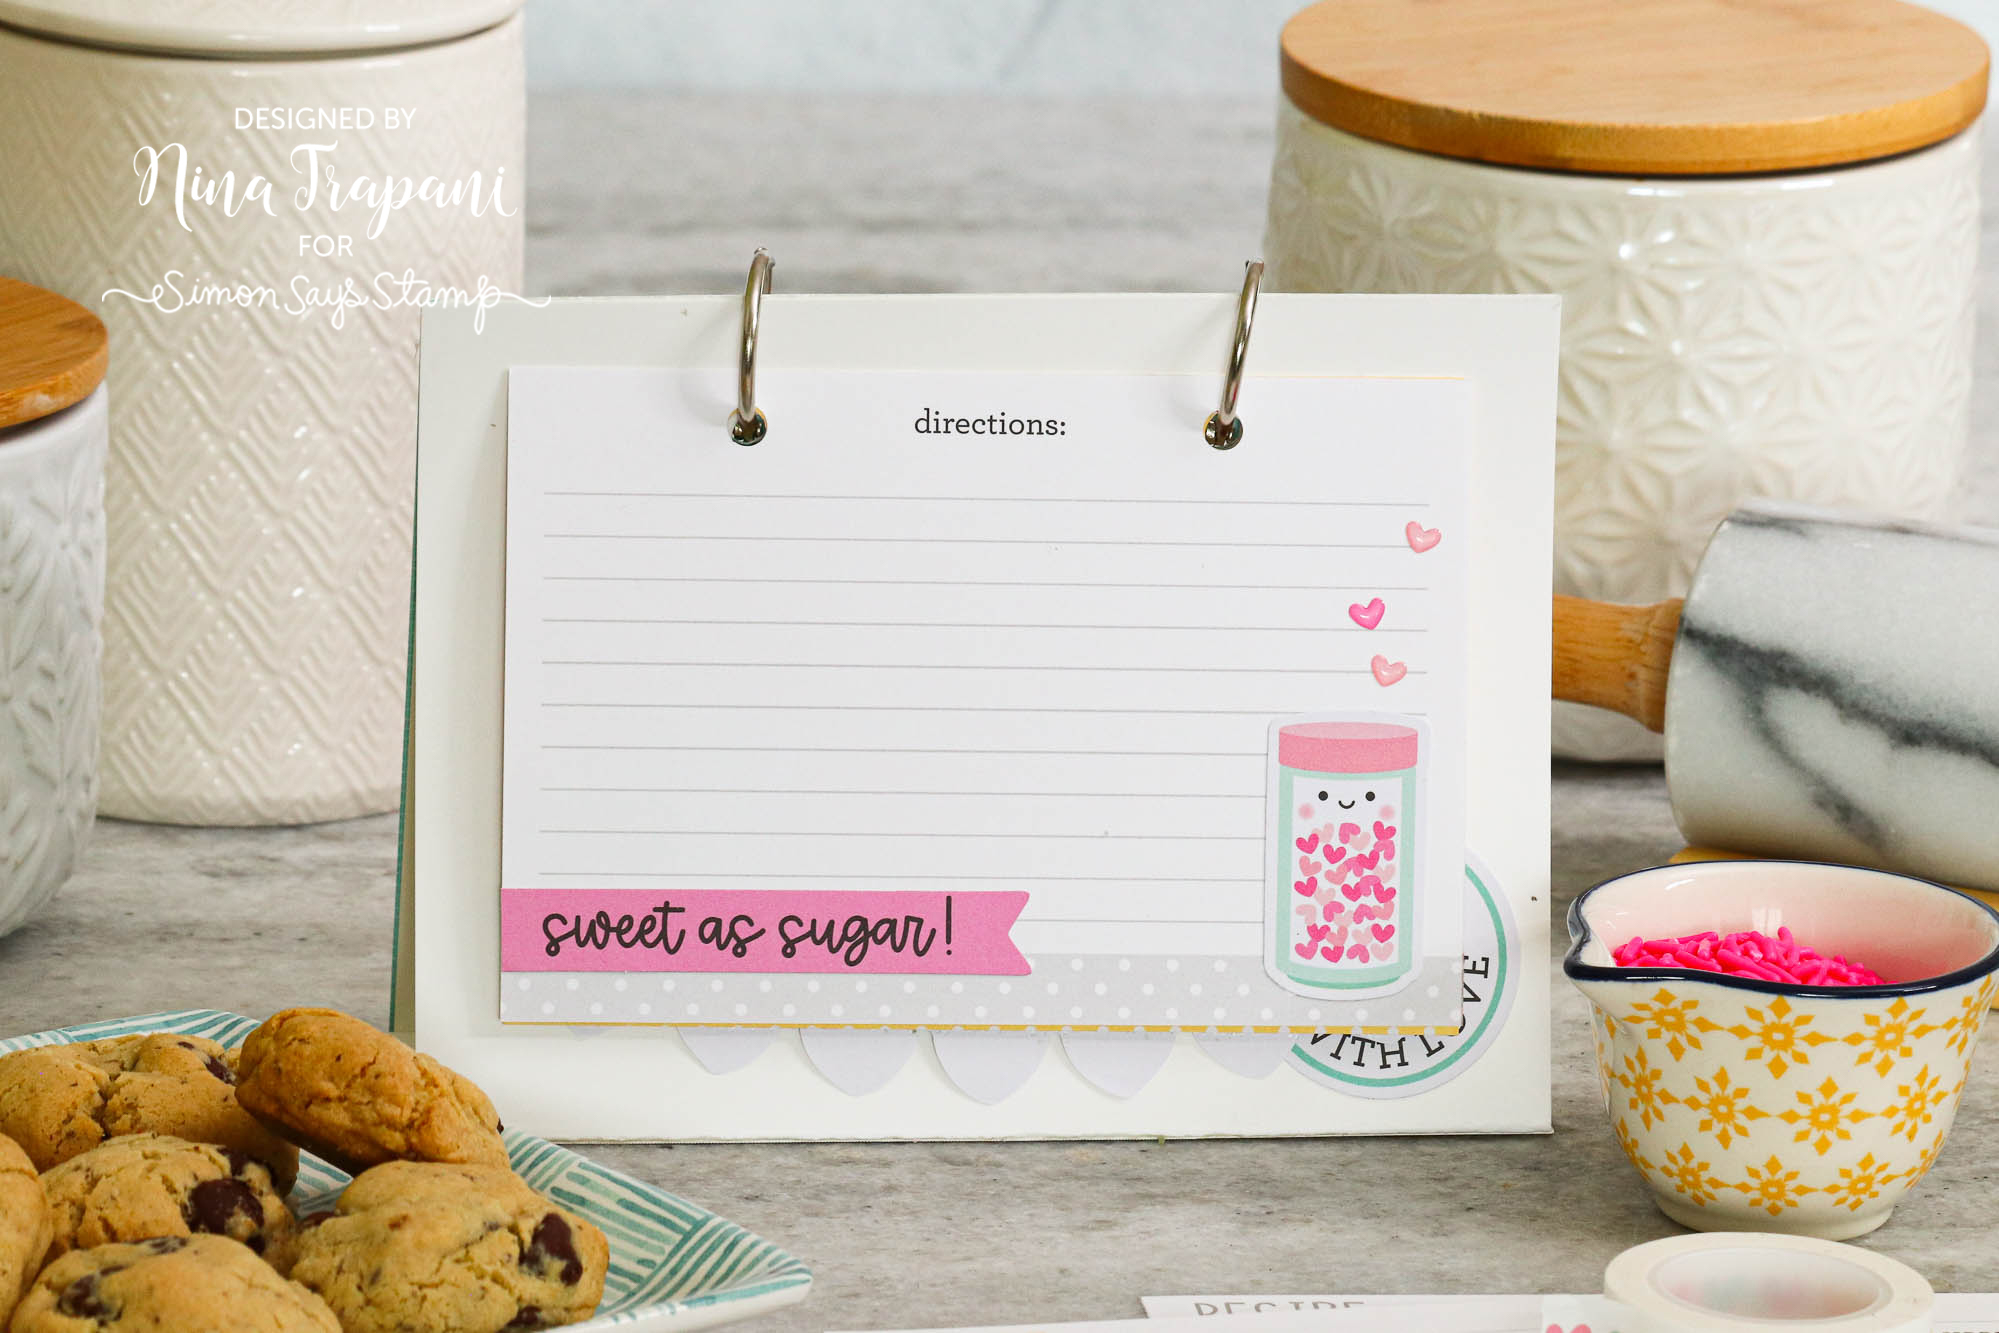
Many of the cards also have extra embellishments on them using Sprinkling of Love and With All My Heart shape sprinkles.
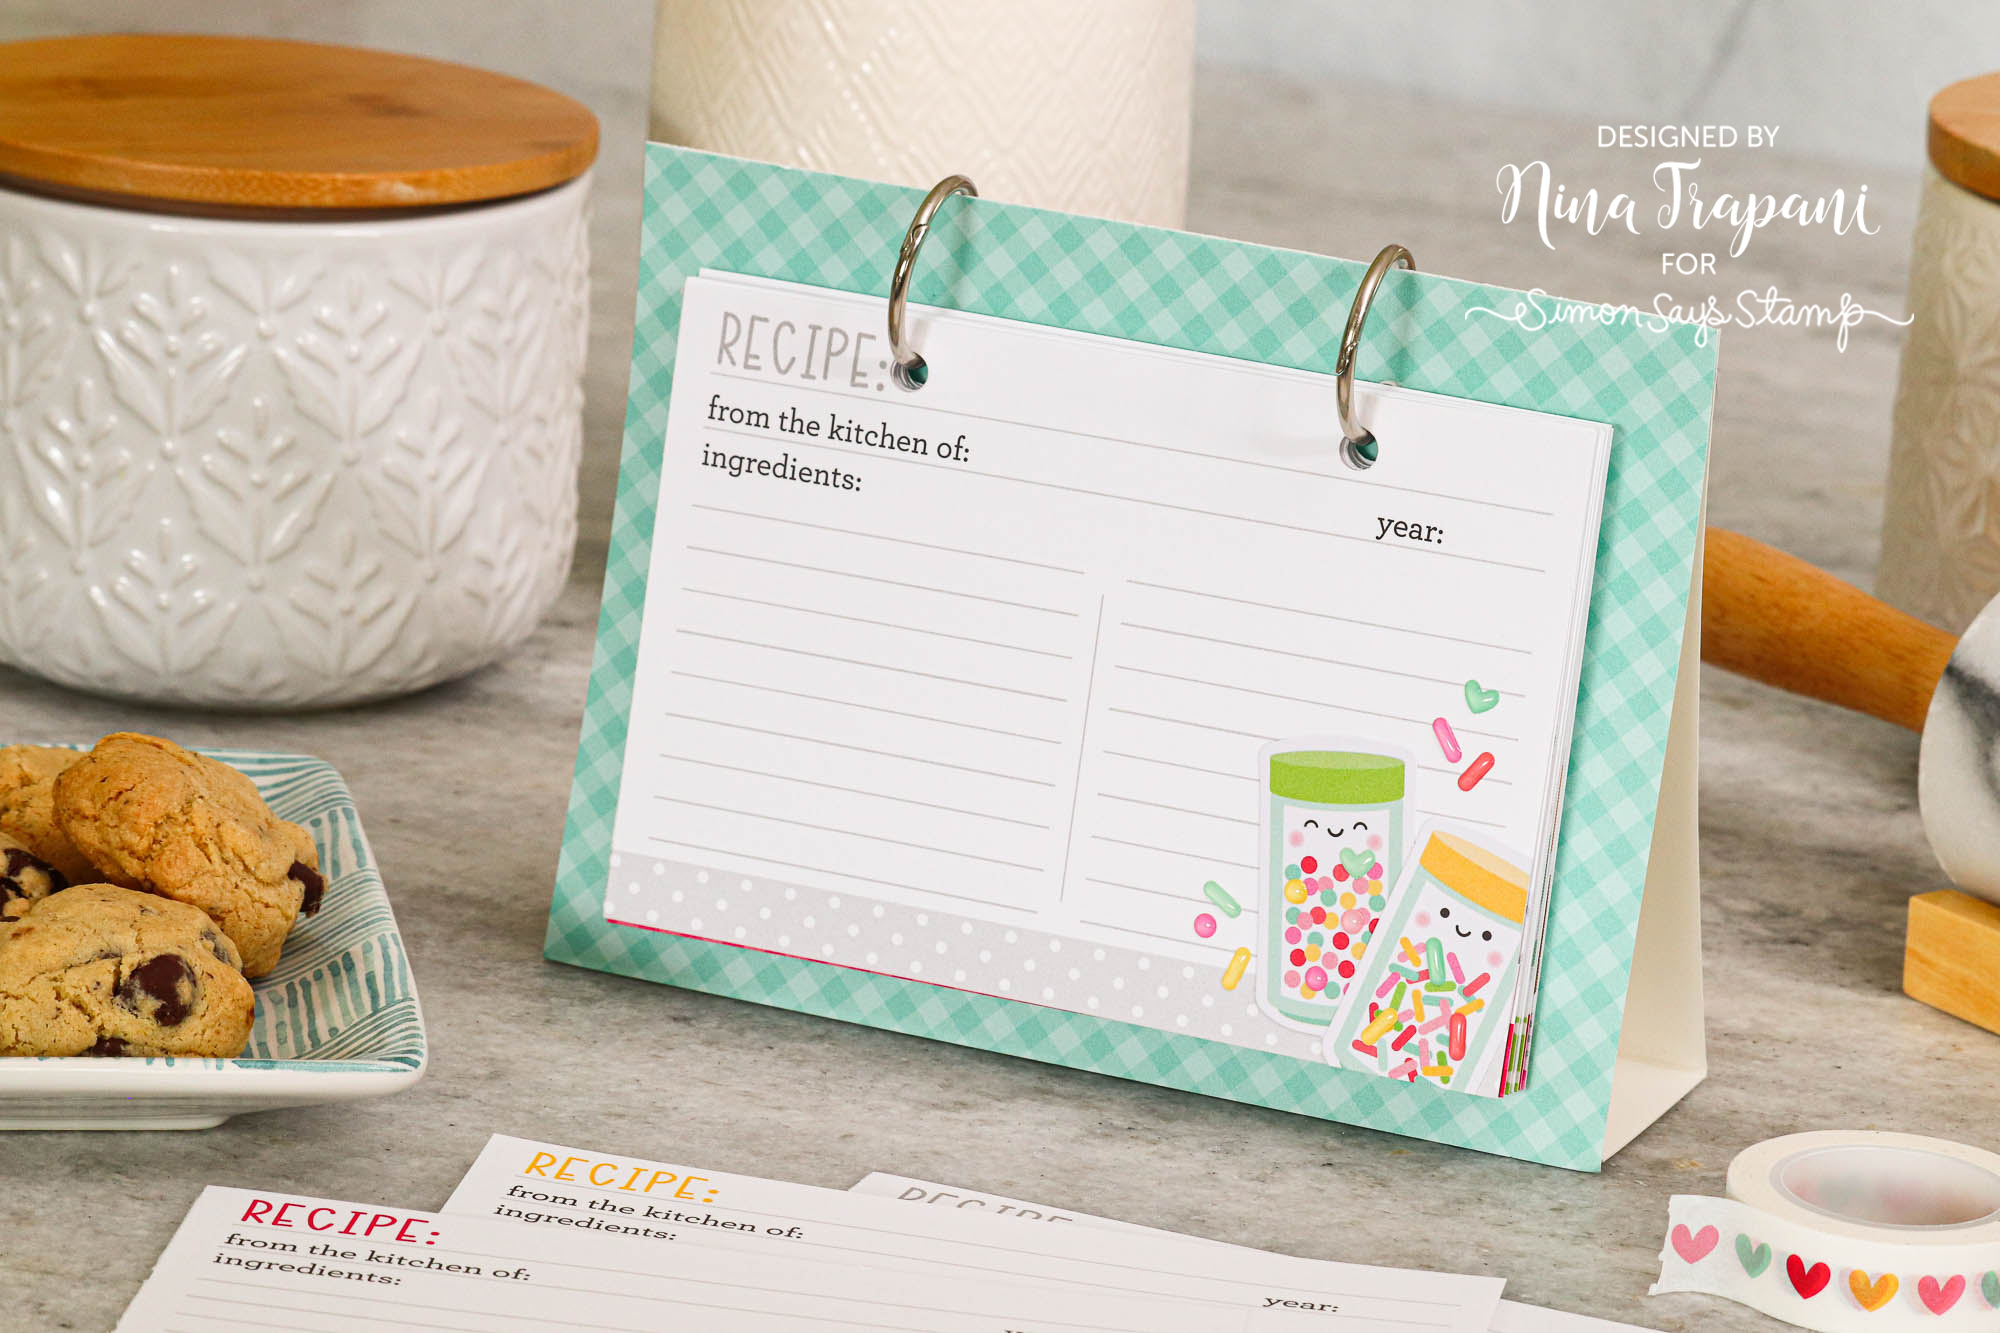
This recipe book I plan on leaving empty because I plan on gifting it to a very dear friend of mine so that she can fill it with her favorite recipes!

I hope you enjoy the video below and will make one of these adorable recipe flip books for either your kitchen, or a loved one’s!
WATCH THE VIDEO
SUPPLIES
|


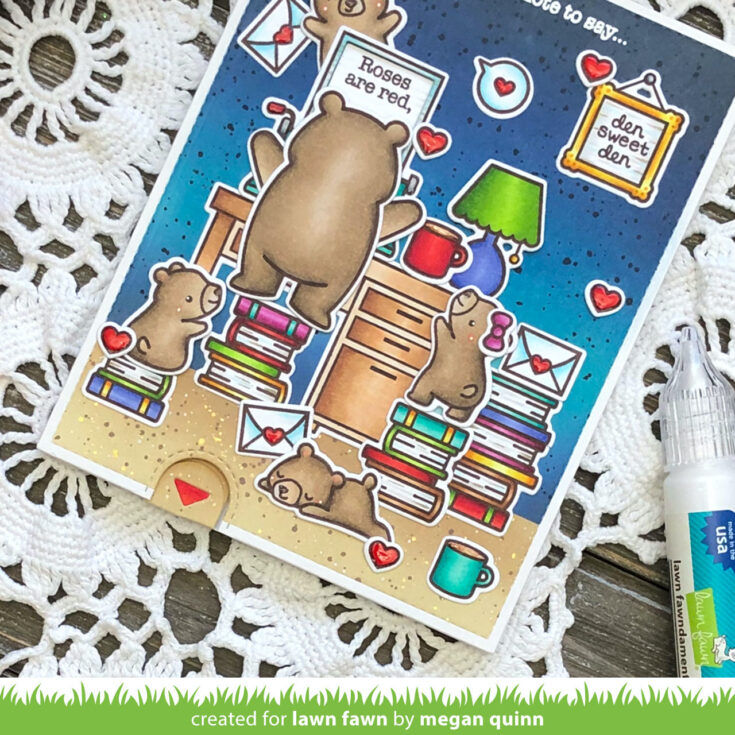
BEAR-y Sweet Lawn Fawn Poetry
Hi friends! I’m SUPER excited to welcome back special Lawn Fawn guest Megan Quinn to our blog today! She is SO talented and it’s always inspiring to see how she creates! Read on to learn more about her latest card and enjoy!
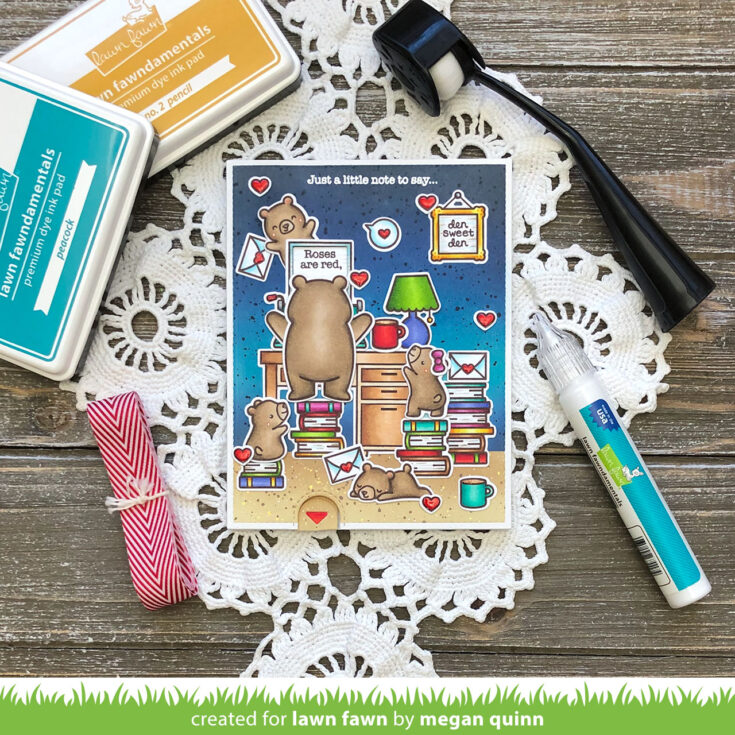
Hello! This is Megan and I am super excited to be back on the Simon Says Stamp Blog today to share a fun interactive card with you! I think we could all use a little more happy these days. That is exactly what Lawn Fawn and crafting is all about! Not only is it calming for the crafter, it also allows you to pass on that joy to someone else. You cannot beat a two for one deal, am I right?!
The card that I have created features one of my favorite Lawn Fawn critters of all time. The captivating and charming bear images included in the Snow Much Fun and Den Sweet Den Stamp Sets. (I can’t seem to stop grabbing for them and the ideas just keep coming with these little guys.) This card could certainly be used for the upcoming Valentine’s Day, but it would be great to send to someone to let them know that you are thinking of them too.
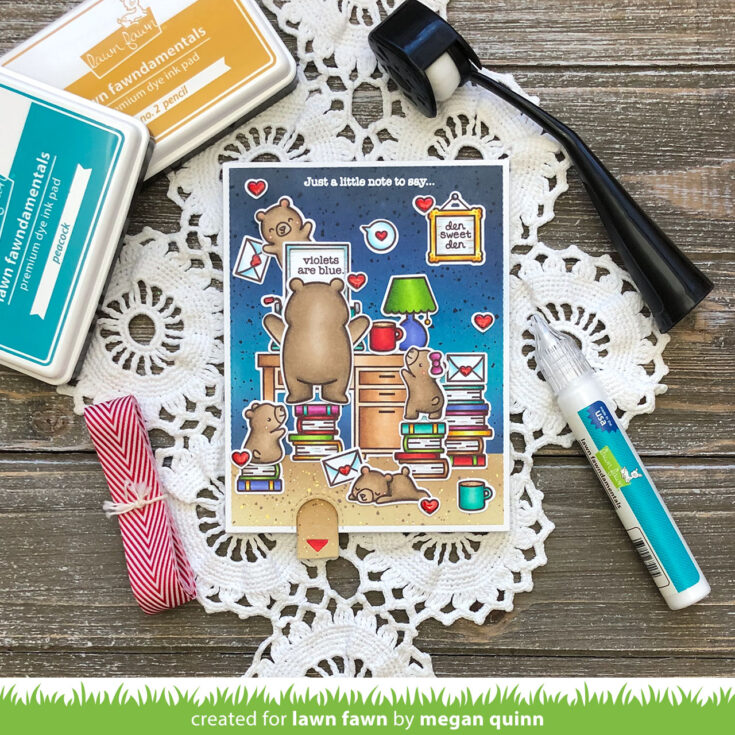
To begin, I chose the images that I wanted to use. I picked ones from Snow Much Fun, Den Sweet Den, Special Delivery, Love Poems, and Just My Type Stamp Sets and stamped them onto Lawn Fawn White Cardstock using an alcohol friendly ink. I then colored the images using Copic Markers and cut them out using the coordinating dies. For the sliding sentiments, I cut a 1 1/2” wide strip of white cardstock, stacked the sentiments from the Love Poems Stamp Set, and stamped them using the same ink.
Next, I built the background elements for the scene. Using the largest rectangle from Large Stitched Rectangles Stackables, I die cut a piece of Bristol Smooth Cardstock. (This cardstock is so forgiving for ink blending. It really is a game changer.) I wanted to maintain a white border without having to add an additional layer so I used Post It Tape to mask off the edges and to mask the line that divides the floor from the wall in the scene. I used Peacock Feathers, Blue Print Sketch, Faded Jeans, Chipped Sapphire, and Black Soot Distress Oxide Inks to ink blend the wall. Then, I flicked on diluted Black Soot to add a bit of interest to the wall. For the floor section, I used Antique Linen and Vintage Photo Distress Oxide Inks. I flicked on some Vintage Photo and a bit of gold from the Gansai Tambi Starry Nights palette. Once the panel was dry, I heat embossed a sentiment from the Love Poems Stamp Set at the top.
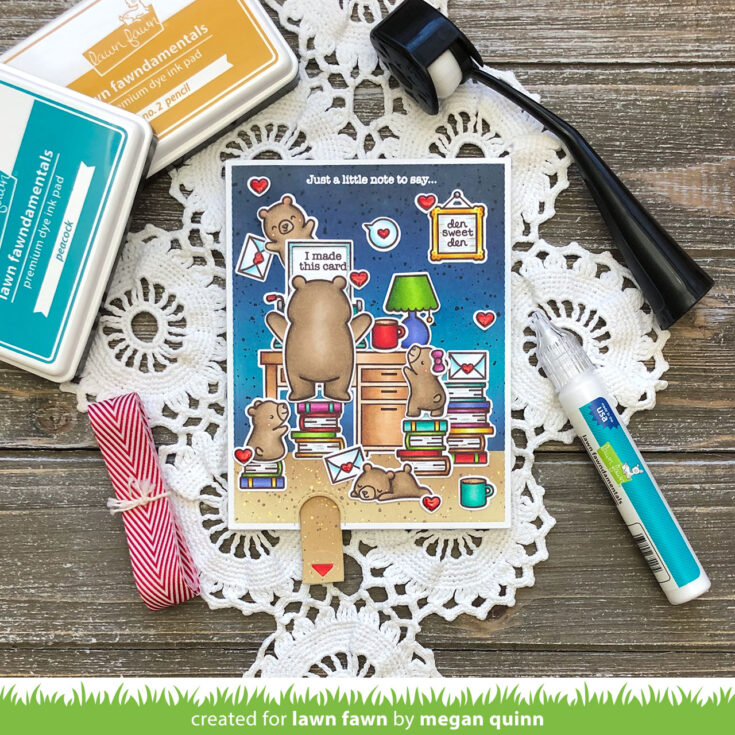
To die cut the interactive elements, I began by laying out the images on the background panels. This allowed me to figure out placement and to line up the dies to cut out the square from the background piece for the typed piece of paper coming from the typewriter. I also cut out the notch at the bottom using a die from the Waving Pull Tab Starter Die Set.
Using the front panel, I traced where the notch is at the bottom and the square hole for the typed piece of paper lines up onto another A2 sized piece of cardstock that will go behind the front panel. (This allows me to get proper placement for the sliding mechanism.) To make the double slider, I used the die from the Snow Much Fun Die Set that has two slits and partially die cut it into back panel. I only die cut one slit about 1/4” from the bottom of the traced square. I then partially die cut another slit about 1/4” from the top of the traced notch at the bottom. Using a 1/2” piece of plastic, (I trimmed down a piece of a freezer ziploc baggie for mine.) I threaded the plastic thru the slits and attached them together using Lawn Fawn 1/8” double sided tape. Using the same double sided tape, I attached the sentiment strip to the front of the plastic strip. I attached a pull tab to reverse side to complete the mechanism.
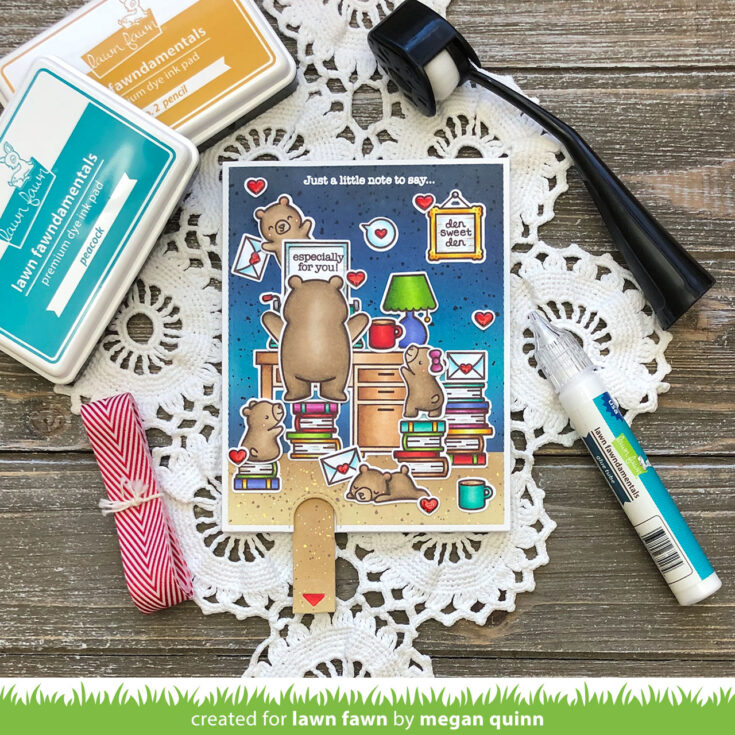
To finish the card, I adhered the images using liquid glue and glue dots. I used foam tape to adhere the front panel to the back panel, being careful not to interfere with the slider. I then adhered the back panel to a card base using foam tape as well.
I hope that you have enjoyed seeing my card. Thank you so much for stopping by the Simon Says Stamp Blog and I hope that you have a great day!
SUPPLIES:
|


Thanks so much for stopping by, and thanks to Megan for being our guest!


