Studio Monday with Nina-Marie: Craft Room Organization!

Hello crafty friends, it’s Nina-Marie Trapani here today with a few organizational ideas to share! I am always looking for ways to better organize my craft supplies and these products have been a helpful addition to my studio – so much so, that I want to share them with you!
Scor-Pal Stacker
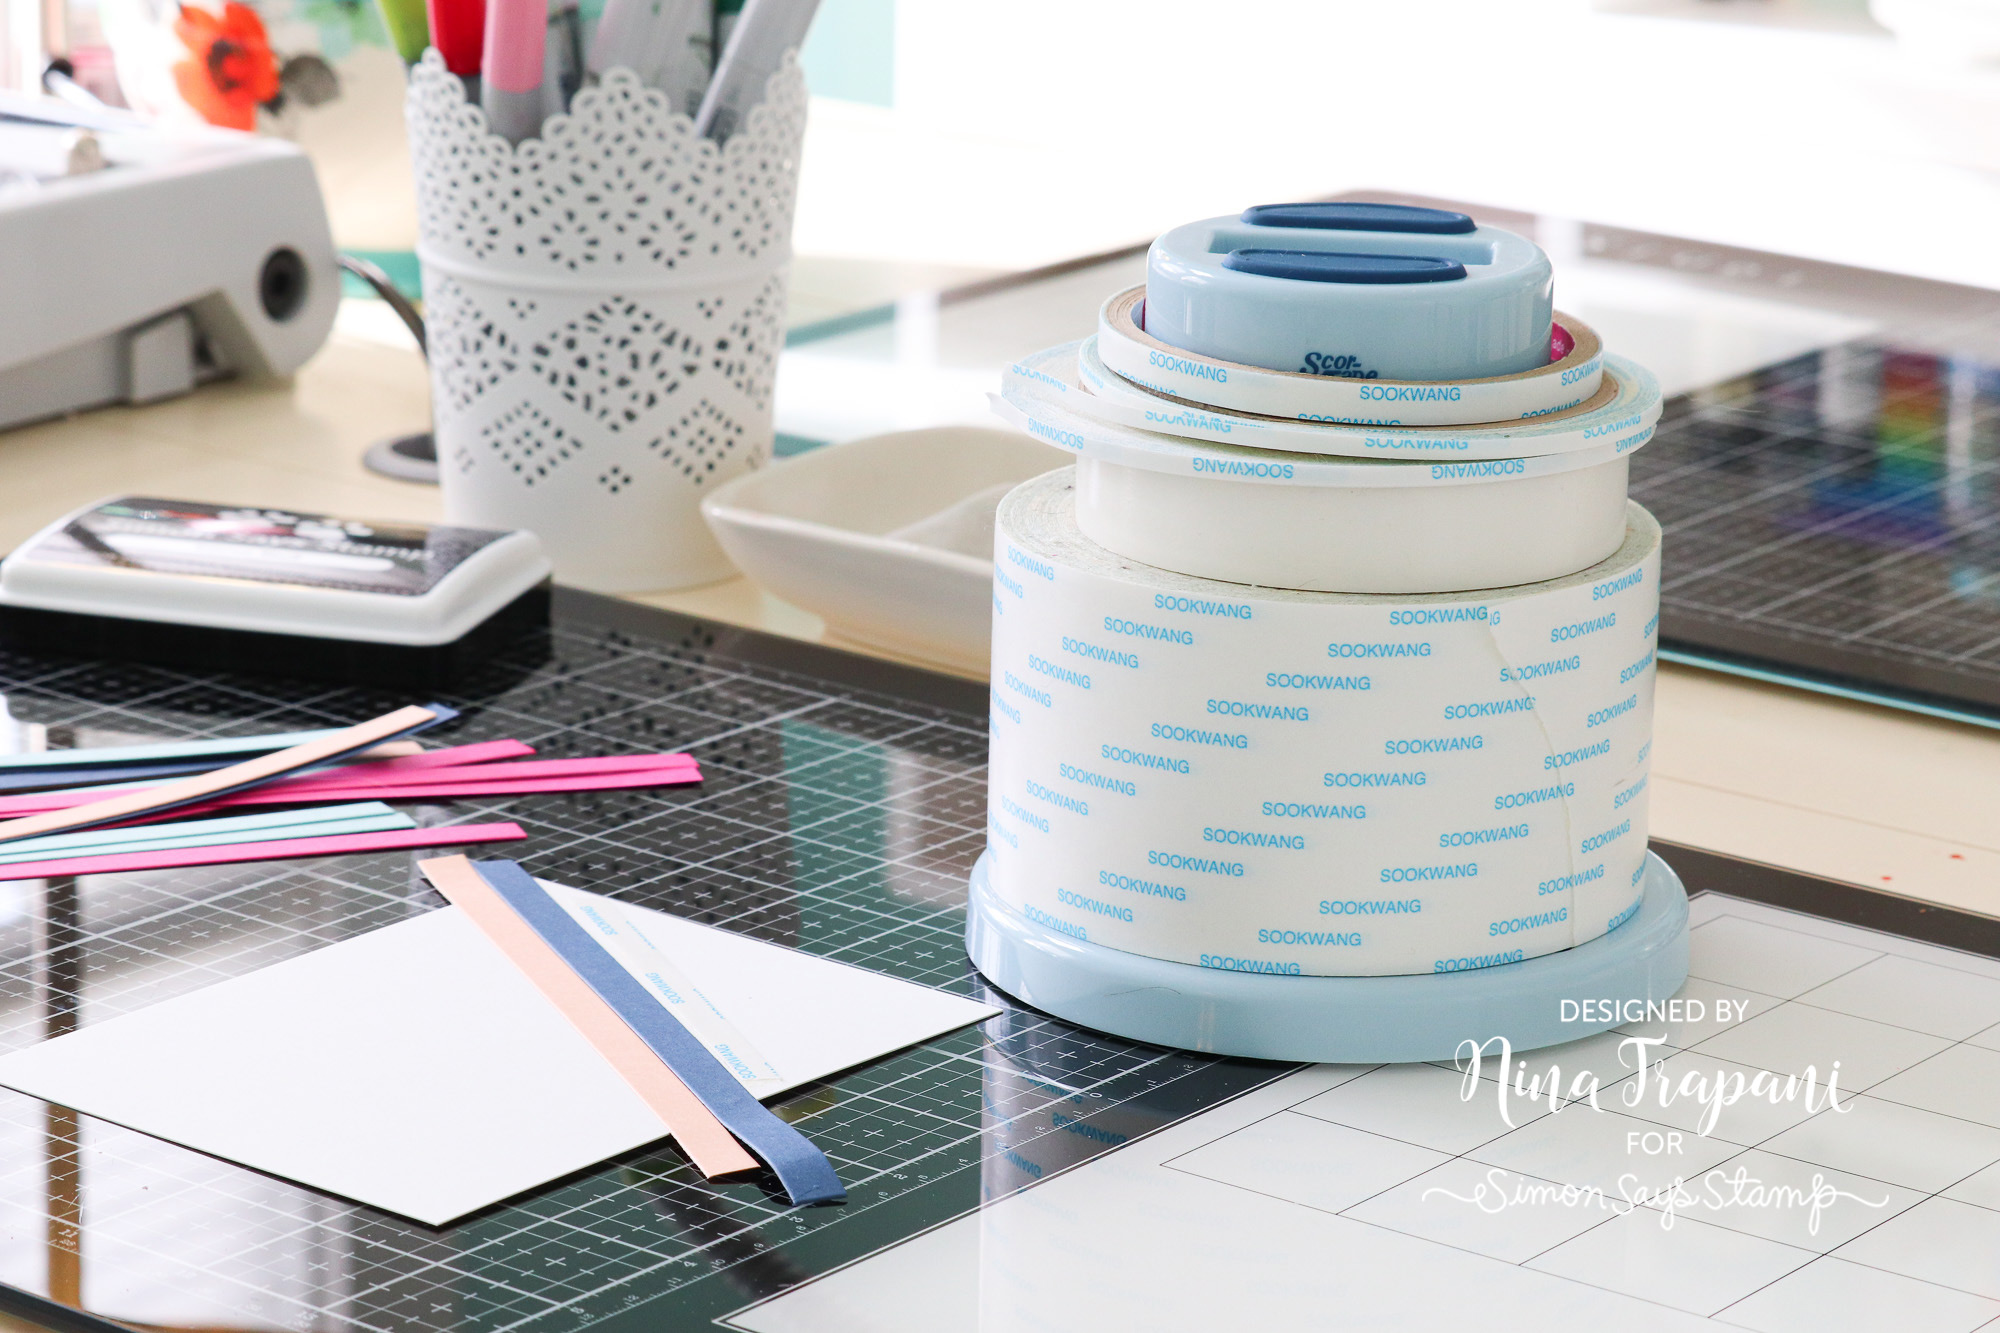
I have really enjoyed the addition of my Scor-Pal Stacker to my craft space as a way to corral all my Scor Tapes! This tool can hold many rolls of tape and allows the tape to be easily used right off the stack!
Round Organizer
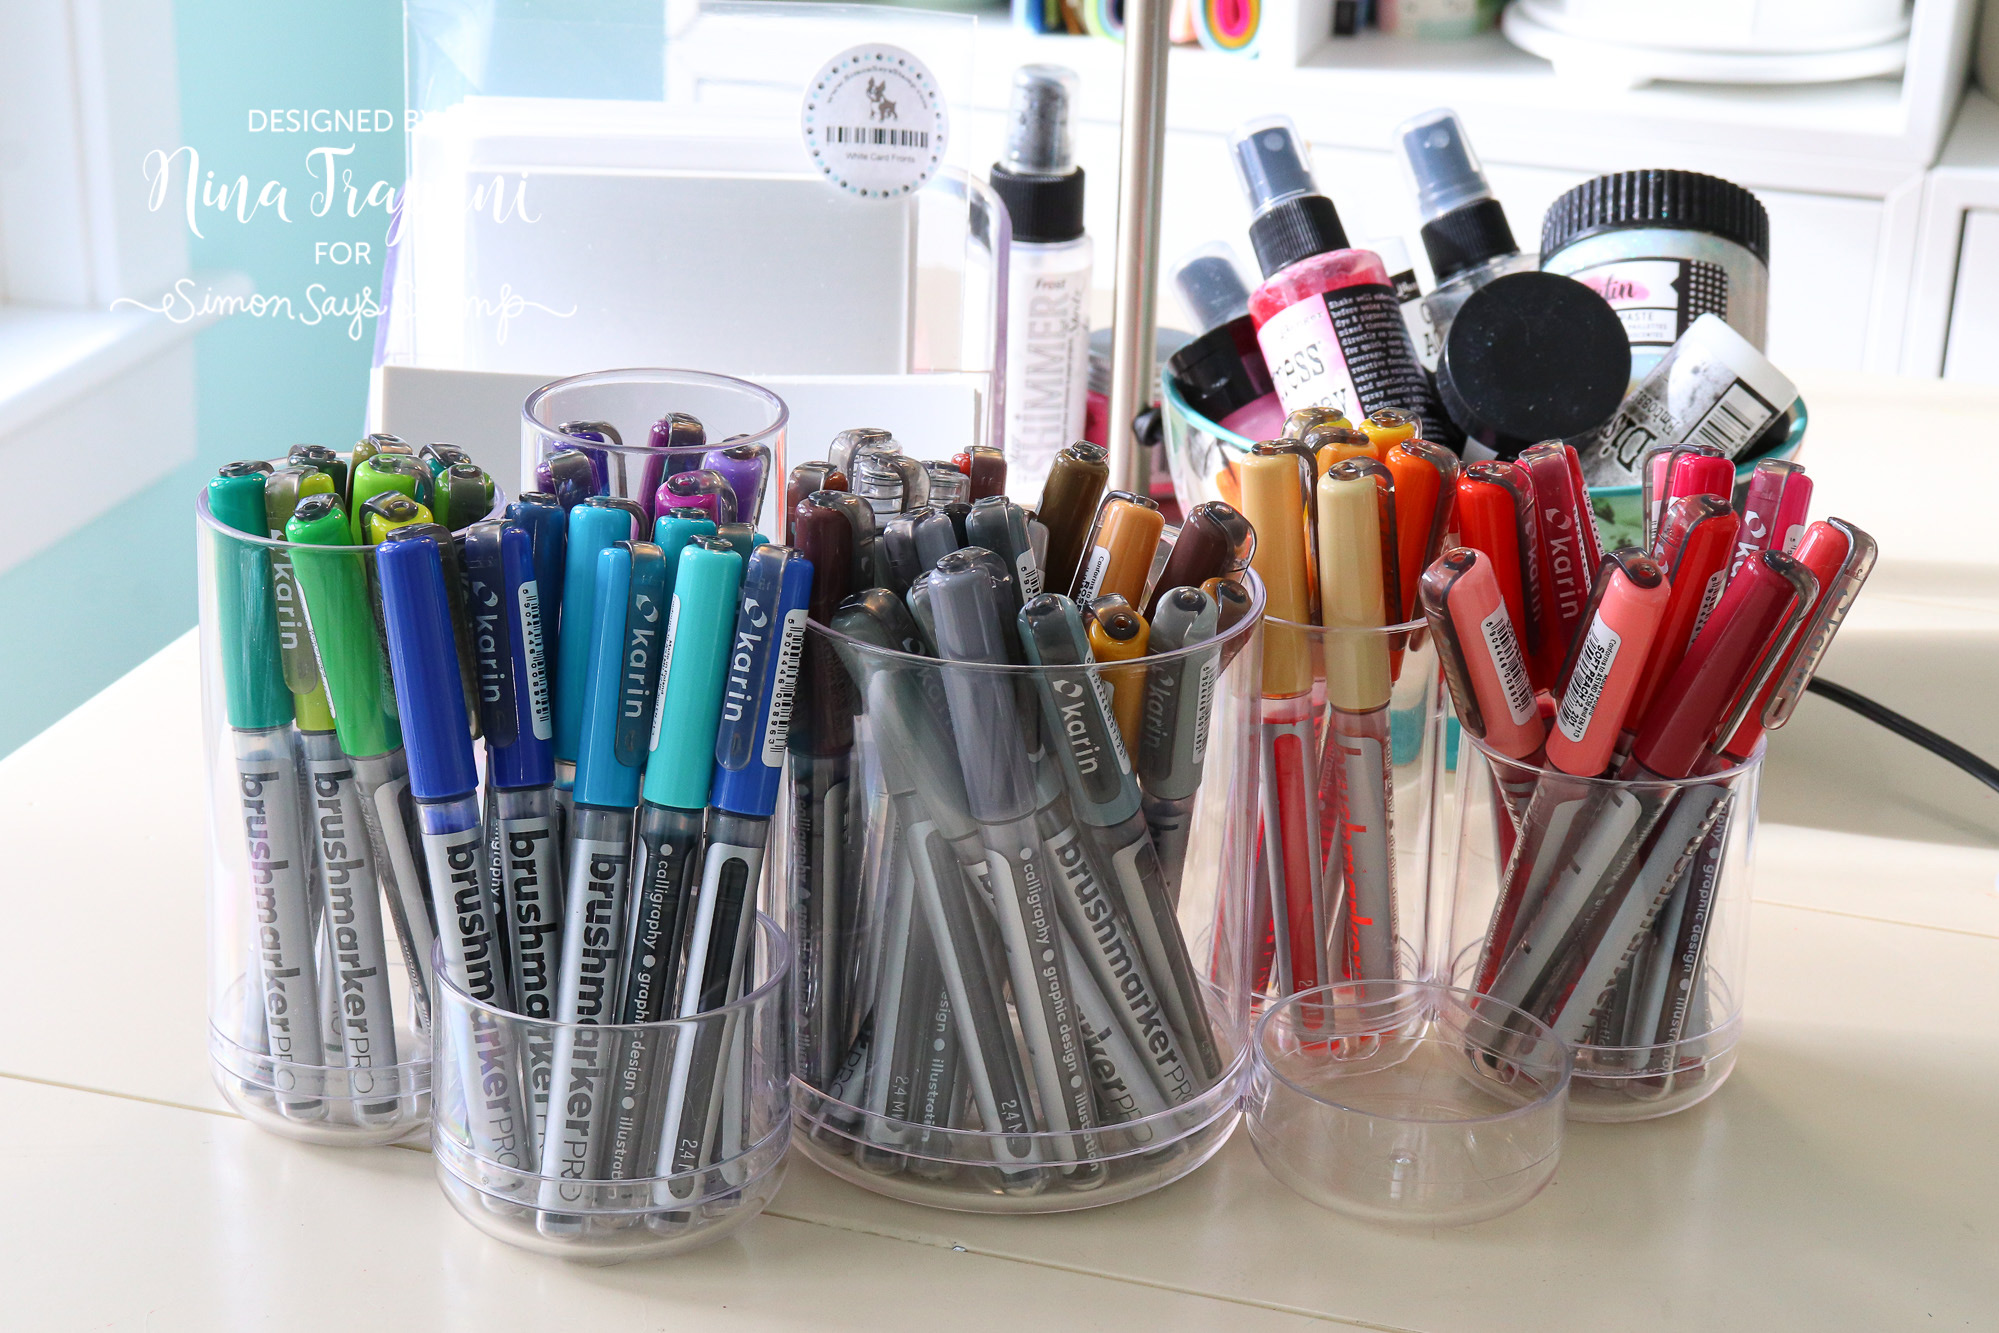
I’m a visual person and I like to be able to see all the colors of my different mediums. So I’ve been looking for a pretty but compact way to organize my Karin markers. When I discovered this acrylic Round Organizer, I was thrilled! It holds my entire set of 60 Karin markers, with room to add. I can also separate the colors out by groups, which makes finding the right color that much easier for me. If you don’t have Karin markers, you could also fill this with markers, pencils, brushes, pens, tools and so much more!
Magnet Sheets
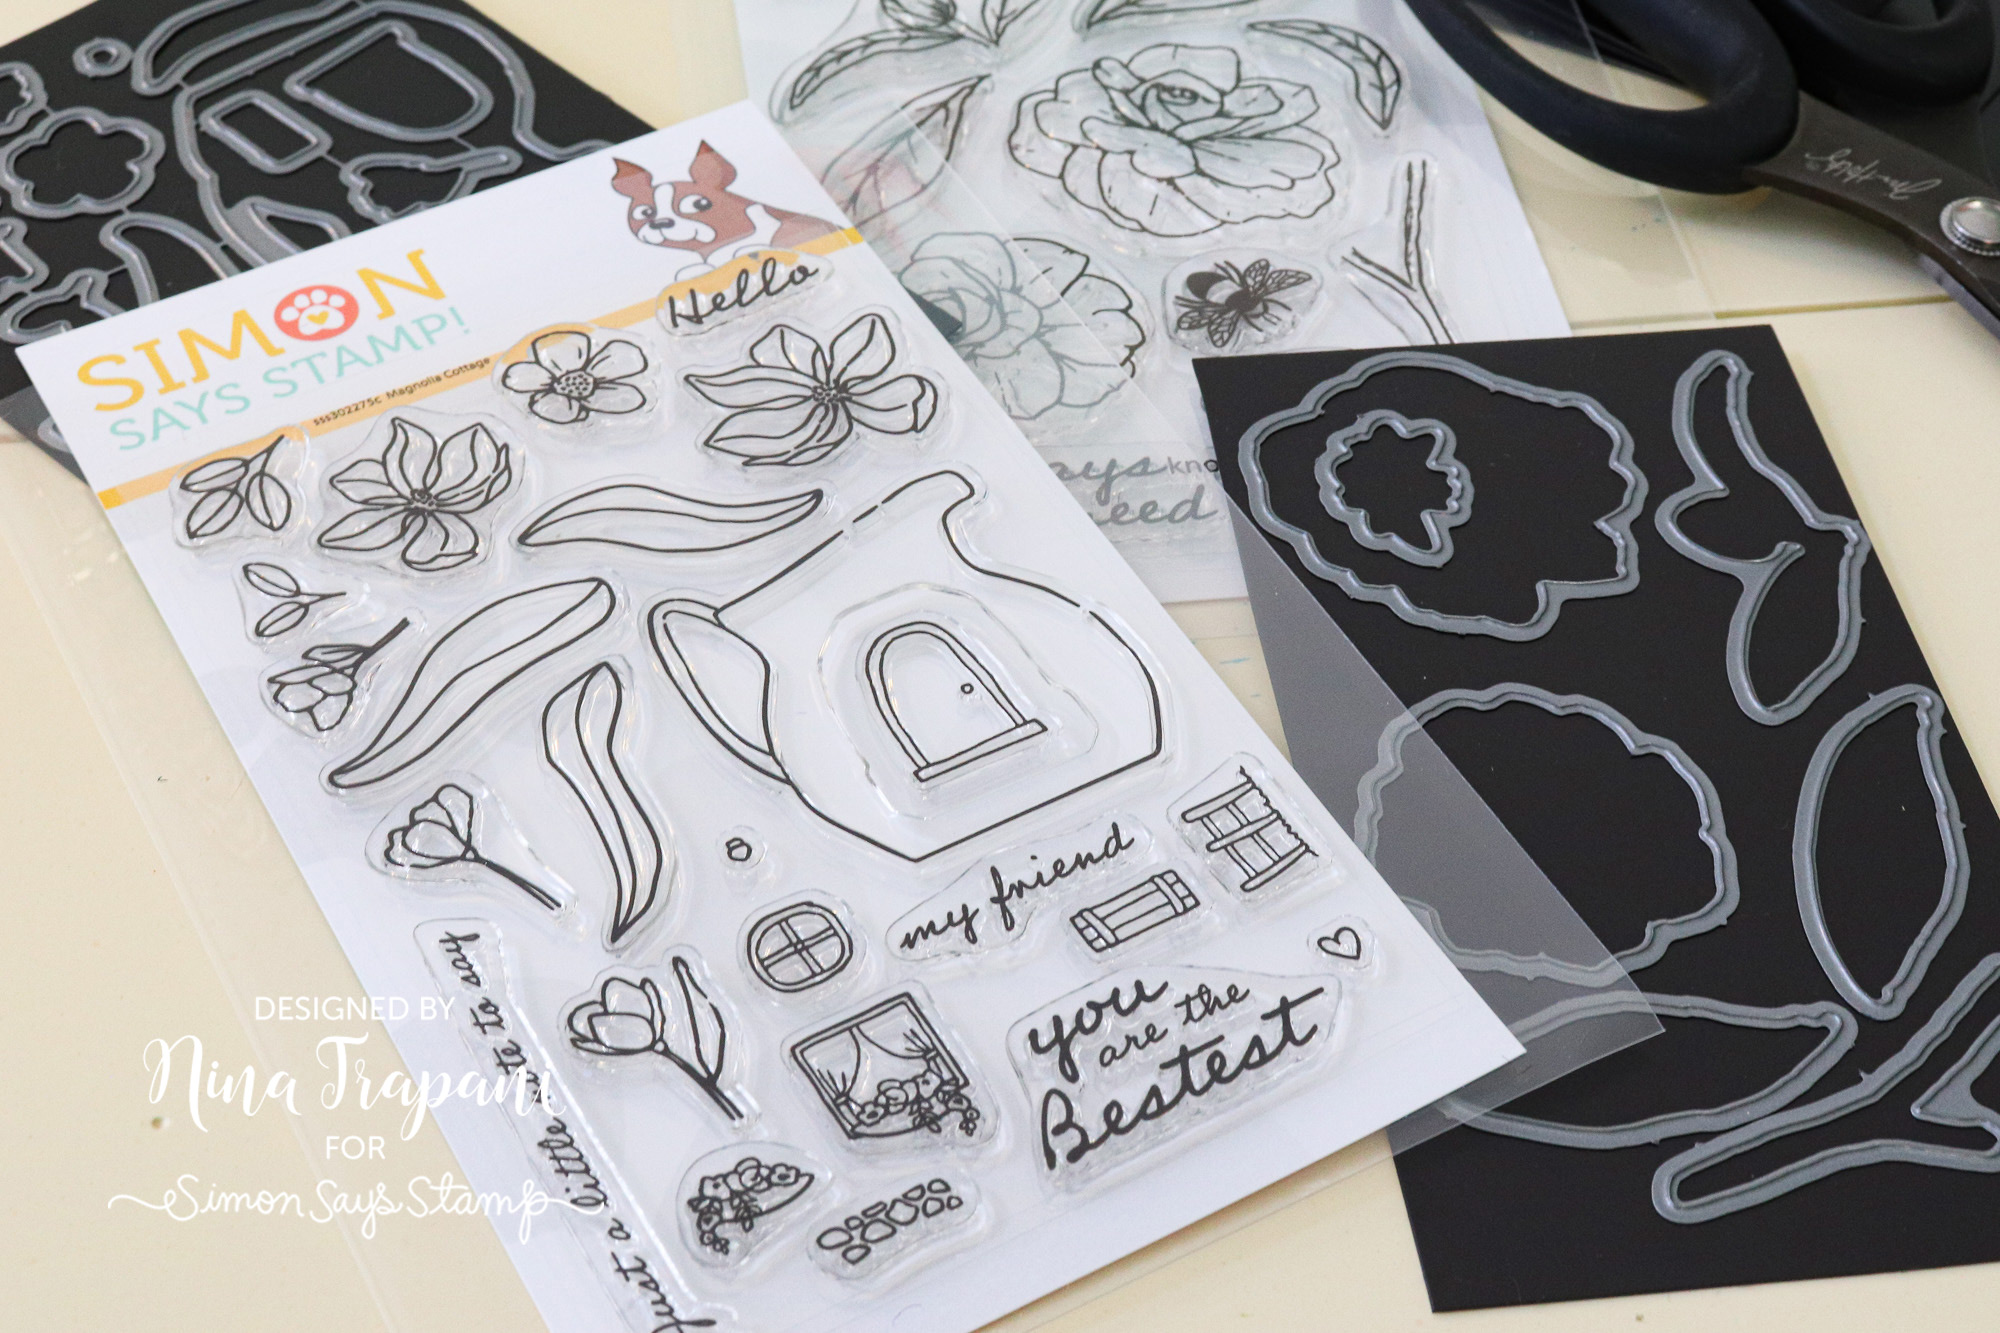
Dies can be tricky to organize, but a couple of my favorite ways to store dies are to stick them to magnet sheets! You can cut magnet sheets to fit in storage sleeves to contain either store stand alone or coordinating dies! If I am putting a coordinating die set onto a magnet sheet, I like to slip it into the storage sleeve with the stamp set it goes with.
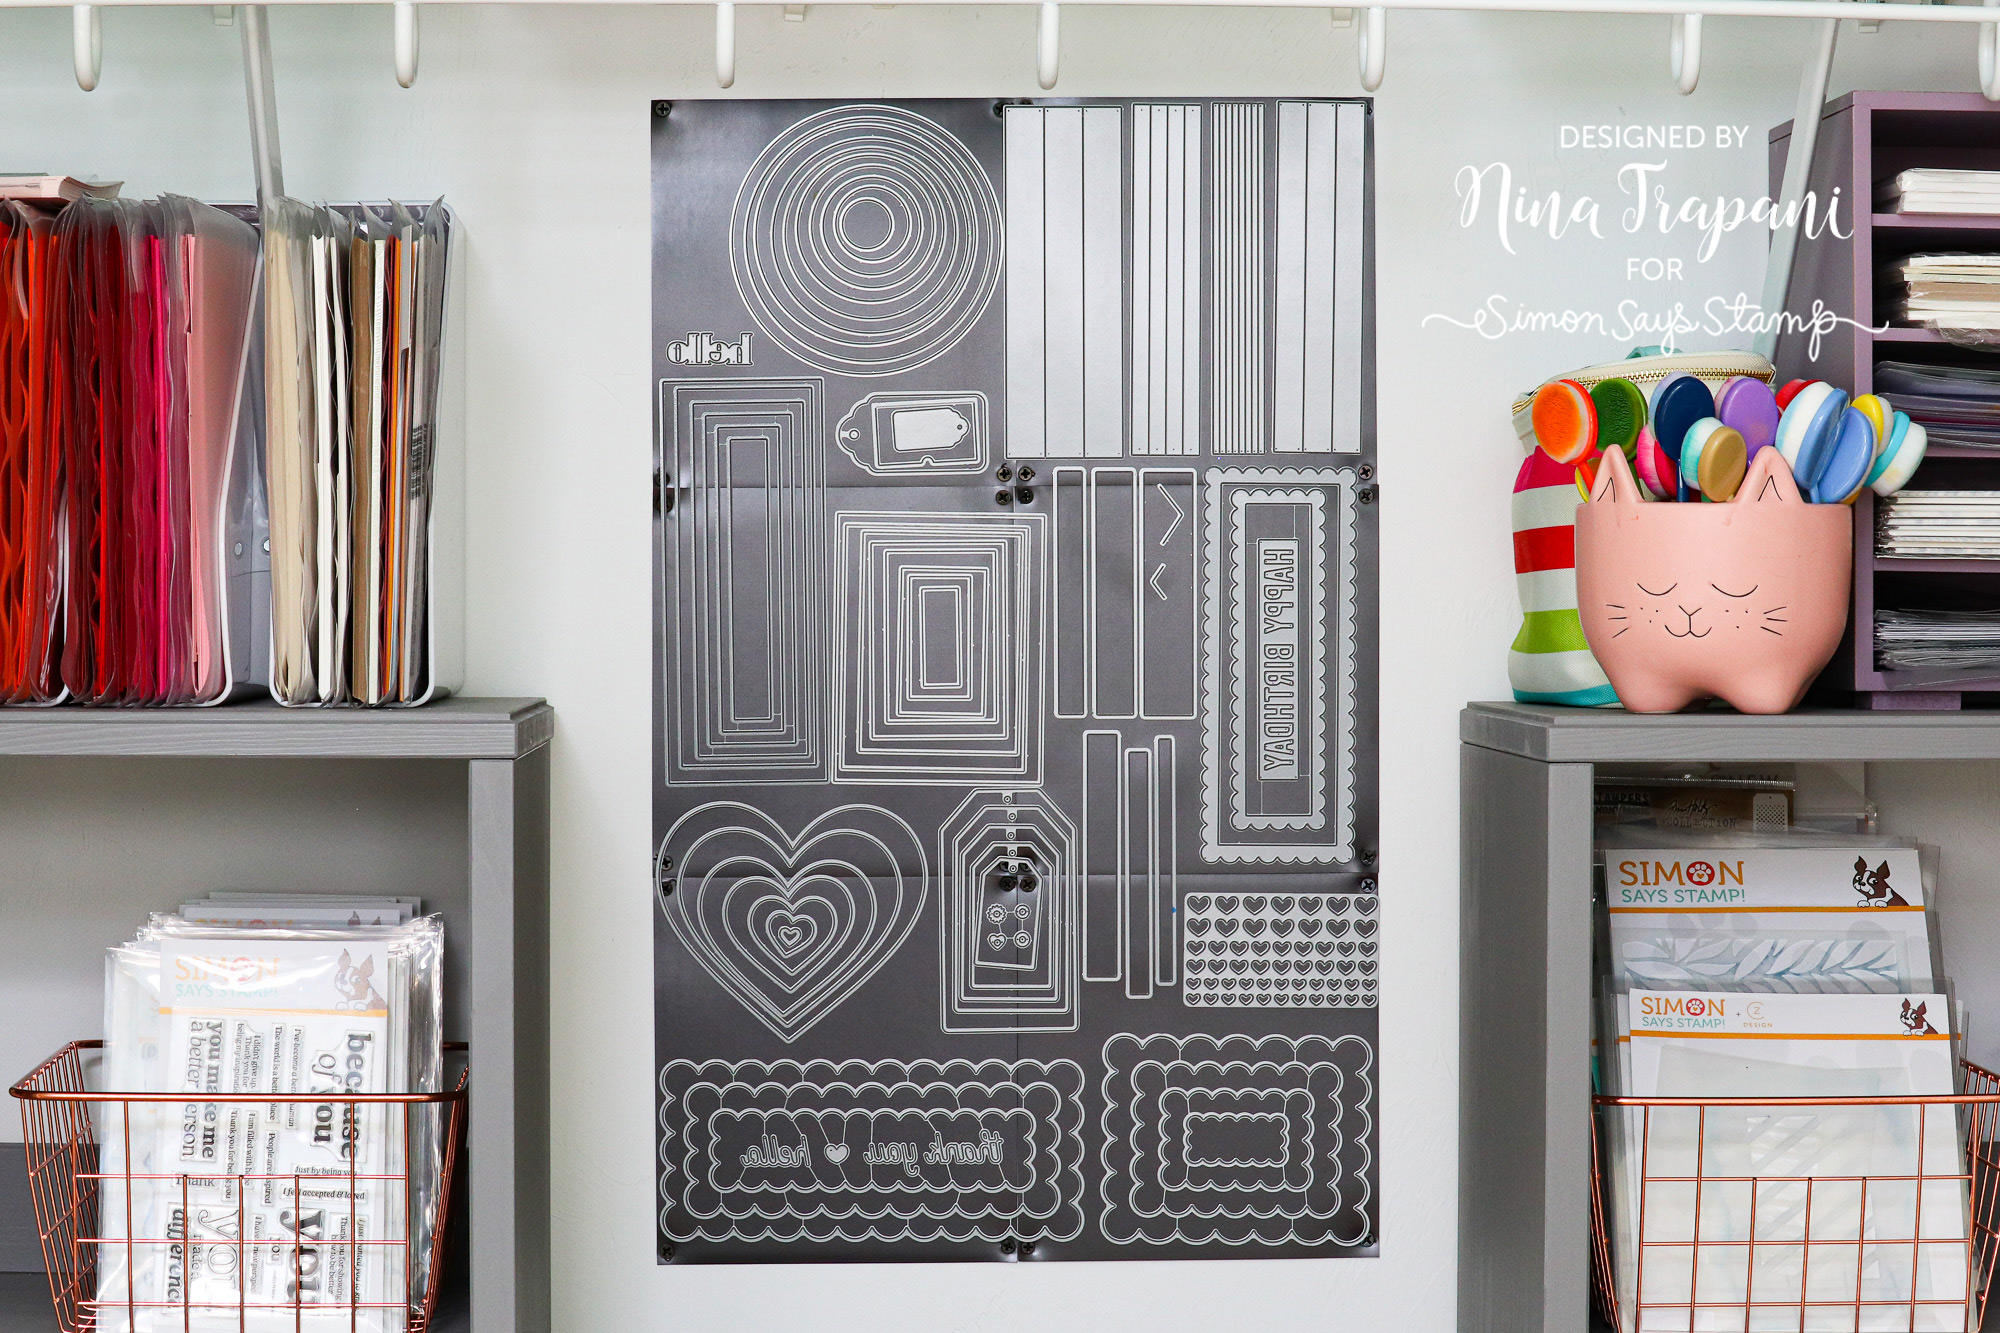
I’ve also recently installed a magnetic wall system inside my closet! This DIY project was inspired by my good friends and Simon teammates, Susan R. and Beth Opel’s craft room. Susan posted a photo of a repurposed door she and Beth have covered with dies. I don’t have the space for something that large, but I had been trying to come up with a way that I could keep my most used dies close at hand. All it took were these magnet sheets, a few black screws and some careful measuring to install this handy, magnetic wall storage in my closet! This has been up for a couple weeks now and I’ve been so happy to have these dies so easily accessible!
Divided Organizer & Storage Sleeves
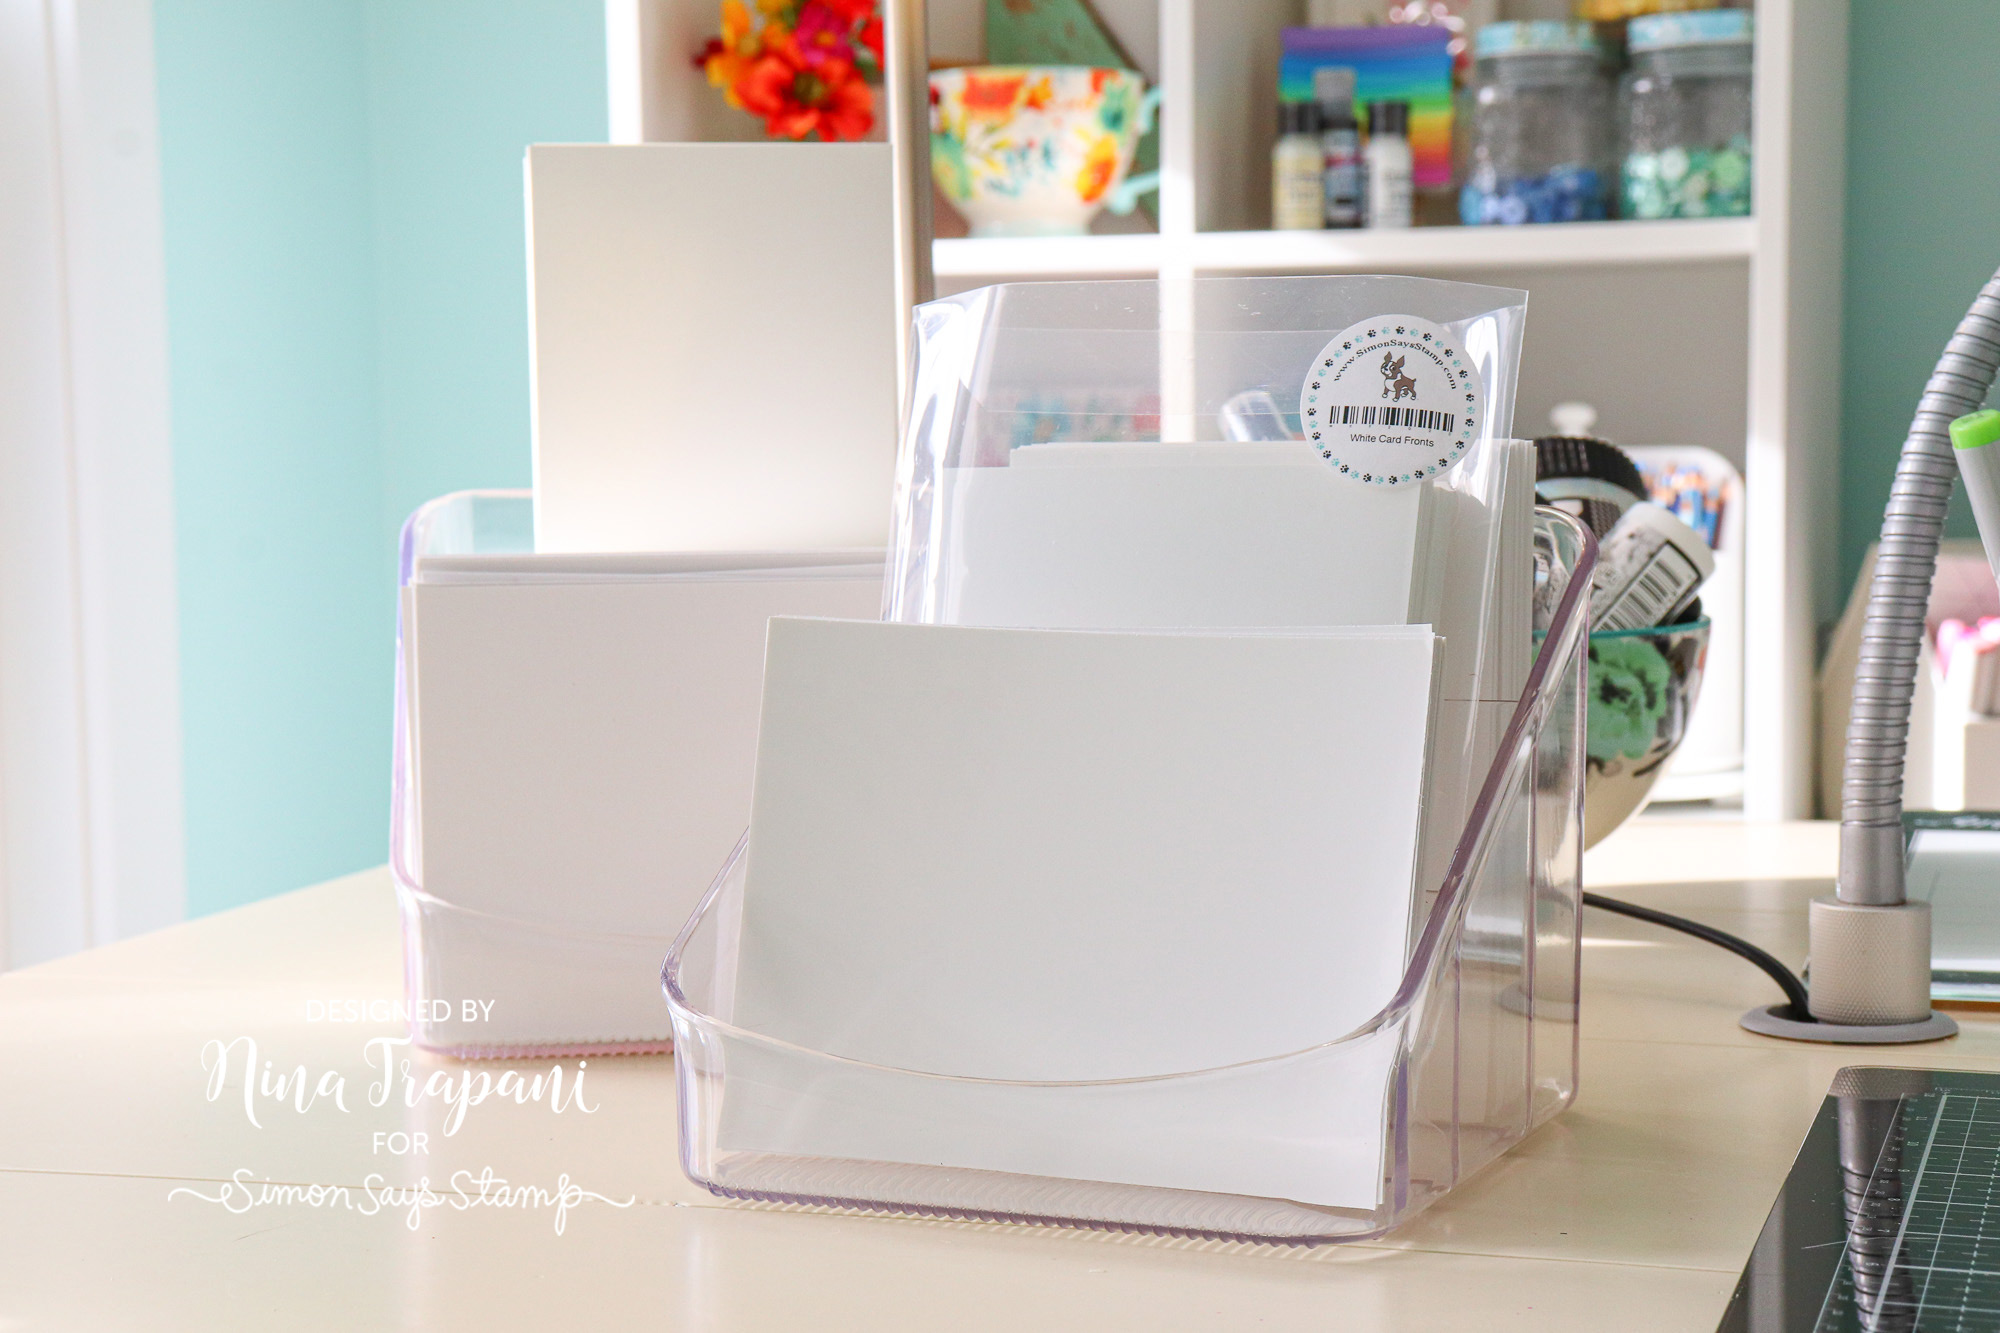
I like to keep pre-cut card fronts, card bases and other most used cardstocks handy so that I don’t have to stop and cut something down while I’m in the middle of creating. I discovered that these organizers are perfect for not only holding all my different pre-cut papers, but they keep them sorted by type because of the handy dividers! Each container has three sections, which means I can store three different types of cardstocks in a single bin. You’ll also notice that some of the cardstocks are in storage sleeves – I find that stamp storage pockets are a great protector for keeping my cardstock clean and safe from inky messes!
WATCH THE VIDEO:
SUPPLIES
|


Yippee for Yana: Angled Ink Blending

Happy Sunday, friends! Please join me in welcoming back special guest Yana Smakula in the latest edition of Yippee for Yana on our blog! Read on and be sure to watch the video for more information! Enjoy!

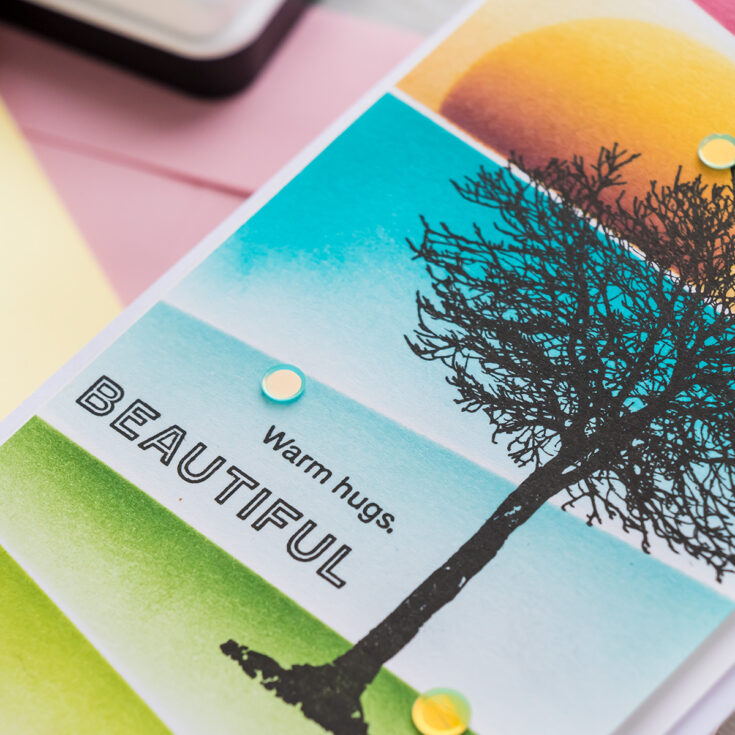
Hi everyone, this is Yana Smakula, welcome back for another Yippee For Yana video! Today I have a colorful ink blend card featuring what I call angled ink blending to create a bold and colorful background and some simple silhouette stamping.
I wanted to create a colorful background for a black stamped tree silhouette, so I pulled out several stencils from Simon Says Stamp and ink blended a colorful abstract background. Instead of evenly blending each section, I applied the ink using just the edge of my ink blending tool coming in very heavily where the edge of the stencil meets the paper and gradually fading into white.
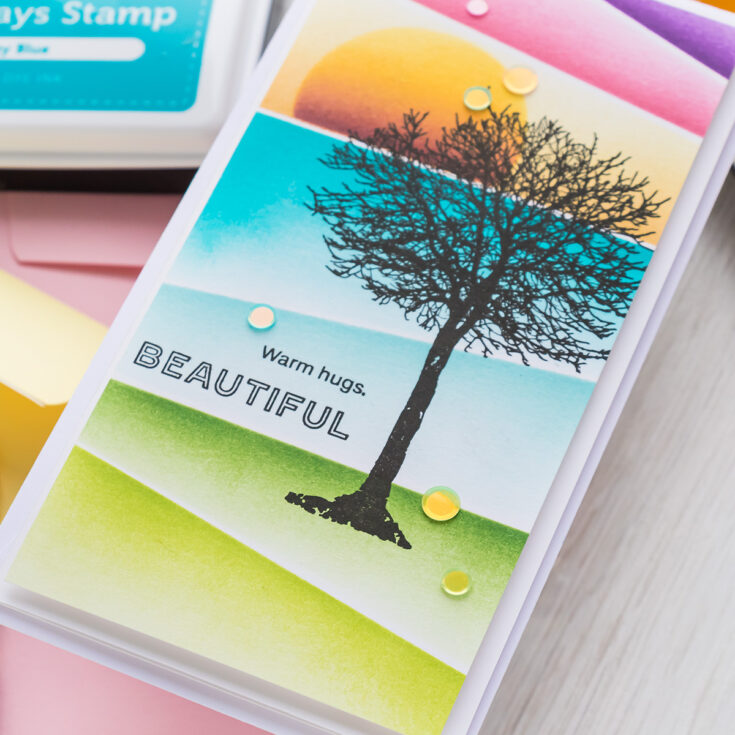
I pre-planned my card background and divided it into 3 sections – a sky, with 3 subsections (ink blended with Deep Purple, Hollyhock, and Duckling), an ocean, with 2 subsections (ink blended with Audrey Blue and Maliblue), and land, with 2 subsections (ink blended with Green Leaf and Jellybean).
With the ink blending done, I stamped the tree from the All Seasons Tree stamp set and a sentiment in black ink and trimmed my panel to 3 x 6” and foam mounted onto a 3 ¼ x 6 ¼” white card base to fit inside the new mini slimline size envelope.
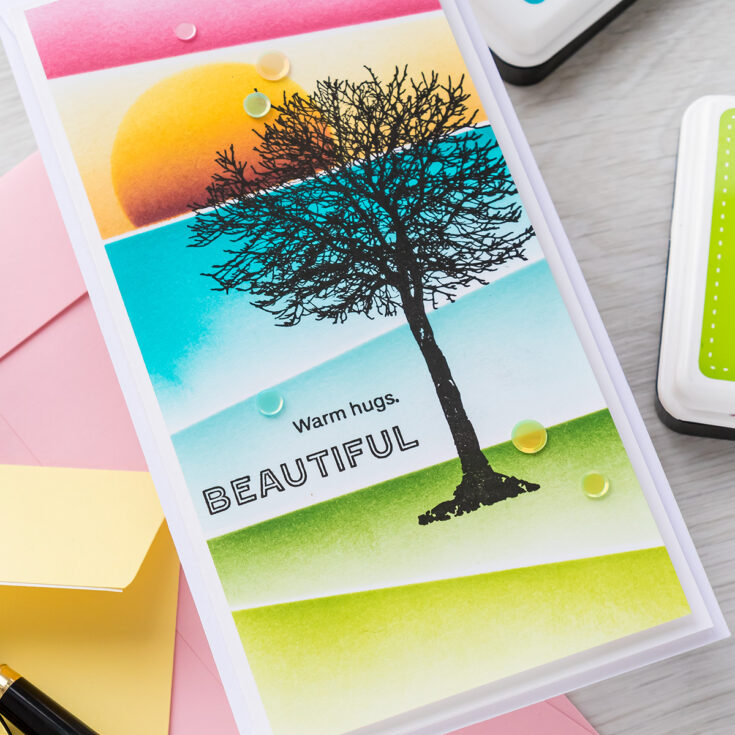
Finally, I embellished my card with sequins from the Strawberry Shortcake mix – it contains not only purple and pink sequins but also pale green, blue, and yellow, perfectly complementing the colors used to create a background for my card.
I hope you enjoyed this video and will give this idea a try! Have fun stamping.
WATCH THE VIDEO:
SUPPLIES:
|


Thanks so much for stopping by, and thanks to Yana for being our guest!
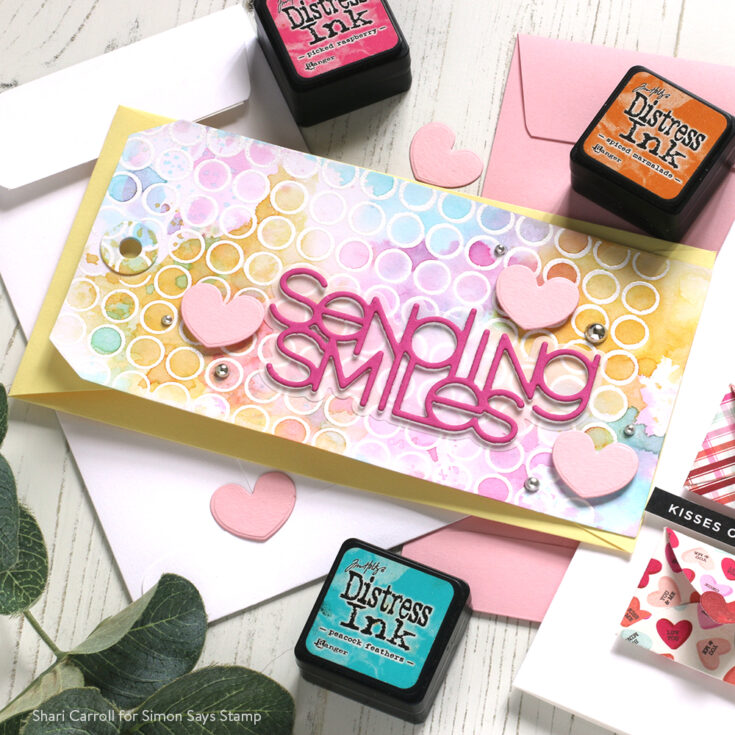
Did You Know? February 2021 Edition!

Hello crafters, it’s Shari Carroll here with you! Today I have a new edition of our popular Did You Know series!
If it’s your first time seeing this feature, each month we bring you fun facts, creative tips, and even crafty hacks about your favorite supplies and brands; you can then use these awesome tips that you learn in your next crafting projects! Are you ready to learn some fun tricks? Keep on reading!
We have a few new Simon Says Stamp products that I want to highlight for you that are becoming fast favorites! I’m all about keeping great staples in my toolbox and these next items are winners in my book!
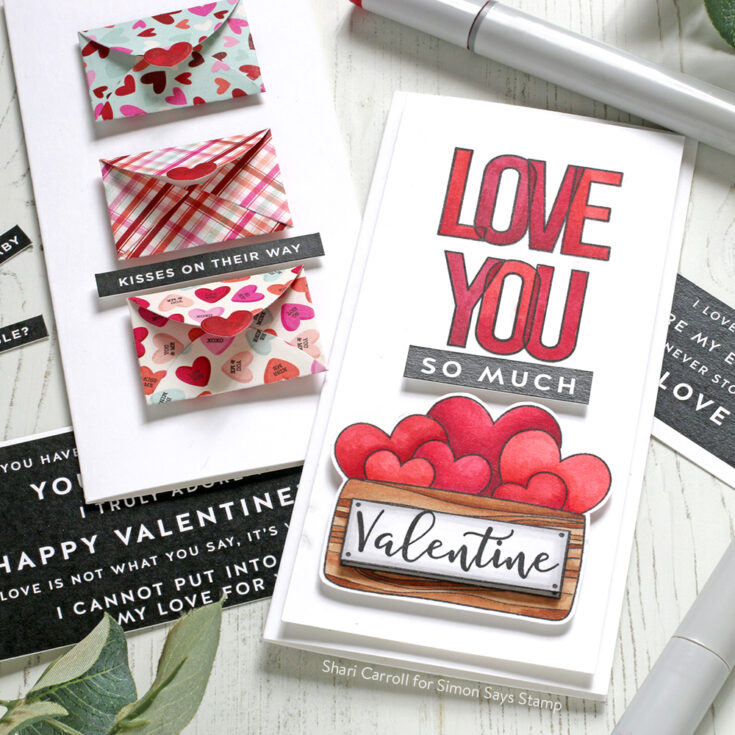
There’s a new kid on the block!
Check out our new Mini Slimline notecards. This new card measures 3.125 x 6.25 inches and is made from our popular 120# cardstock which is great for blending Copic markers and does not bleed through to the other side! The cards come in a pack of 10 and are prescored.
They give you the feel of a full size Slimline card where you can use larger stamps and stencils, but they are also ideal for your smaller images and techniques.
I’m super excited about these! Our new Mini Slimline Envelopes not only fit our new Mini Slimline cards, but they also fit #8 tags! I’ve always wanted to send tags in the mail and now I can.
We’ve introduced 3 colors for Valentines and Spring. They are White, Cotton Candy, and Lemon Chiffon and come in packs of 6 with a peel-away adhesive so you don’t have to lick them to stick them.
SIMON SAYS STAMP MINI ENVELOPE DIE

Cuteness overload right here!! This is our new Interactive Mini Envelope die set. These dies cut out the envelope with score lines for easy folding and a tiny heart to attach to the flap. It also comes with a mini notecard that you can decorate and slide into the finished envelope.
Cut them out from your favorite pattern papers, pair them with Simon Says Stamp Sentiment Strips to make quick cards in seconds!
SIMON SAYS STAMP EMBOSSING FOLDERS
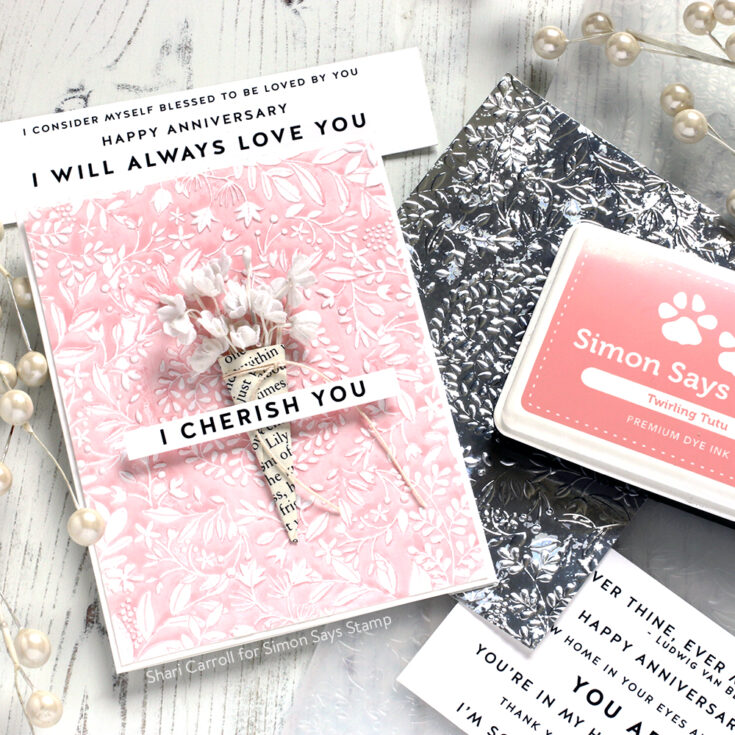
We’ve come out with a nice selection of Embossing folders. They are really easy to quickly add texture to your card background. These are absolutely stunning when used with foiled type papers that are reflective.
I like to ink up the folder to create a letterpress look. You can either ink up the debossed (flat) area for a colored background, or you can ink the raised detailed side for a colored impression.
Tip: Tap your ink directly onto the folder, then use a brayer to smooth out the ink before running it through a die-cut machine.
Here are a few recipies to use with your favorite die cutting machines:
- Spellbinders Platinum Machine – platform and 2 metal shims, embossing folder.
- Sizzix Big Shot Machine – base plate number 1, and 1 cutting plate, embossing folder
- Gemini or Gemini Junior machines – 1 cutting plate, magnetic shim, embossing folder.
- Alternatively, some users have found they got deeper impressions from using the following recipe with the Gemini machines – 1 cutting plate, 4 sheets of 80lb cardstock (cut to at least 4.5 x 6.5 inches and stacked together), embossing folder.
I hope these tips have helped you learn a few tricks that you can use in your card making and crafting… Thanks for tuning in today and spending some time with me!
SUPPLIES:
|


