Make a (paper) cake with Sandra Mouwen
The Simon Says Stamp and Show challenge has been posting challenges now for 3 years, and that needs to be celebrated. This weeks challenge is therefore devoted to celebrating!
Hi, Sandra Mouwen here and I will show you how I made and decorated this 3D cake which can be used as a décor piece, but also can store treats.
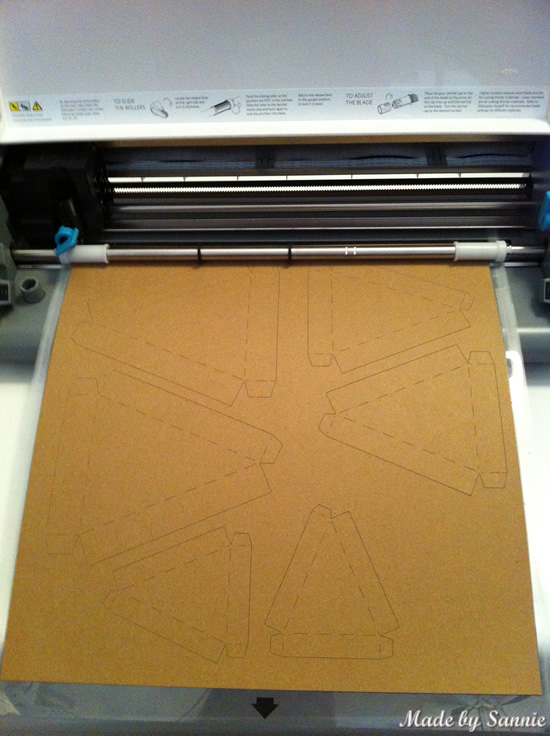
I designed the cake pieces in Adobe Illustrator and made it in two kinds of files. PDF file to print out and cut the parts out by hand and SVG file for if you have a digital cutting machine that can handle the SVG files. Click here to download the zip file containing all the files.
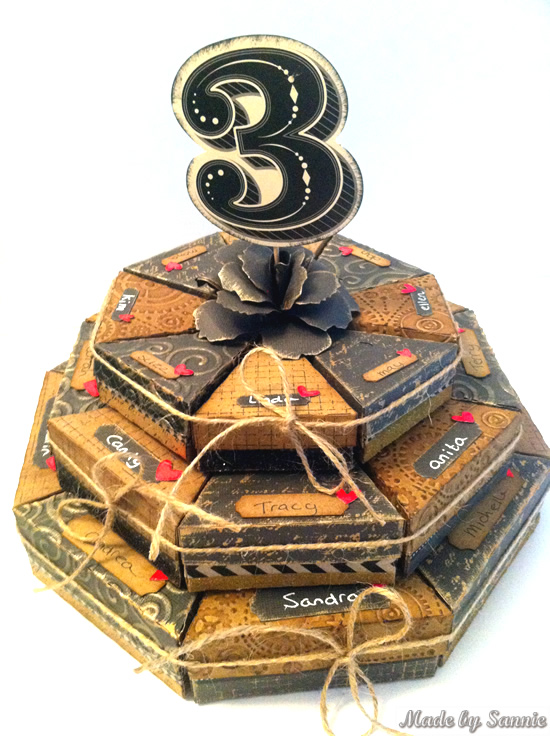
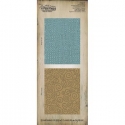
As you can see it’s a 3 tier cake and each layer consists of eight cake parts. I decided to go for a grungy but slightly elegant look and chose for my favorite colors black and Kraft. The whole cake is made out of 10 sheets of 12 x 12 inch cardstock. 5 sheets of Bazzill Kraft and 5 sheets of Bazzil Black cardstock. With the Silhoutte Cameo Digital Cutting Machine I’ve cut out all the pieces. It’s a bit of a puzzle to get the most pieces out of a 12 x 12 inch sheet.
When everything is cut, it’s time to decorate the pieces. I have 4 different designs but only two are really different. This is for three layers.
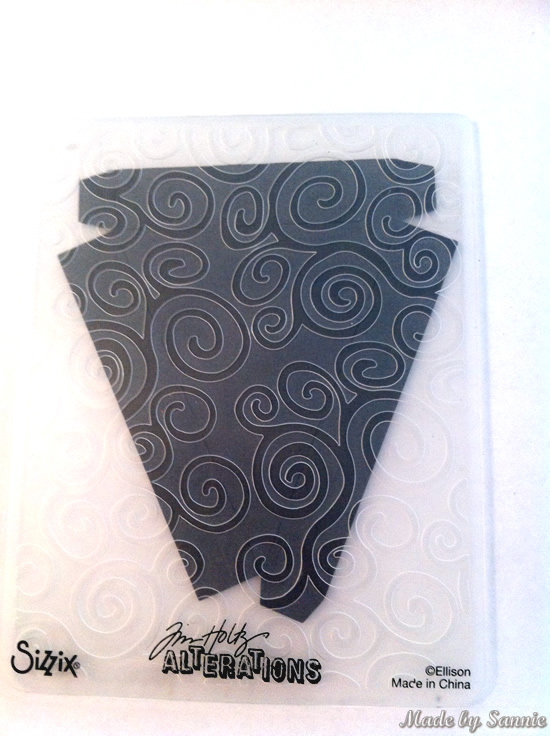
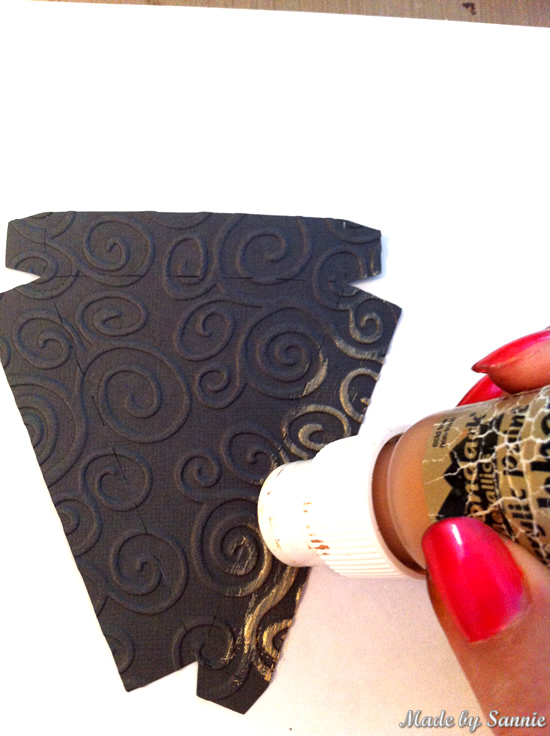
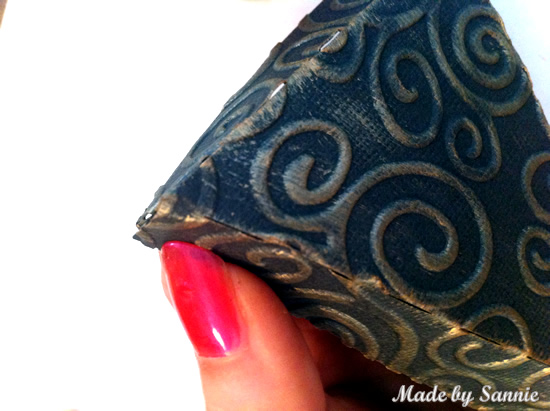
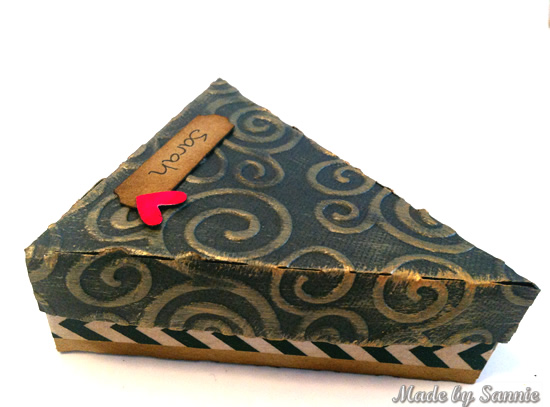
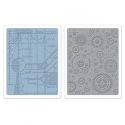
First I made this lid. I embossed it with the Tim Holtz Swirl Embossing Folder. I so love those swirls, that design so versatile!
To see the texture better, I gently went over the raised areas with the Gold Paint Dabber and also over the fold lines.
When the paint is dry, I folded all the lines used some Glossy Accent on the tabs. Glossy Accents is my favorite glue for this type of project, as it’s strong and dries quickly.
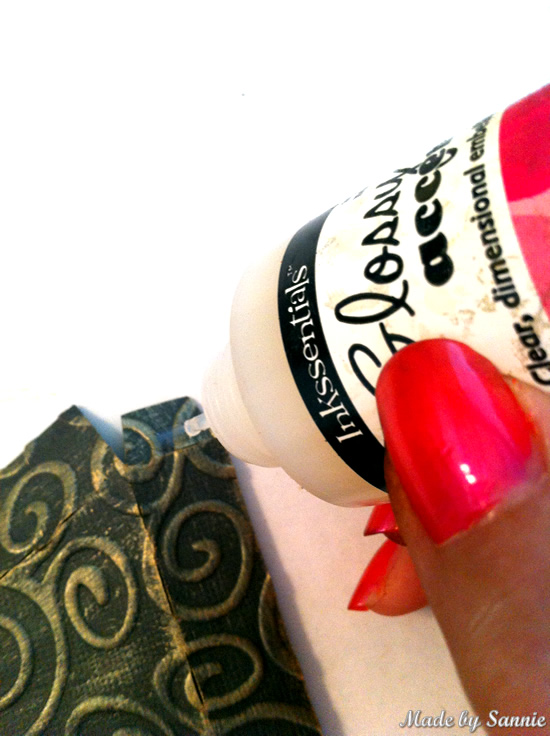
Hold it in place so it can dry for a bit. Repeat this for each tab and the lid is finished.
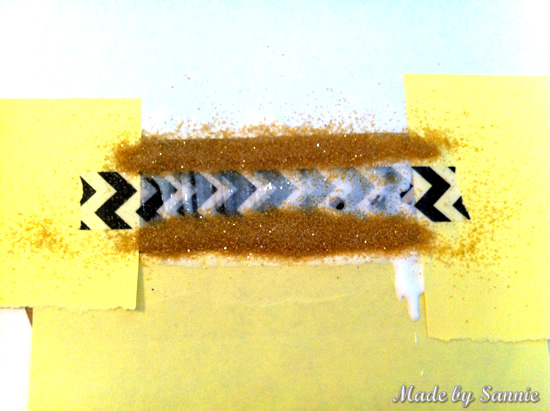
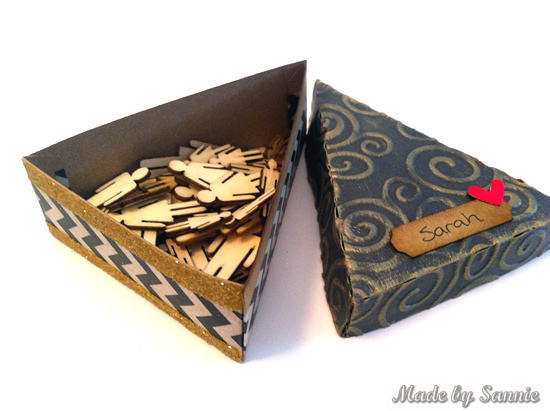
Time to make a bottom part. On the front side I used glitters which look a bit like cookie crumble. This bottom part is Kraft, which is hard to see now. It’s covered with Post-its to cover the areas that don’t need glue. I also covered up the tabs, I don’t need glitter on those either. I placed another piece of washi tape over the one that I want to show. So it protects it from the glue and the glitter.
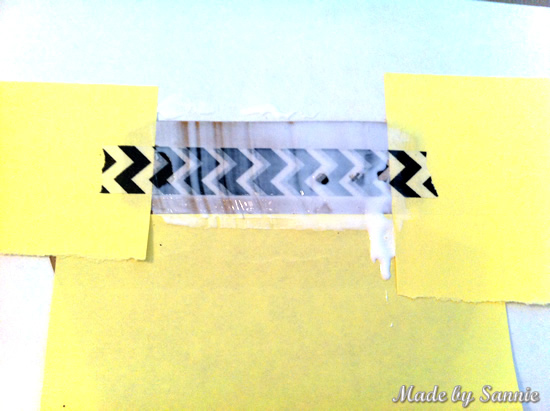
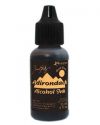
The glitter I used is the Rock Candy Distress Stickles Dry Glitter. I colored it withwith Mushroom and Sunshine Yellow Alcohol Ink to make a cookie crumble color. I sprinkle it on the glue. I placed a piece of scrap paper on top and carefully pressed into it so the glitter will stay better in place. The excess glitter will go back into the container and then I removed all Post-its and the excess piece of washi tape carefully before the glue can dry.
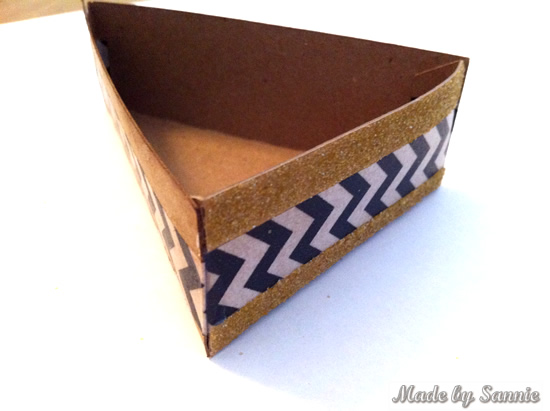
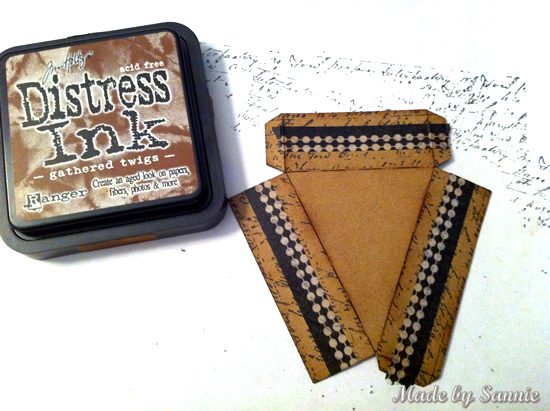
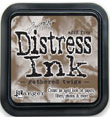
The edges are distressed with Distress Ink Gathered Twiggs Distress Ink to give it some dimension. The last step is to fold it and put some Glossy Accents on the tabs and hold it in place while it dries. The same steps as with the lid.
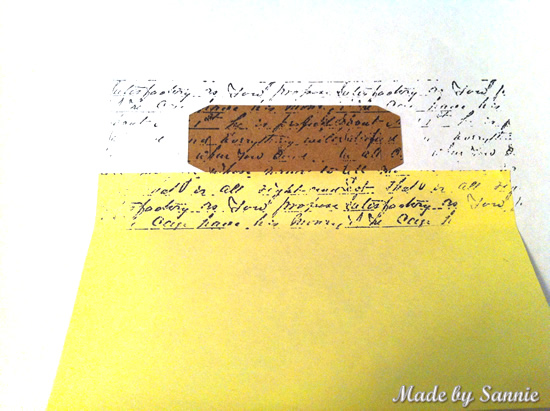
This is the last cake part that I’ll show, since the rest is similar. To align the stamps it’s necessary to stamp in line with the edges of the bottom. I masked all the parts that need to be covered before I stamped.
To make it seem as if there is filling in the cake, I used washi tape on all the edges. These edges are also distressed with Distress Ink Gathered Twiggs Distress Ink to give it some dimension.
The other bottoms and lids are made with the same principle. The black parts I stamped and did the fold lines and edges with Gold Paint Dabber.
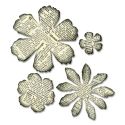
Here are some more detail photos of my finished cake-
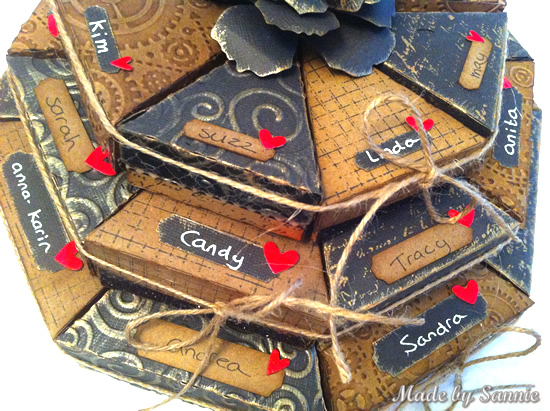
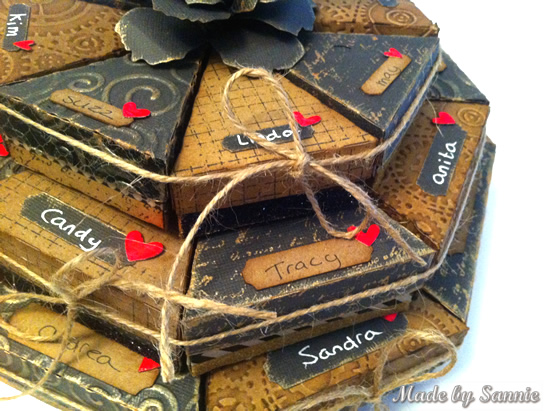
This cake has just enough pieces to have everybody’s name on a slice that has ever been a part of the Simon Says Stamp and Show DT. I tied the cake parts together with a rope so that it fits nicely and it’s also a it more stable.
Hope you’ve enjoyed this tutorial and would like make your own one some day.
Supplies Used:
|
|
|
 |
|
 |
 |
|
|
|
 |
 |
 |
 |
 |
 |
 |
 |
 |
 |
 |
|
 |
|
 |
 |

 Thanks to Sandra for this amazing and delicious looking tutorial! I love how she made the most aged and vintage cake I’ve ever seen – and I’m thinking this would be super fun for a party!
Want to join in the party? Then join us in this week’s challenge! For the full rules, read the “challenge rules” posted in the side-bar here on our blog, and be sure to enter your challenge in the post below this one.
Challenge Badge

Spotlight Badge


Wow Sandra! Wat een gave creatie! Niet normaal! En dan ook nog alles kant en klaar voor ons om het na te maken in eigen stijl! Dank je wel! Groetjes, Gerrina
Very cool! love all the details you added and the texture is wow.
Sandra this is FANTASTIC!!! I love this vintage cake. Thanks for creating the cutting files. Can’t wait to try this. What a way to celebrate 3 awesome years at SSS&S.
What a brilliant birthday cake this is!!!! Awesome! Congrats on the third anniversary btw. ;)
Hugs,
die amelie x
I knew there was cake! and a slice just for me! Wow! This is a fabulous cake to celebrate the anniversary of our challenge!
Wow, what an awesome creation, love it. And thanks for a great tutorial.
Wow Sandra! What a fabulous cake! The gold detail and all the distressing looks fantastic! Such a creative project! Thanks for the tutorial!
Sandra, this cake is so clever! What a wonderful design and perfect for a celebration! Love the embossing and gold highlights! Hugs!
This is so fabulous! I loved it immensely. Thank you so much for providing the pdf file and the tutorial.
Wow one piece especially for me. Love your cake Sandra, fantastic details a d tutorial too. Love the touches of gold and all the dimension and texture. Great way to celebrate 3 years. Tracy x
Are you kidding me?!?!? How awesome is this!!! Downloaded the files and pinned the tutorial. Thank you!
That is really awesome, thanks for the file and the tutorial, great ideas! ~Diane
What a amazing project! Happy 3rd birthday Simon Says Stamp and Show challenge!
This was totally yummy!!
Wow!!! What a wonderful cake — You are truly creative
Sandy
Some people have no end to their creativity and thank you for sharing it
OMG!!! Love this! I especially like how you made a slice to celebrate very DT person – nice way to celebrate. Thanks for the tutorial too.
Oh my what a fun and amazing project. I so enjoyed your tutorial and would and NEED to make one of my own. Well I do over do “need” but I am sure you all understand. LOL Thank you for sharing you. Linda aka Oz
Wooooo…. Sandra, this is such a fantastic project! All the details are gorgeous. Thank you so much for the great tutorial. :)
This ist adorable! I love Kraft paper and your black/brown color mix, especially the lot of wonderful details, embossing, painting and stamping. Absolutely amazing! Thanks a lot for the templates, too! :)
best wishes, serafeena
Wow Sandra!!! This is so cool! What a great idea and the vintage look is perfect. The craft, black, gold and colourized glitter looks wonderful together. Most of all I love this fun idea. I wish I could see it in real life.
Thank you for all your sweet comments! Had a blast making this cake! Hugs, Sandra
You never cease to amaze!! What an amazing project. So very creative!!