Faux Leather Wish Pouch By Linda Ledbetter!
Hi There!
Today we have a really cool project by Linda Ledbetter that features some Tim Holtz techniques! Linda’s creativity is never-ending…whether she’s showing a project on or off the page, I always find myself thinking “how did she think of that??” Her style is fun and grunge-tastic, and she is one of the nicest people I’ve had the pleasure of working with! Here is one of her latest projects, complete with detailed instructions!
Happy New Year, you guys! It’s the season of fresh starts, and I’m thrilled to have been invited to create another tutorial for my friends at Simon Says Stamp. I think a cute little pouch to hold wishes feels like a nice project to kick off 2013. You can wear it as jewelry or hang it somewhere special (or, like me, from your rear view mirror…). You’ll recognize a classic Tim Holtz grunge technique in this tutorial, along with a new way to use that darling Sizzix Alterations Artful Dwellings die. Ready? Let’s do this!
Begin by using the Artful Dwelling die to cut two identical shapes from Grungeboard.
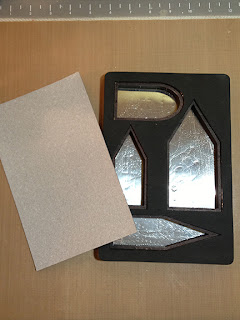
I used the largest of the house shapes for my pouch so I can store lots of wishes!

Next, emboss the two shapes with the Sizzix Alterations Steampunk die.

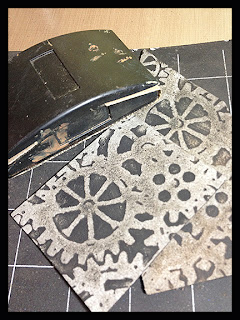
Working on a cutting mat, use your ruler and a sharp craft knife to carefully cut away the triangular top from one of the shapes. The piece that remains will be the front panel of your Wish Pouch.

Still on the cutting mat, stack the piece you just cut on top of the piece that’s intact so the sides and bottom align perfectly. Use the ingenious Tim Holtz ruler to plot guide holes for your stitches. I spaced mine 1/8 inch from the edge, and 1/4 inch apart. The see-through ruler makes it really easy to line everything up just the way you want it!

Use your craft pick or an awl to punch holes through both layers of Grungeboard. Take care to keep the two pieces aligned. When you’re finished, you’ll have guide holes through both layers of your pouch-to-be.

Use dark colors of Adirondack Paint Dabbers to paint both sides of both pieces of Grungeboard. I mixed Black and Espresso for mine.

Use your Sanding Grip to sand the paint off the raised areas of the embossing. Remember, never sand directly on a nonstick craft mat! Always sand on a cutting surface or a piece of scrap cardboard.
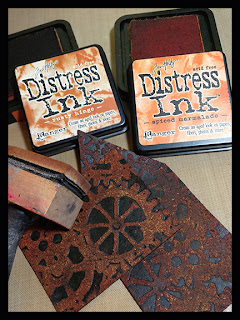
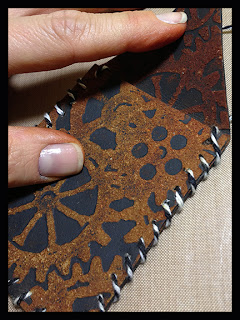
Use an Ink Blending Tool to rub bright colors of Distress Ink onto the sanded surfaces. I used Rusty Hinge and Spiced Marmalade.
Now, punch two holes for the hanging cord. Make sure the two pieces of Grungeboard are aligned, then punch a hole on one side of the back panel, right at the top edge of the front panel. This hole should line up with the other guide holes on that side of the pouch. Repeat on the other side.

Cut a long piece of twine and thread it into an embroidery needle. Begin stitching by running the twine from the back of the pouch through the one of the holes you just punched for the hanging cord. Then, run the needle from front to back through the top guide hole on the same side. Bring the needle back around to the front and run it through the next guide hole. Keep stitching your way around the pouch, always running the needle from front to back.

When you’ve stitched all the way around the pouch to the other side, run the needle through the hanging cord hole on that side, again from front to back.
Plan where you want to place your Word Band. Fold the back triangle down over the front panel to create a flap, and arrange your Word Band so its bottom edge is about 3/4 inch from the tip of the flap.

Thread a new piece of twine onto the embroidery needle, and run the twine through one of the existing holes in the pouch through the attachment loop on that side of the Word Band. Repeat on the other side.

Tie the twine in a knot to hold the Word Band in place, being careful to leave a little slack so the triangle tip can slip beneath it. Repeat on the other side.

Place the pouch on a cutting surface and use your craft pick to gently separate the ends of the twine that’s holding the Word Band in place.

Decide what length hanging cord you want, then tie the two long ends of twine into a knot. Fray the loose ends with the craft pick.

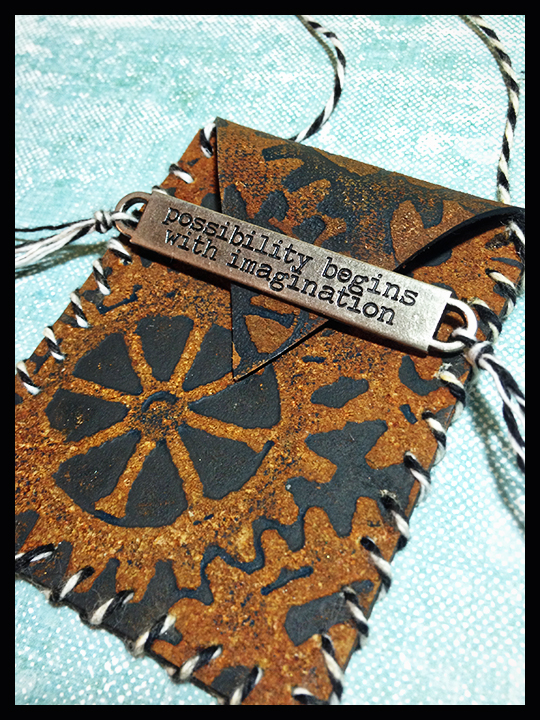
Here’s the finished Wish Pouch!

And, here’s a wish to slip inside it.

Thanks so much for hanging out with me today, and thanks to Simon Says Stamp for being awesome! I hope you enjoyed this project, and please let me know if you make a Wish Pouch of your own!
xo,
Linda
Supply List:
                 |
A HUGE thank you to Linda Ledbetter for another fantastic project! How cool is that pouch?! Make sure to swing by Linda’s blog for the Compendium of Curiosities Challenge Finale that honors Tim Holtz for his Birthday!
-Sarah
I hope you all have a phenomenal week! Make sure to stay tuned for lots of CHA coverage: COMING SOON!


There are no comments.
Leave the first?