Happy International Friendship Day + Dimensional Background with Distress Ink Refills + Embossing Paste
Hello crafters, it’s Nina-Marie here with you; Happy International Friendship day!
Today is one of those “fun” holidays, in which friendship is promoted and celebrated. As cardmakers, we have many friends around the world that love and support us. And what better way to celebrate International Friendship day than to send a card to one of our friends! I encourage you to send a handmade card to a friend, letting them know how much you love and appreciate them.
Need inspiration for making a friendship card?? Well, I have a bright and happy card to share with you today in honor of this special day! This card spawned from a crazy experimental-idea that I had one day and just had to try.
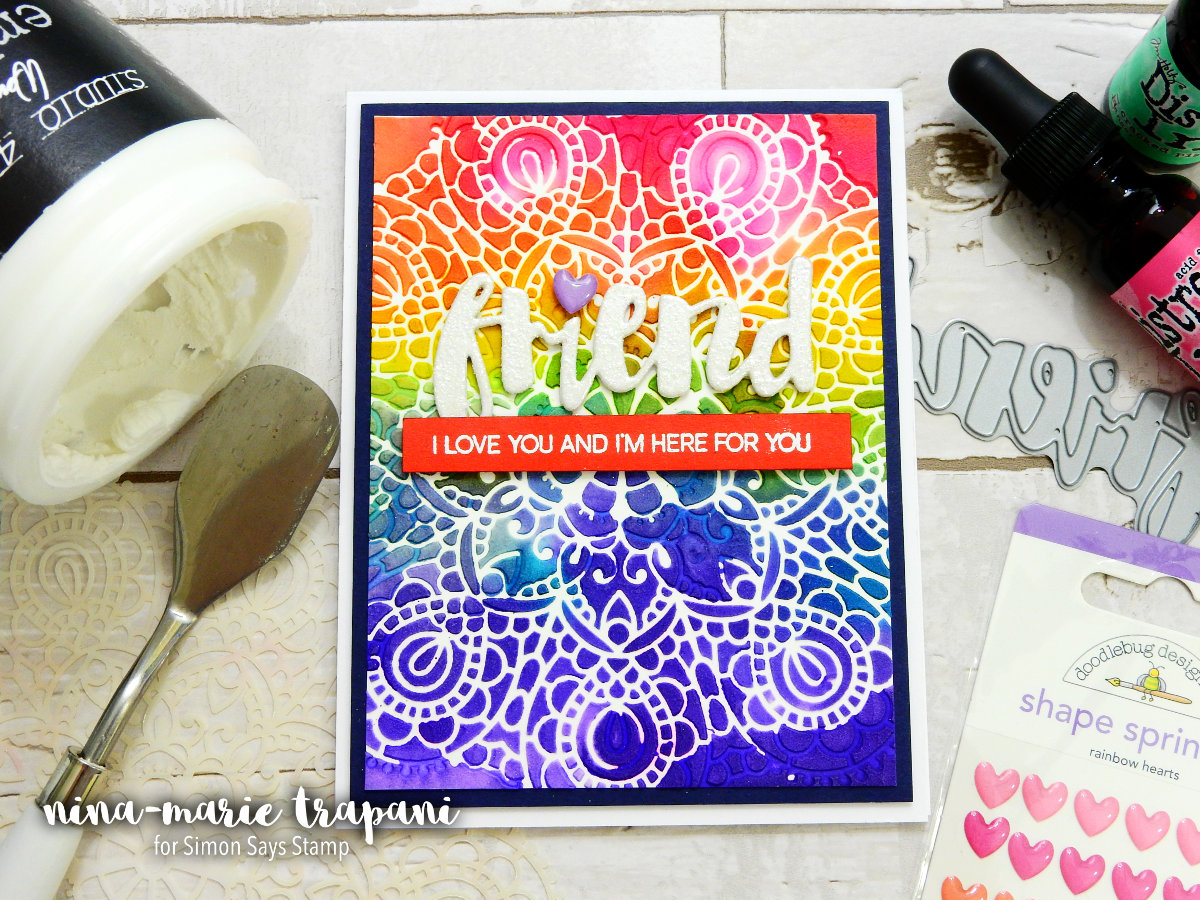
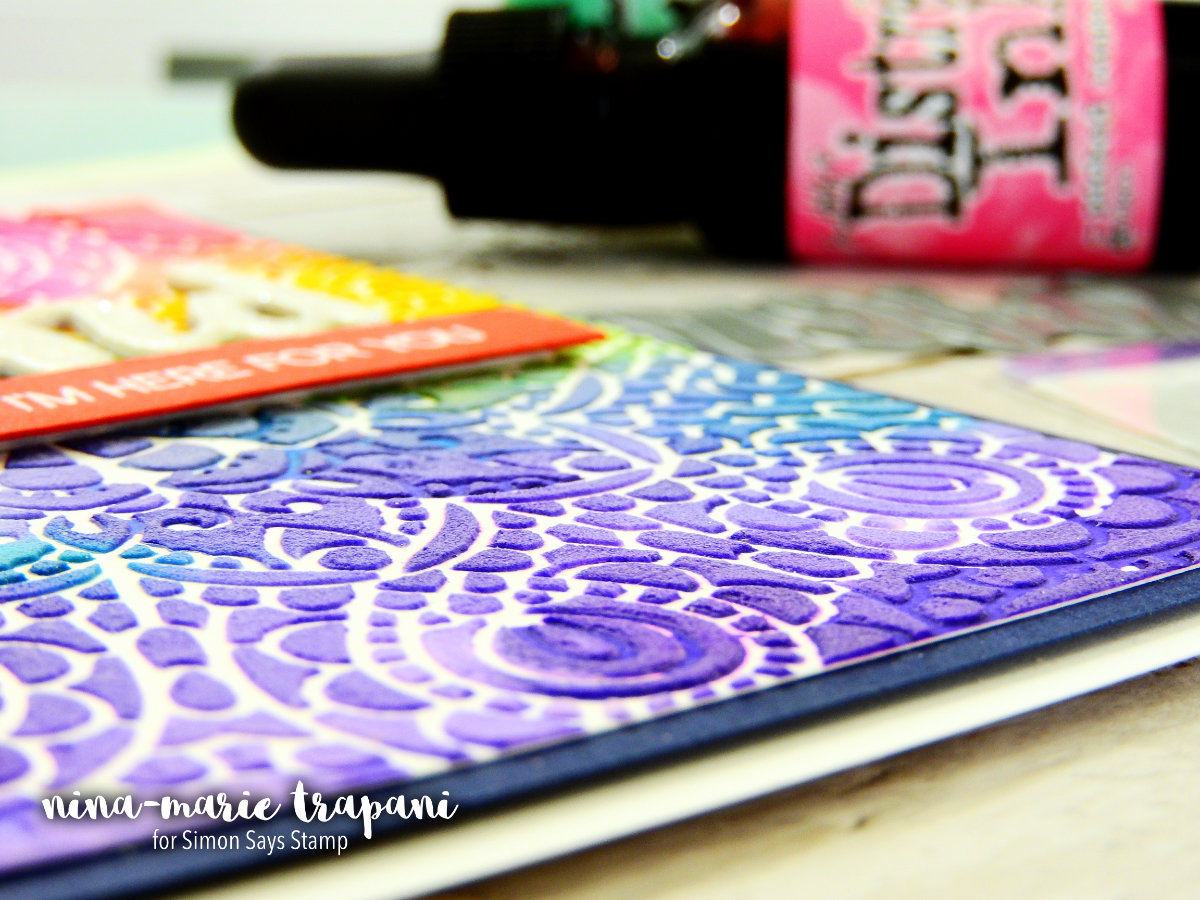
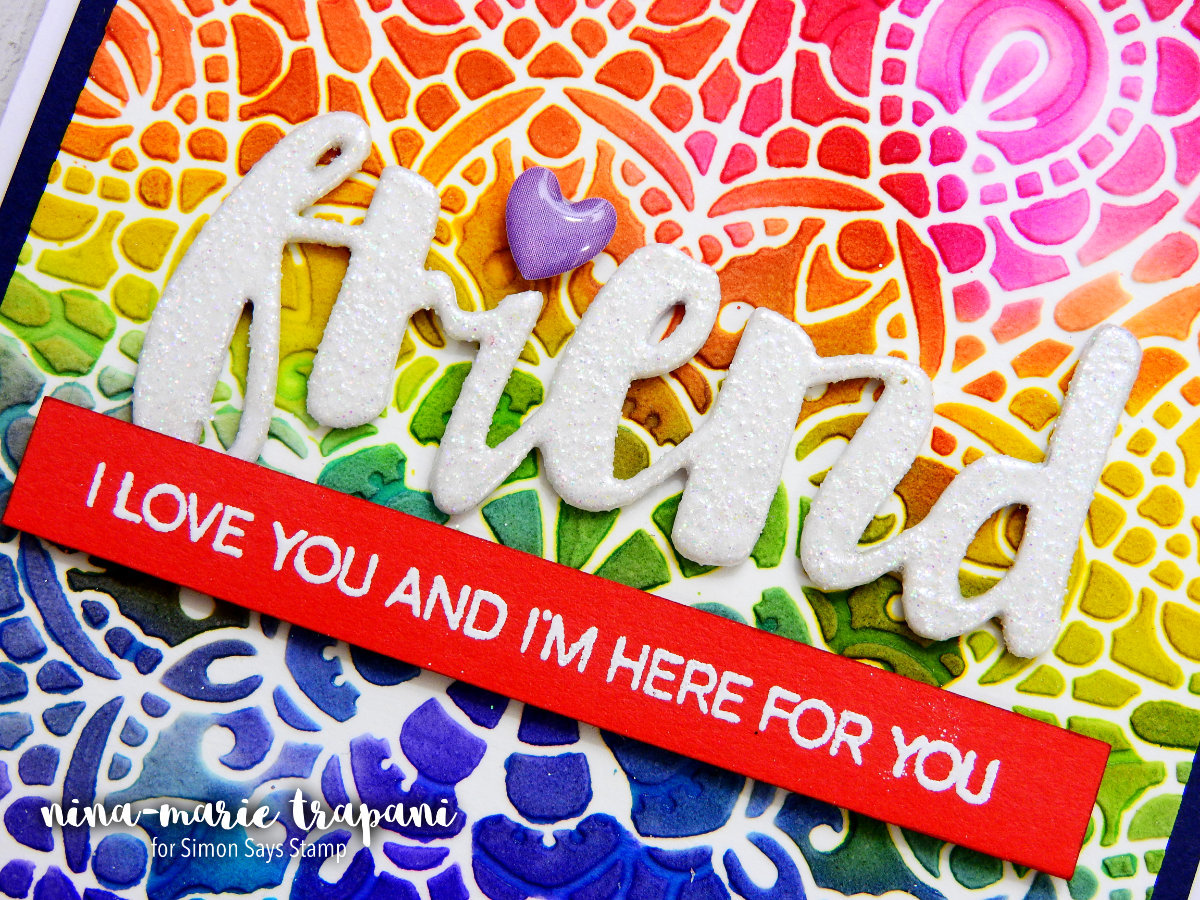
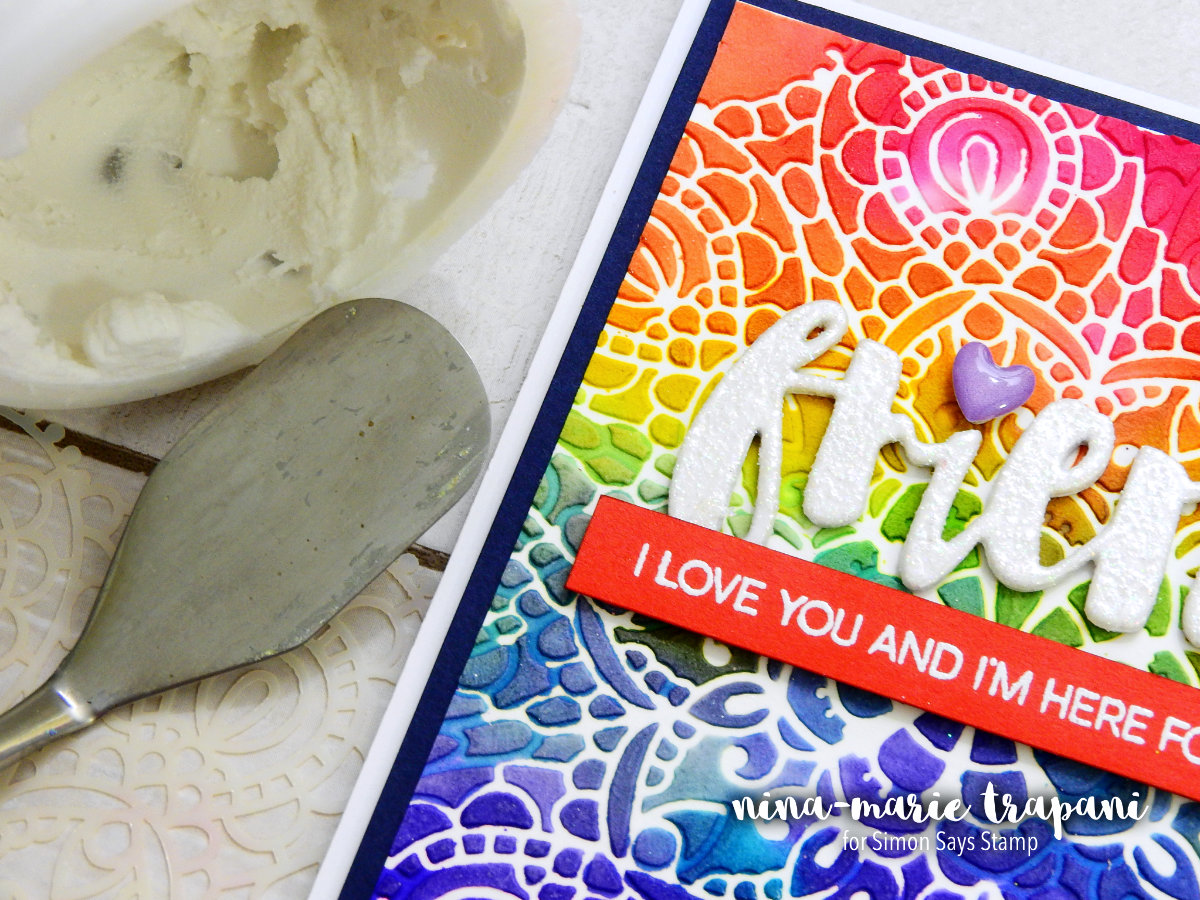
I wondered what would happen if I combined Distress Ink refills with Embossing Paste. I’ve done techniques in the past where you color the Embossing Paste with Distress Ink refills and that looks cool too. But my idea was to add the Distress Ink refills after I applied the paste onto my card. The result was even better than I had hoped!
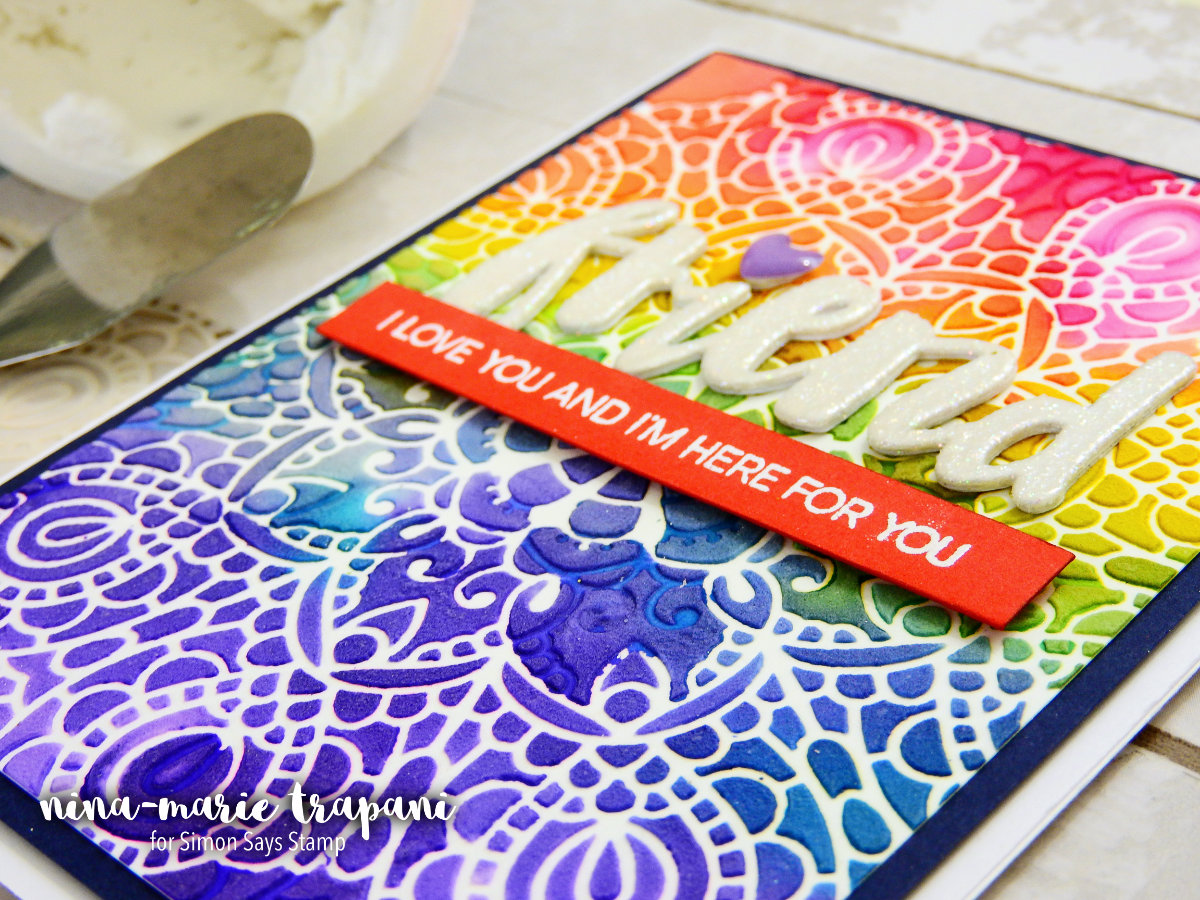
There is such a unique blend of color by using the refills in this way! This has more of a watercolor effect, yet it still has the dimension of the Embossing Paste.
Overall, the technique is really easy to recreate. The hardest part is letting it dry, LOL! I ended up letting this dry overnight because I wanted to ensure that the paste was completely dry. Depending on your climate, drying time will vary.
I finished off the card with a die cut friend word from Simon Says Stamp and a supporting sentiment from Altenew. I covered the friend die with glitter embossing powder from Tonic Studios and added a little heart Shape Sprinkle from Doodlebug over the dot of the “i” for an extra bit of embellishment.
Be sure to watch the video below to see this card in action! I think you’re really going to enjoy watching the Distress Ink refills and the paste combine together for an amazing result!
Thanks for stopping by and visiting with me today; I’ll be back again tomorrow with a new Studio Monday video for you!
WATCH THE VIDEO
SUPPLIES


Blog Candy Alert!! Follow our blog via email and comment on this post for a chance to win grab bags and blog candy! Remember to tag your awesome projects with #simonsaysstamp on social media so we can see what you are creating!


Fantastic idea for a dimensional card!Thank you for sharing :)
Fabulous idea! Love your cards.
Love this! Thanks for the video
Cool card! love the dimension and colors!
I love the stencil you used and your bright colors – perfect for a friend to brighten their day!
WOW such a pretty friendship card!!! Love it:)
What a cool technique! I can’t wait to try it myself!
That’s so cool! I’ve never tried the paste but just might have to give it a try!
Looks like I need to invest in some embossing paste :) Great idea. Love how it turned out.
Wow the embossing paste looks great
Great idea to use products. Very pretty cards.
Nina, what a gorgeous card! I love the bold, bright colors.
Thank you for sharing your new technique. It’s amazing. I love all your video’s and it was nice to see you in this one. Your craft room is amazing also. Thanks for all your great techniques and hard work.
Such a fun technique and I LOVE your shelves in your craft room! May we please
have a tor of your craft room?
Wow, so pretty! Thanks for sharing the technique.
That’s a beautiful, bright, vibrant card.
That is a cool day to celebrate, especially in the crafting world, I met a lot of friends via blogging, I even get a chance to meet them in person, lucky me, what a lovely card to celebrate international friendship day!
I can sense the excitement you had. Love this.
Love the bright colors!
Beautiful card and excellent tutorial; thank you for sharing and happy national friendship day. I would love a grab bag of crafty goodness from Simon Says Stamp!
Your technique turned out great. Thanks for sharing it in a video. Your card is really beautiful.
What a cool idea
Very creative technique!
Great friend sentiment and love the colors and texture.
Such a fun technique! Love how it turned out. I must give this a try.
Beautiful card! Love the technique!
Gorgeous card with a really cool, colourful, boho feel – love the dimension and bold colour!
I love this concept Nina and also how well it turned out. Got to give this a try. Thanks for another great idea.
Your card is a real beauty! Thanks for sharing this great twist on using embossing paste.
Beautiful card and a great technique!
Fun card. Happy Friendship day. I already follow by email.
/this card is awesome!
What a great card – thanks so much for your video!!
GORGEOUS card!
So cool! Love the bright colors and the pearlescent die cut! Thanks for the inspiration!
The colors are gorgeous!
Such beautiful, bright colors!!
Love the vibrant colors & texture! A beautiful card!
Thanks for doing the experiments that I don’t have the nerve to do! What a beautiful and vibrant card. I love it!
How absolutely clever of you to think of this. A gorgeous card with such beautiful colours. Well done!
This is really beautiful! I love the vibrant colors and the texture. Thanks for your amazing video!!
I hesitated using embossing paste for a Long time, but now I figured out they are not as messy as it may seem. And they deliver wonderful results like this very colorful card.
Fabulous design! TFS In my country (Argentina) we celebrate Friends day on July 20th, the anniversary of the Moon Landing.
It’s always fun to experiment!! I couldn’t find the right paper for a scrapbook layout (yes I also scrapbook, LOL), I was doing a page for a Disney trip and I needed paper for the Illuminations Fireworks show at Epcot, so I made my own fireworks background paper. I had a fireworks stencils so I made several colored embossing pastes and made colored fireworks all over two black pieces of cardstock then sprayed shimmer mist over it when it was dry. It’s one of my favorite layouts :) . I’ve never down anything like that before and it very time consuming to make all of the different colors of embossing pastes but so worth it in the end! Thanks for sharing!!
Love your cakindness d and the clour
Gorgeous colours, fun technique.
Stunning. I will for sure be trying this. Your card is beautiful. Thanks for trying it and passing it along.
Wow! The design just pops against all that color!
Such vibrant results with the technique. Waiting for things to dry is such a hard thing to do!
Beautiful card and Video!! Happy International Friendshio Day SWEET Nina Marie!! Have a FABULOUS Week!! ❤️❤️❤️