Be Brave Journal Page
Hi friends! Happy Sunday! Thanks for tuning in today! I’m so pleased to welcome back the amazing Anna-Karin Evaldsson back to our blog as a guest writer today! To see more of her fabulous work, be sure to tune into our Monday Challenge Blog each week. For now, keep on scrolling to see how Anna-Karin created this gorgeous canvas page and enjoy!
Hi everyone! I am so happy to be here today with a fun and easy tutorial. Outside my window, most leaves have now fallen, after a really beautiful autumn season, and winter is knocking on the door. We had our first flurries of snow today. I was in the mood for an art journal page with some lovely fall leaves, but the techniques work just as well for cardmaking, scrapbooking, tags or 3D projects.
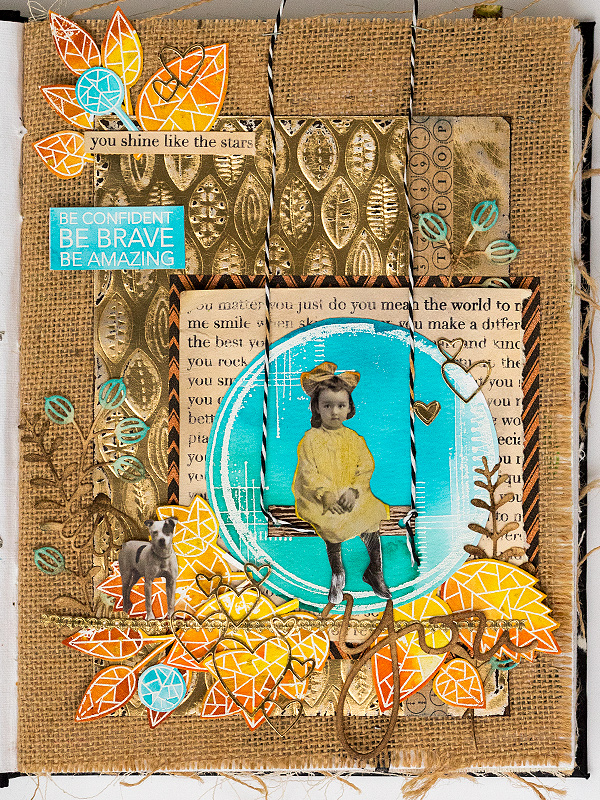
Fall is such a beautiful and vibrant part of the year, full of color and texture, and I wanted to capture that on an art journal page. I really like Dina Wakley’s Media Journal, which has four different surfaces: cotton rag watercolor, canvas, kraft and burlap. The latter works great for depicting the texture of fall, so I worked on one of the burlap pages. There are different types of leaves, and various layers on the page, but I avoided bulky elements, so that my art journal will close relatively flat.
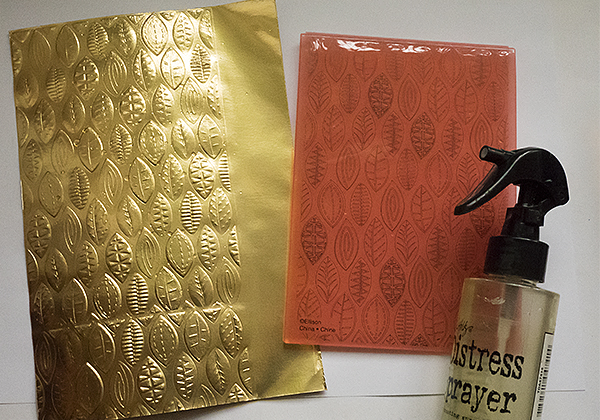
1.I wanted lots of gold on the page and embossed a piece of gold kraft paper (5.5 x 8 in) with Sizzix Impressions Leaves 3-D folder. These folders work best if the paper is slightly moist, so mist the gold paper on the back with water first. Use this sandwich: Sizzix Multipurpose Platform Tab 1, 3-D folder with paper inside, Cutting Pad. Repeat for the lower part of the paper. As you can see, I left the right-hand side of the panel without embossing, just for a different look from what I normally do.
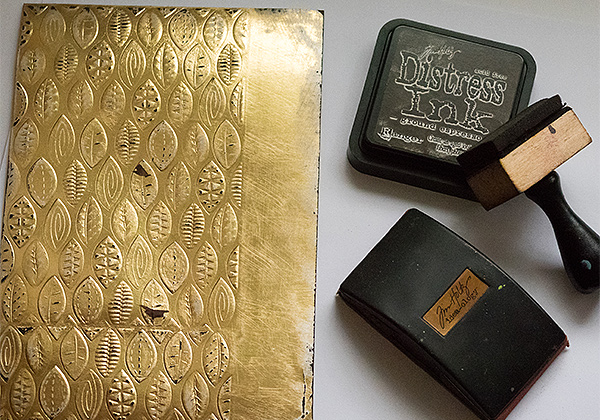
2.Sand the embossed area and the edges slightly and then ink with Ground Espresso. The ink will stick to the areas where the gold was sanded off.
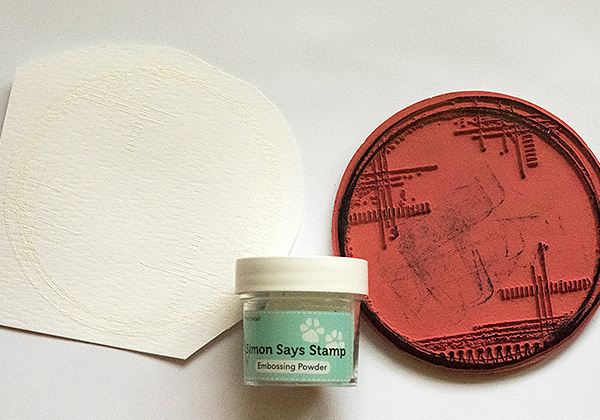
3.White emboss Wendy Vecchi’s Collage Circle on watercolor paper. Always be careful when using a heat tool so that you don’t burn yourself. (I am sorry about the slightly grainy photo, I had forgotten to change the ISO settings on my camera).

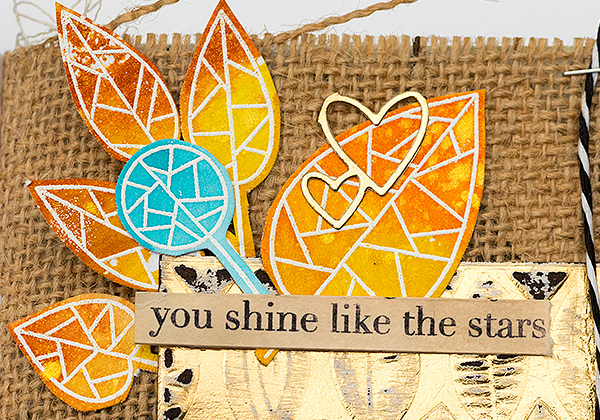
4.White emboss various leaves from the SSS Fractile Leaves set, also on watercolor paper.

5.Roughly cut out the circle and leaves. Smear Distress Inks on a non-stick craft sheet, mist with water and press the papers into the ink. The embossing will resist the ink. Try to vary the look of the leaves.
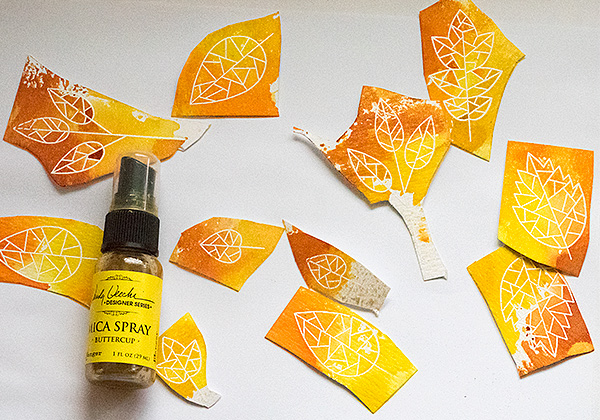
6.To make the leaves shine, they were misted with Buttercup Mica Spray.
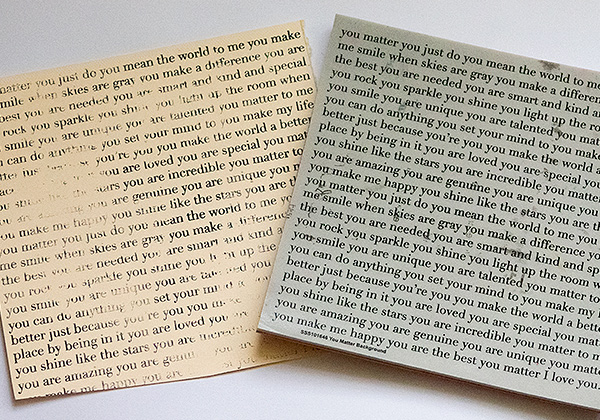
7.Stamp the You Matter Background stamp with Jet Black Archival Ink on manila cardstock. Don’t worry about getting a perfect impression. I wanted a partially stamped look.
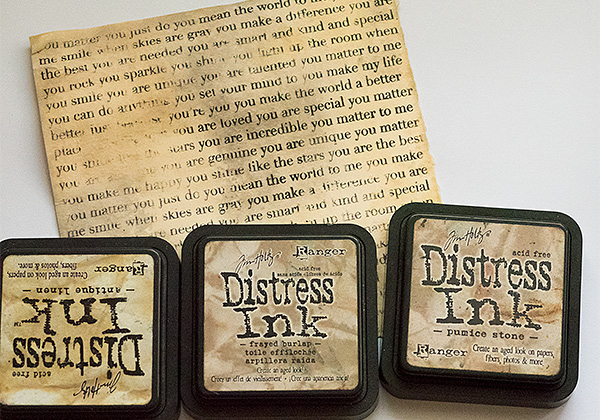
8.Smear Distress Inks on a craft sheet, mist with water and press the paper into the ink to distress it.
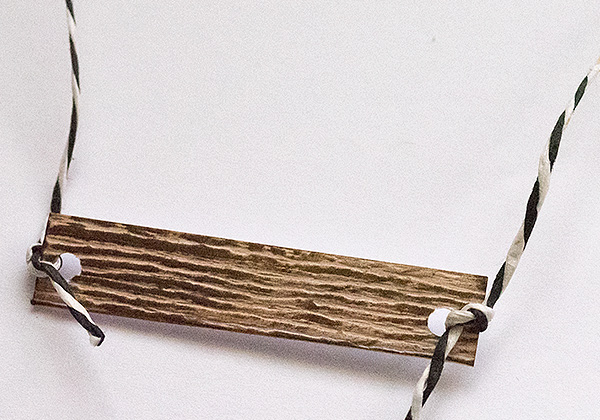
9.Cut a rectangle of woodgrain paper and ink it with Ground Espresso. Punch holes in the ends and tie with twine, to create a swing.
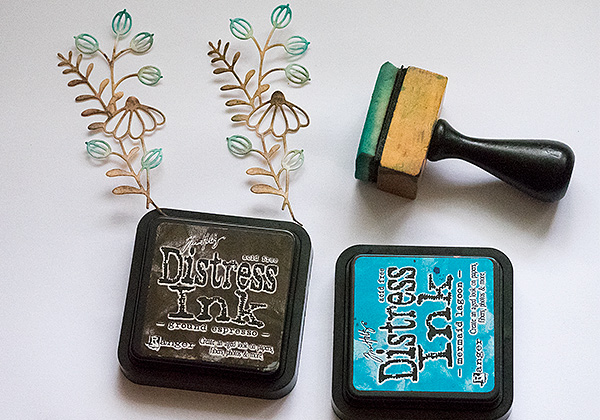
10.Die cut two Cottage Stems from manila cardstock and ink with Ground Espresso and Mermaid Lagoon.
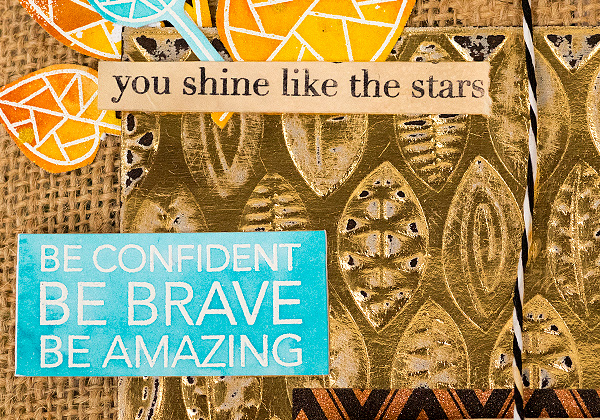
11.For the sentiments, I cut a line from the You Matter stamped background and also white embossed a sentiment from Uplifting Thoughts. The panel was colored in the same way as the blue circle. Here you can also see the effect of the sanding and inking on the gold paper better.
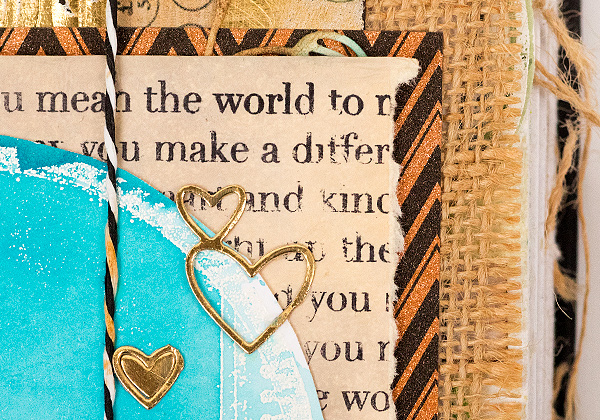
12.Tear some of the edges of the You Matter stamped paper and place a Halloween Deco Sheet underneath. Glue the blue circle on top. Everything was glued down with Distress Collage Medium Matte. The hearts were die cut with the Clipping Heart die.
13. I adhered a piece of design tape down the length of the embossed gold panel.
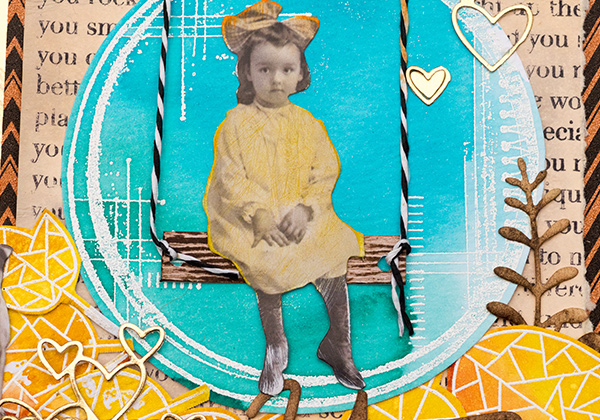
14. Glue the swing and a girl from Tim Holtz’s Paper Dolls set on the blue circle. She was colored slightly with Mustard Seed and Spiced Marmalade Distress Ink.
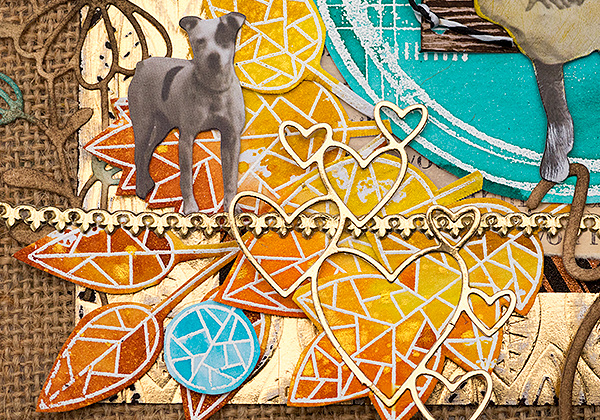
15. Tuck leaves below the circle to make it look like the ground is covered in leaves. I also added a Paper Doll dog, more hearts and a piece of Prima Dresden trim.

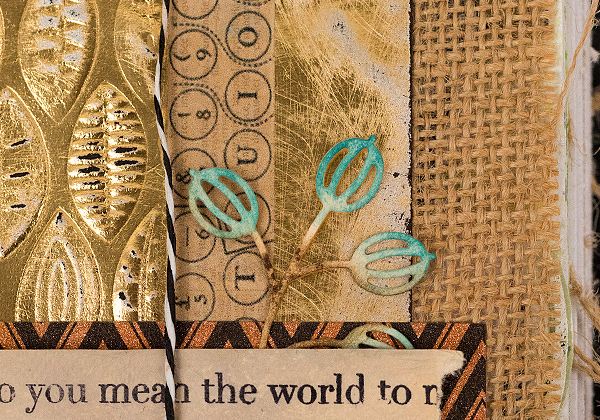
16.Glue the Cottage Stems in place. I cut one of them into two pieces.
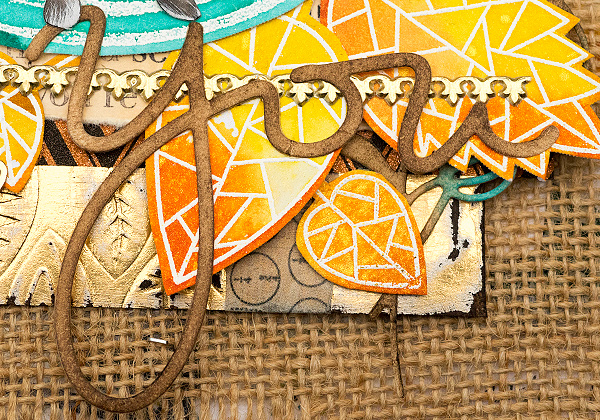
17.I also die cut You from manila cardstock and inked with Ground Espresso. This is a favourite die of mine, since it is so versatile.
18.Add a little group of leaves at the top left corner of the page too. I hope you enjoyed this tutorial and that it inspired you to do a fall themed project, or play around with textures or Distress Inks.
Thank you so much for looking! Happy crafting! Anna-Karin
Supplies:
|


Thanks so much for reading, and thanks again to Anna-Karin for the fabulous inspiration!

Blog Candy Alert!! Follow our blog via email and comment on this post for a chance to win a special blog candy!


How utterly beautiful.
Love the vibrant colors and the gorgeous textures of this page!
Wow, your art journal page is gorgeous!! So much detail, I just love it!
beatiful laout but what a weird big bow in the kid’s hair…would like to see if that would make it on someone’s head today ha..
Lovely idea. Thanks for sharing all the details on how you designed this. Really when you take it in smaller pieces it seems doable, but when you just look at it you can be intimidated. Thank you..
What a beautiful page!
Wonderful journal page!! I don’t have an art journal yet, but when I see projects like these I really get the urge to start one!!
What an awesome page, love this design and all the different textures!
Absolutely stunning.
Like all the wonderful texture, inking & arrangement of this creation.
Melissa
“Sunshine HoneyBee”
Goodness gracious! This is AWESOME!
Awesome colors and textures!
What a stunning piece. Love the orange and aqua colors.
Fantastic page.
So many bits and pieces to look
at – you have to spend time to
see everything and it’s well-worth
the time. Love the little girl
on the swing.
thanks for sharing.
Oh my goodness Anna-Karin this is fantastic! It is a fabulous journal page and I love all of the elements but I can’t get past how beautiful the gold embossed leaves look. Such a beautiful addition to the background! Very nicely done!
Your page is realy cute! I love it!
Such a GORGEOUS page!!!! I love the colors!!!
Just absolutely gorgeous!!
Absolutely stunning! Thanks for taking us through all the layers and details, it’s such a wonderful project! XX
Journalling is my favorite and this is one of the best designs I’ve seen in a long time. Love all the elements that were used to make it so texturally dimensional
Awesomeness! I Love all those bright colored leaves. This page is pure fall to me.
oh this page is just gorgeous. Got to get me the gold Kraft paper and the leaf EF
Great design. Love the colors and textures.
WOW! This is beautiful! I love all the leaves, especially the gold in the background, and the burlap adds more texture.
Stunning page, great warm colours, I love fall. Lovely swing, that’s a good idea, thanks!
Wow–such a gorgeous project! I’ve had those leaves on my wishlist since they came out & now I really want them!
I do so appreciate the “how to” for all of the lovely details on this project!!
Beautiful journal page!
WOW such a beautiful journal page!!! LOVE the colors:)
What a beautiful creation! I thought the girl on the swing was from an old family photo!
So much detail! So gorgeous, so rich, so many layers, colors, and textures, and everything is absolutely perfect. Wow!!
THIS is beautiful and I love the detailed tutorial!
This is just gorgeous! Love the gorgeous touches of gold!
So many techniques and elements, amazing!
What a glorious work of art! Just amazing all those layers and textures and colors. WOW
Great page (makes me smile)! Love the excellent photos of all the wonderful details.
This is fabulous on so many levels!!
Love that leafy gold background.
Lovely! The rustic with the gold foil is an awesome combination!
So many wonderful layers and textures!!!
Such a lovely journal page with a wonderful array of embellishments. tfs
Wonderful – I especially love how that blue just leaps out at you, with all those wonderful fall colours in back.
What a gorgeous journal page with so many fun techniques! Thanks for the tutorial!
This is lovely! I love the techniques you have used.
Beautiful page with a lot of great elements! Every little detail pulls everything together!! I love your page, it’s beautiful!! Thanks for sharing .
Beautiful journal page!!! Love your technique!!!
Really beautiful page. Thanks for sharing.
Oh wow, i can see the work of heart put into this fabulous piece!
Great ideas.
Love the colors and the textures and the swing.