Brave Girls Unite!
Hi readers! Happy Wednesday! Congratulations! You’ve almost made it through the hump! ;) Today we have a gorgeous tutorial in honor of brave girls by Richele Christensen! Welcome back, Richele! This post is packed full of tips and tricks so be sure to read through! Enjoy!
Hello, it’s Richele! I’m so honored to be back here on the blog today.
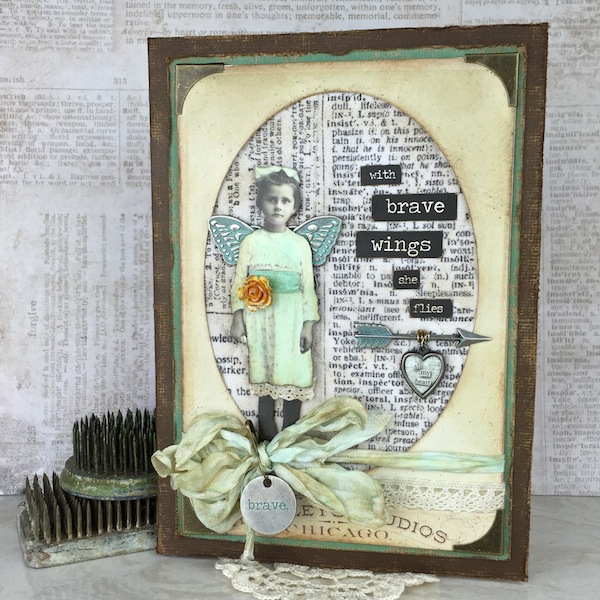
Today is all about the details that go in to creating a project. What makes a project special is all those little details. Adding color, an embellishment or DETAIL is what will make your project memorable. Today’s card features photo tinting with Distress Inks, the new Distress color “Cracked Pistachio” and adding details.
-
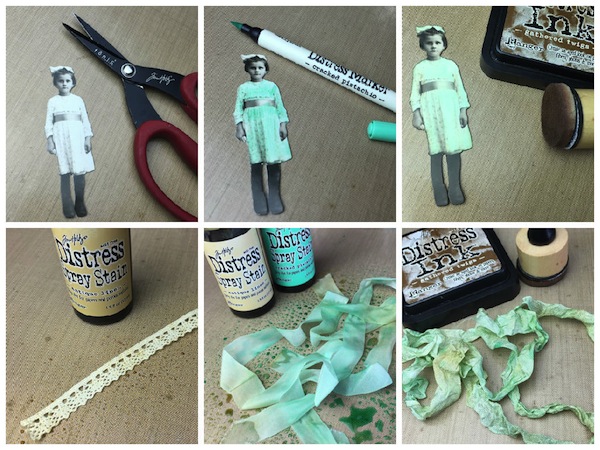
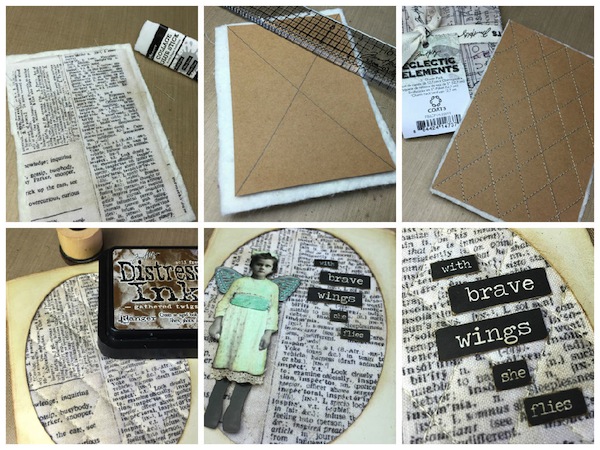
Cut Found Relative out with scissors.
-
Color the girls dress and hair bow with Distress Marker, let soak in for a little then blend the color with a cotton swab. Don’t you love this new color “Cracked Pistachio”? You could even use “Abandoned Coral”.
-
Ink the edges of the girl with Gathered Twigs Distress Ink on an Ink Blending Tool.
-
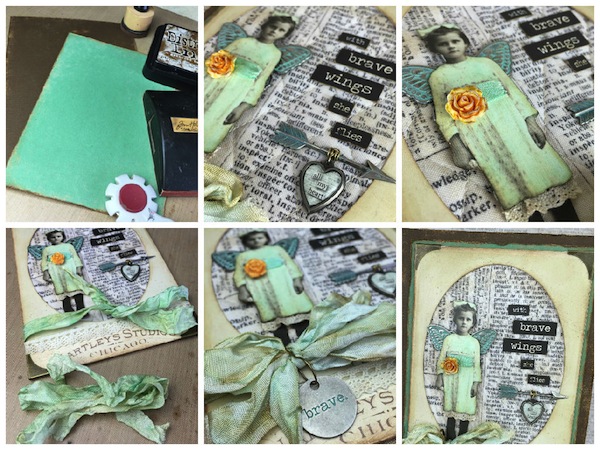
Color lace with Antique Linen Distress Spray Stain. Add the color in a few spots to give it a worn look.
-
Spray the Crinkle Ribbon with water, this will help the ink spread and stay light. For more intense color don’t add any water. Spray the ribbon with Cracked Pistachio and Antique Linen Distress Spray Stain.
-
Dry the ribbon with a Heat Tool and as it dries scrunch it up. Continue to heat and scrunch until the ribbon is completely dry.
-
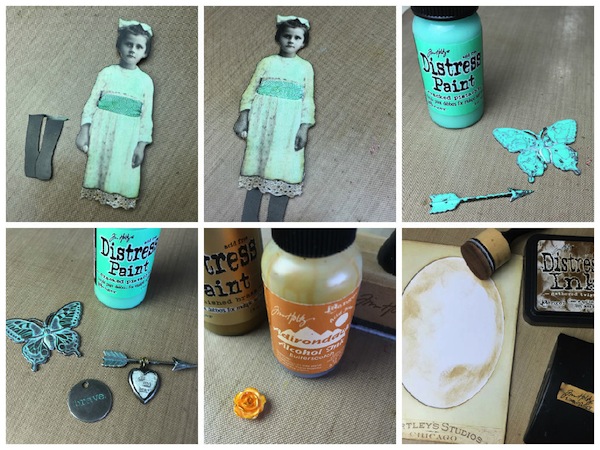
Cut a slit on both sides of the waist, fold ribbon in thirds, thread ribbon through slits and adhere on back. Trim legs off the little girl, adhere lace to the bottom of her skirt.
-
Adhere legs back on to the little girl behind the lace. These are little detail that are not necessary…but oh so pretty.
-
Paint metal embellishments with Cracked Pistachio Distress Paint and let partially dry.
-
Wipe off excess paint with a dry cloth before it completely dries to reveal the raised areas of the metal.
-
Apply 1-2 drops of Alcohol Ink in the center of the Heirloom Rose, spread ink with a brush or applicator tool and let dry. Apply a little Tarnished Brass Distress Paint to the tips of the petals.
-
Sand and ink the edges of the Cabinet Card with Distress Ink on an Ink Blending Tool.
-
Cut a piece of cardstock 3 3/4” x 5 1/2”. Cut batting and fabric a little larger then the cardstock. Adhere layers together with the batting in the center using a glue stick.
-
Draw pencil lines on the back of the cardstock from corner to corner diagonally.
-
Continue to draw lines 3/4” apart. Stitch on all the lines with a neutral color thread. If you’re not a sewer no problem just use a piece of cardstock.
-
Slip the quilted fabric in the Cabinet Card Frame and add a little Distress Ink with an Ink Blending Tool.
-
Adhere the painted butterfly and the little girl to card using Multi Medium.
-
Choose a phrase from the new Small Talk Stickers. These stickers come in white or black background with lots of different phrases. For a variation, mix up the phrase with Big Talk to give it interest. Lightly sand and ink the edges with Distress Ink.
-
Cut brown Kraft’core cardstock 10” x 7’, score and fold in half for the base card. Cut the color matte 4 1/2” x 6 1/2”. Sand these pieces, distress the edges with a Paper Distresser and ink edges with Gathered Twigs Distress Ink on an Ink Blending Tool. This is my all time favorite cardstock. Love how when you sand it reveals the kraft core, adds a great texture. The inside of the card is kraft too so it’s perfect for writing a message on the inside of the card.
-
Create the Heart Charm using the included printed heart and epoxy stickers. Attach heart to arrow with a small piece of wire. Adhere arrow to card.
-
Adhere Heirloom Rose at the waistband.
-
Adhere lace around Cabinet Card Frame. Tie a big bow around the card with the ribbon.
-
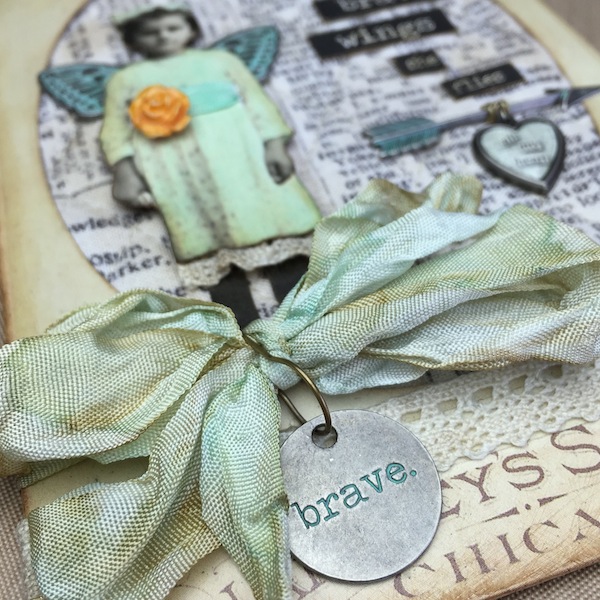
Attach the Typed Token with a Loop Pin to the center of the bow.
-
Add Mini Corners to the Cabinet Card Frame by squeezing them on the corners with pliers. Adhere Cabinet Card to matt and then to base card.
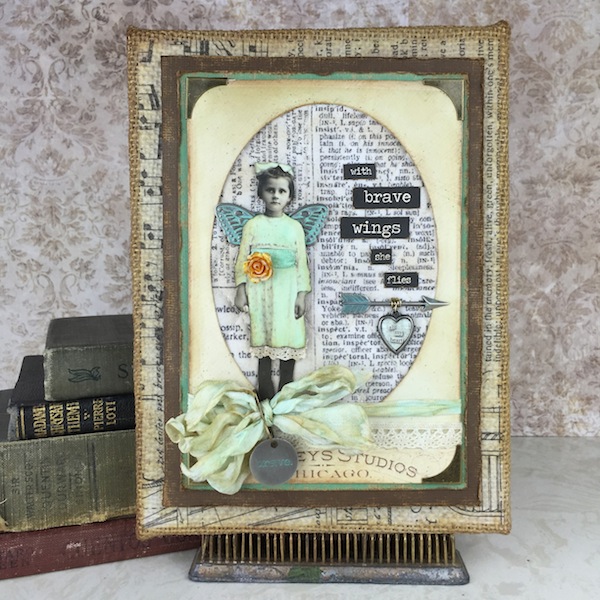
Lots of details to admire!
When creating your next project…add some DETAILS to make it even more beautiful!
Option…you can mount the card on to a Burlap Panel for a pretty home decor piece.
Thanks so much for dropping in!
Richele
SUPPLIES:
 |
 |
 |
 |
 |
 |
 |
 |
 |
 |
 |
 |
 |
 |
 |
 |
 |
 |
 |
 |
 |
 |
 |
 |
 |
 |
 |
 |
 |
 |
 |

Blog Candy Alert!! Follow our blog via email and comment on this post for a chance to win a special blog candy!
Congrats! Blog Candy Winner!
From: Birthday Love and Hugs: Donna Lewis!
Please email Samantha ([email protected]) with your mailing address and the name of the blog you won from to claim your prize!


Very beautifully put together! :)
Love how she used her colour media to put it all together.
Beautiful card with a lot of detail.
Richele- thank you so much for sharing your step outs- this is just fabulous! I love your brave girl and her yummy pistachio !
I love all the little details added to make this so sweet! The lace around the bottom of her dress is so clever and oh so darling! What a great piece!!
This is absolutely gorgeous! Love the vintage!
Such a cool card. Love this Distress inl color.
What a beautiful mixed media piece! I know it’s a small detail but I really love the stitching you did on the background…it’s just gorgeous!
That,ribbon looks,really pretty.
Awesome project, love the pistachio!
Love the pistachio. Beautiful!
So beautiful! I love the finished product and thank you for showing how you made it!
Great project.
I like all the details on this card it gives it such interest!
stamping sue
http://stampingsueinconnecticut.blogspot.com/
WOW, This is amazing!!!!! I Love it so much. Thanks for showing us how you did it. What talent to put this all together, it just amazes me, wish I had it. I have to make this, I have most of the stuff ( I love tim Holtz), the few things I need I added to my ” project list” for my next order. Thanks again.
So cute! I love the faux quilted the background
What a beautiful card. I really love the vintage look. thanks.
Great work here. I love it.
Beautiful AND inspiring, love it!!!
What a piece of art! Loved the vintage look with the color. Absolutely gorgeous.
Love this! Thanks so much for sharing.
Pretty!
oh my gosh, I absolutely adore EVERYTHING about this project!!!! the new Cracked Pistachio is perfection here! love the vintage/shabbiness! :) thanks so much for the inspiration! :)
What a lovely card. Love all the details.
Beautiful! Thanks for sharing.
This is absolutely DIVINE! I love the new distress colour and love the card you created. Thank you so much for the tutorial showing the quilt stitching. I am not a confident sewer, but I am going to give this a go immediately. Thanks for sharing. :)
Absolutely stunning!
awesome – love it
This s so cool. LOVE that color!
The colors are beautiful. Thanks for sharing the process.
Beautiful Colors!
Oh, fabulous mixed media with a stunning vintage look!! thanks for the tutorial!
What an amazing project! I DO love all of the details–such a vintage look!
Thank you for all the lovely tips! Such a beautiful project!!
Love all your ideas! Turned out great! Thank you
Beautifully done and detailed project!
Wow..
Wow!! Gorgeous!! Love it!!
Fantastic! I’m inspired to be BRAVE and try something like this myself
beautiful project, I love it!!
Cute! Thanks for sharing the steps!
Richele is so talented. I love her projects. It’s amazing how the little details add up.
So many little wonderful details! I especially love the lace at the bottom of the dress, and the quilting of the background.
This is just a gorgeous project! My mum likes the shabby chic look and I was wondering what to make her for her birthday! I may just case this idea for a canvas if that’s okay Richele? Thanks so much for the inspiration!!
Beautiful!
What a beautiful piece of art! I would definitely turn it into a piece of home decor…
I love this project. All the little details! I was thinking that it was too pretty to be a card, so I love the panel idea.